Expense Invoice Process
This chapter gives an example of an invoice flow in ExFlow from import to approving and posting in ExFlow / Business Central.
The following steps are made from the "ExFlow Import Journal" --> "ExFlow Approval Status" and the final step will be to view the posted invoice in "ExFlow Approval Status History".
Steps in ExFlow Import Journal
Step 1 Import Document
Step 2 Check and handle "Action Message". If blank move to Step 4
Step 3 When action have been done verify and see if all actions been taken.
Step 4 Create Invoice or Credit Memo
Import and handle an Expense Purchase Invoice
Import invoices is done from "ExFlow Import Journal". Import documents either to all journals or open and import documents in one specific journal.
This part describes the way how to import from a journal created to use only for "Expense Invoices".
Select a journal and open by click "Edit Journal" or click on name.

Step 1 -- Import Document
Go to: Actions --> Import --> Import Documents...
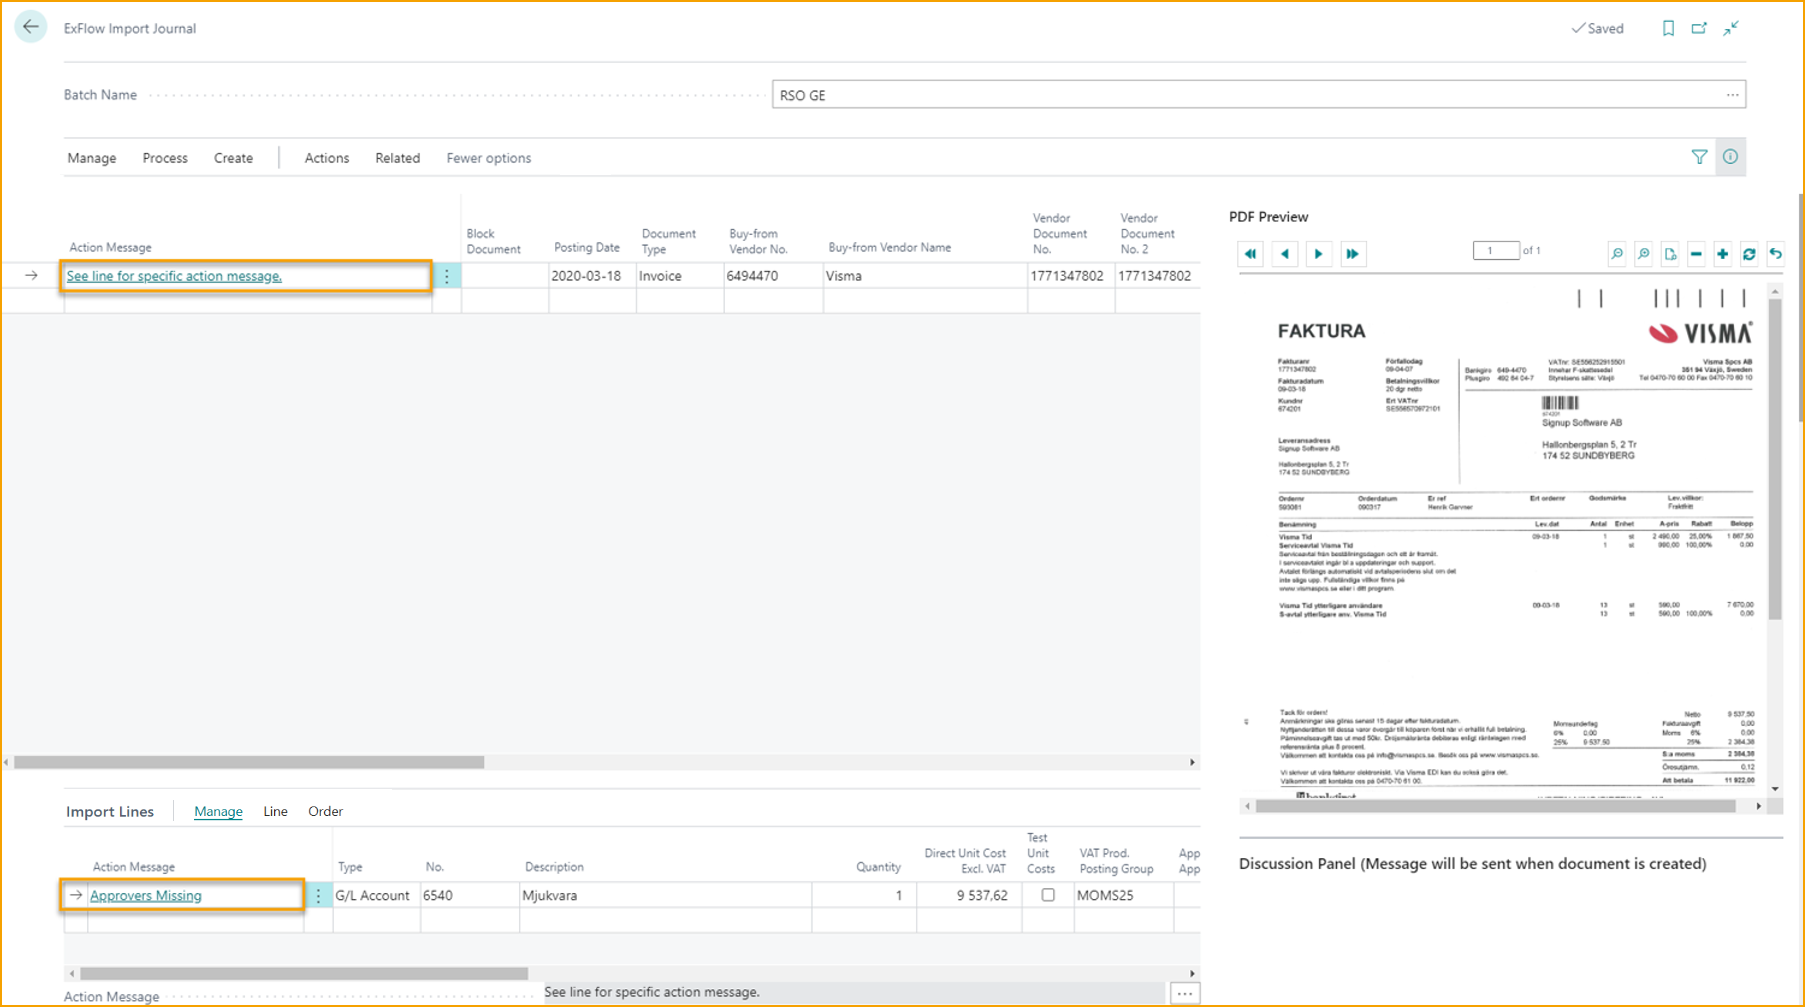
When the import is done a new line is created.

Step 2 -- Check and handle "Action Messages".
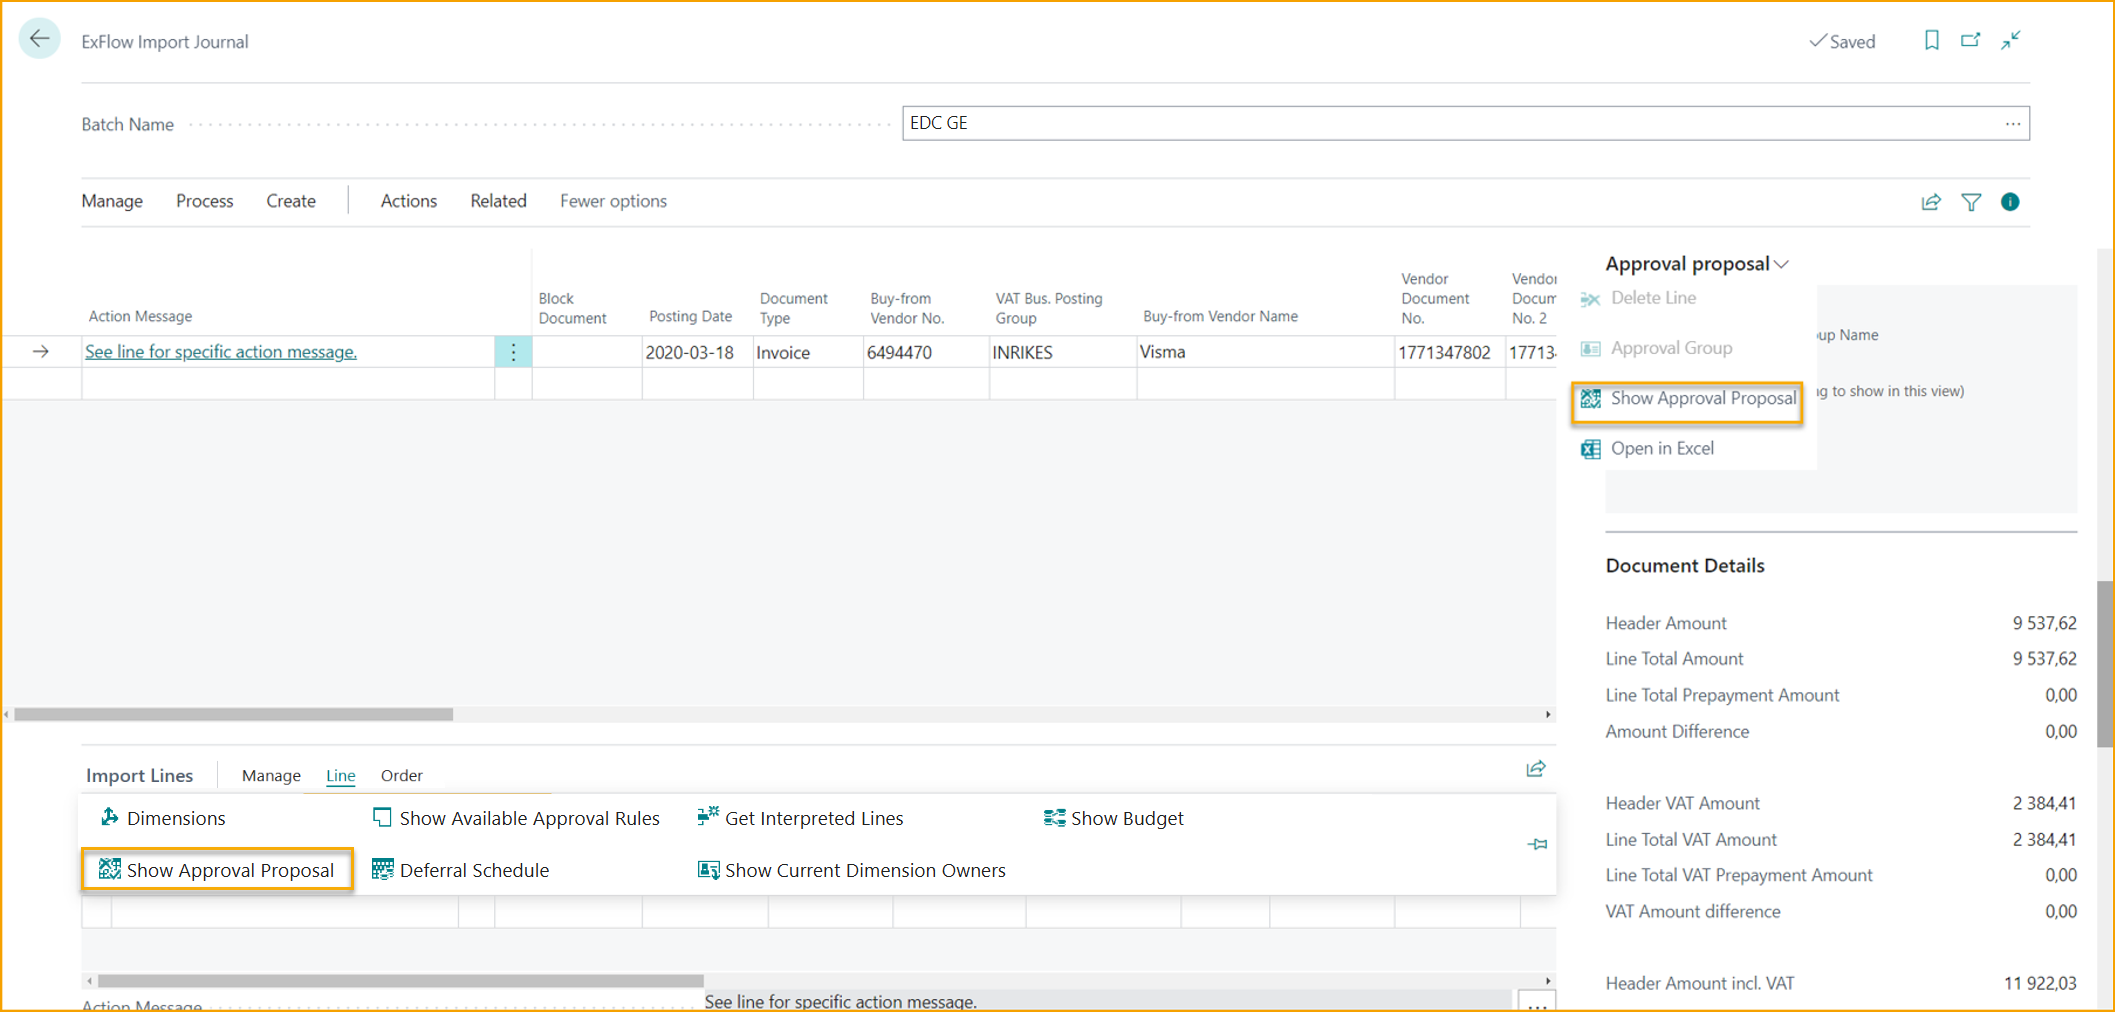
In this example there are no predefined approval rules, so Approver/Approvers must be added manually to the Invoice Line.

Select: Line --> Show Approval Proposal

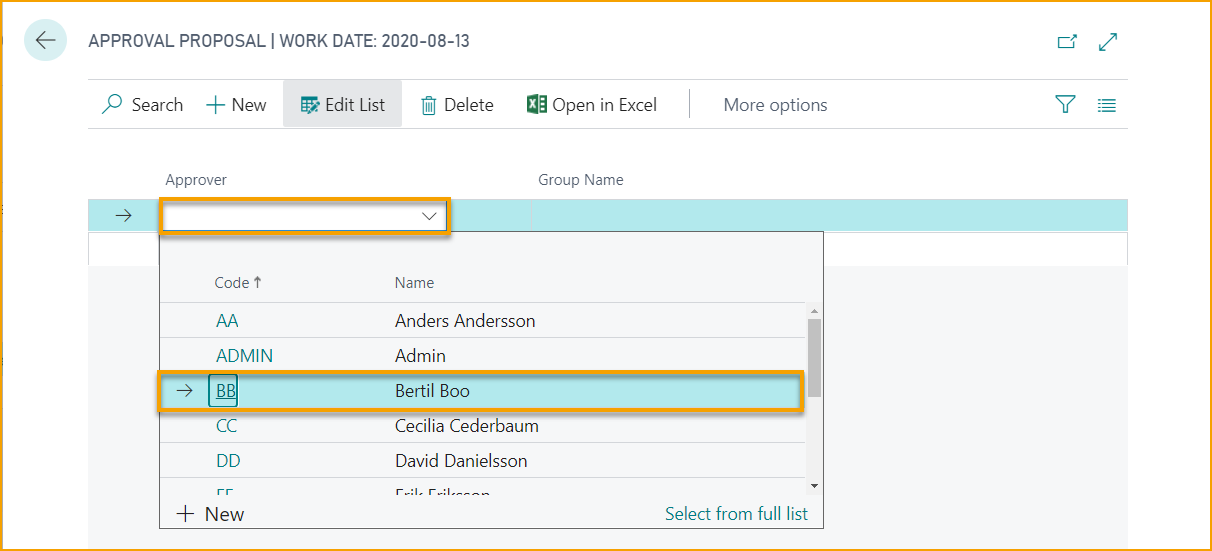
Add one or several approvers.

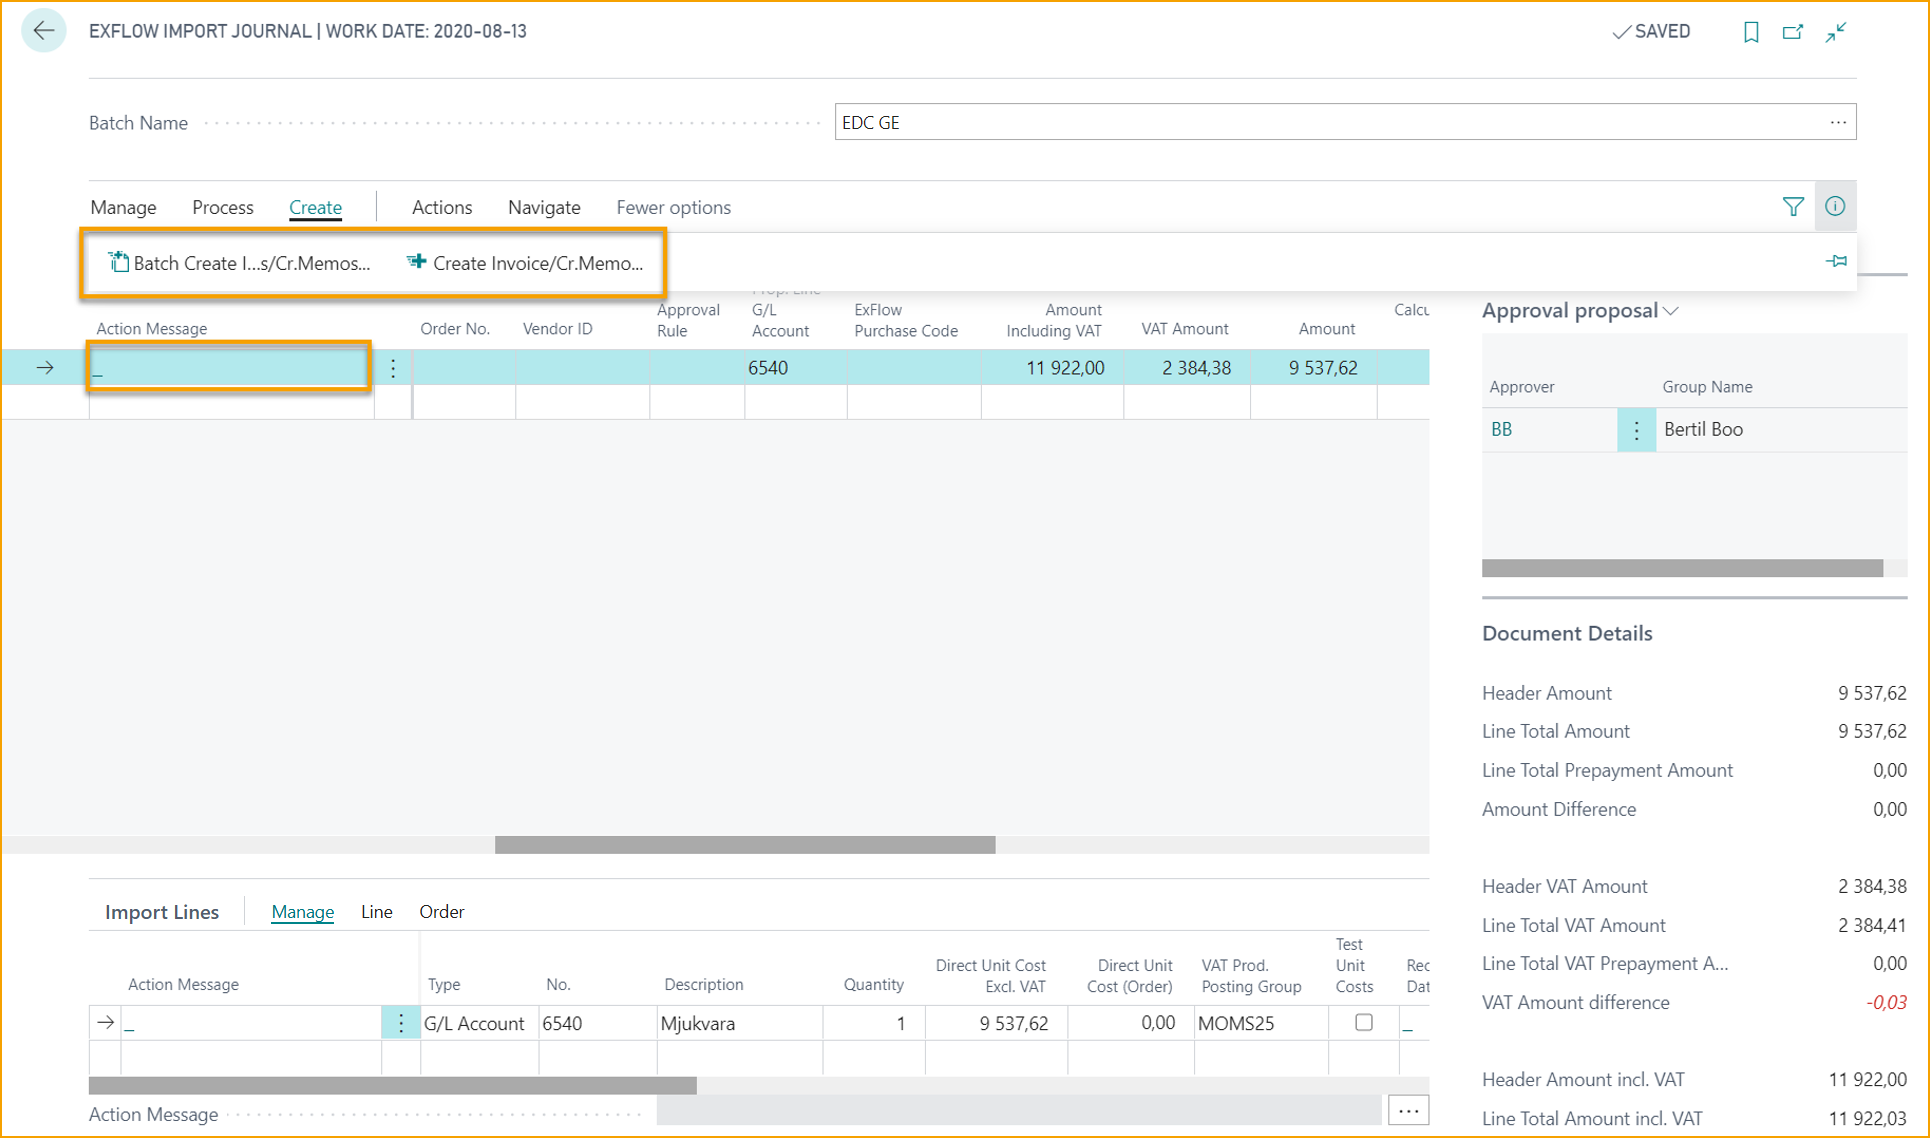
In FactBox to the right approvers will be updated in "Approval proposal".
Step 3 -- Verify Document
Go To: Process --> Verify Document / Batch Verify Documents
When all action messages have been handled, "Verify Document" to see if action message is empty and therefore ready to be created.
Step 4 -- Create Document
Go to: Create --> "Batch Create I..s/Cr.Memos"... / "Create Invoice/Cr.Memo"
Create invoice or credit memo by clicking "Create Invoice/Credit Memo".
