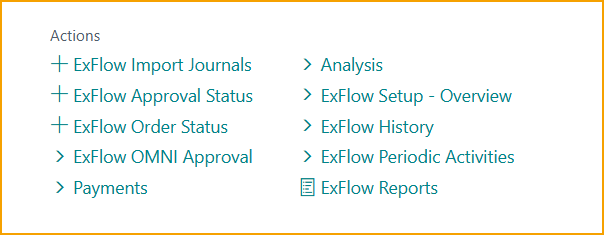
ExFlow Approval Status
Go to: ExFlow Approval Status
When a document is created from the ExFlow Import Journal, and therefore sent for approval, the document can be found in Approval Status.
| ExFlow Approval Status | |
|---|---|
| Verify Changes | Verify Changes |
| Post Batch | Post Batch |
| Card | Opens the standard purchase document card |
| Send Reminder | Send Reminder |
| Force Update of Purchase Document | Force Update of Purchase Document |
| Filter on approver | Filter on approver |
| Actions--> Functions | |
| Batch Update Posting Date | Batch Update Posting Date |
| Update Budget Info on Documents | Updates Budget Information on Documents. Read more under section G/L Budget Control |
| About ExFlow | About ExFlow |
| Other --> Force Update of Purchase Document | Force Update of Purchase Document |
| Actions--> Posting | |
| Post | Post Document |
| Preview Posting | Preview Posting |
| Preliminary Posting | Preliminary Posting |
| Preliminary Posting-->Post | Post Preliminary Documents |
| Preliminary Posting-->Preview Posting | Preview Posting of Preliminary Documents |
| Preliminary Posting-->Reverse | Reverse Preliminary Posting |
| Preliminary Posting-->Find Entries | Find Entries of Preliminary Documents |
| Arrival Preliminary Posting | Arrival Preliminary Posting |
| Arrival Preliminary Posting--> Reverse | Reverse Arrival Preliminary Posting |
| Arrival Preliminary Posting--> Find Entries | Find Entries of Arrival Preliminary Documents |
| Actions--> Posting--> Other | |
| Verify Changes | Verify Changes |
| Post Batch | Post Batch |
| Related--> Approval Status | |
| Show Contract | Show Contract, if any is connected to the Document. Read more under section Contract |
| Revert Document Changes | Revert Document Changes |
| Send Unreceived Order Notification | Send Unreceived Order Notification |
| Related--> Approval Status-->Card | Opens the standard purchase document card |
| Related--> Approval Status-->Send Reminder | Send Reminder |
| Related--> Files | |
| Show Document Image | Download or open PDF |
| Show Import Details (OCR) | Show import details |
| Import or Replace Image | Import or Replace Image |
| Related--> Approvers | |
| Approval follow-up | Run report ExFlow Approval Follow-Up |
| Per Approver | Shows a filtered page on per approver |
| Next Approver | Shows a filtered page on next approver |
| Reset Approver filter | Reset the filter that was set in Filter on approver |
Current approver
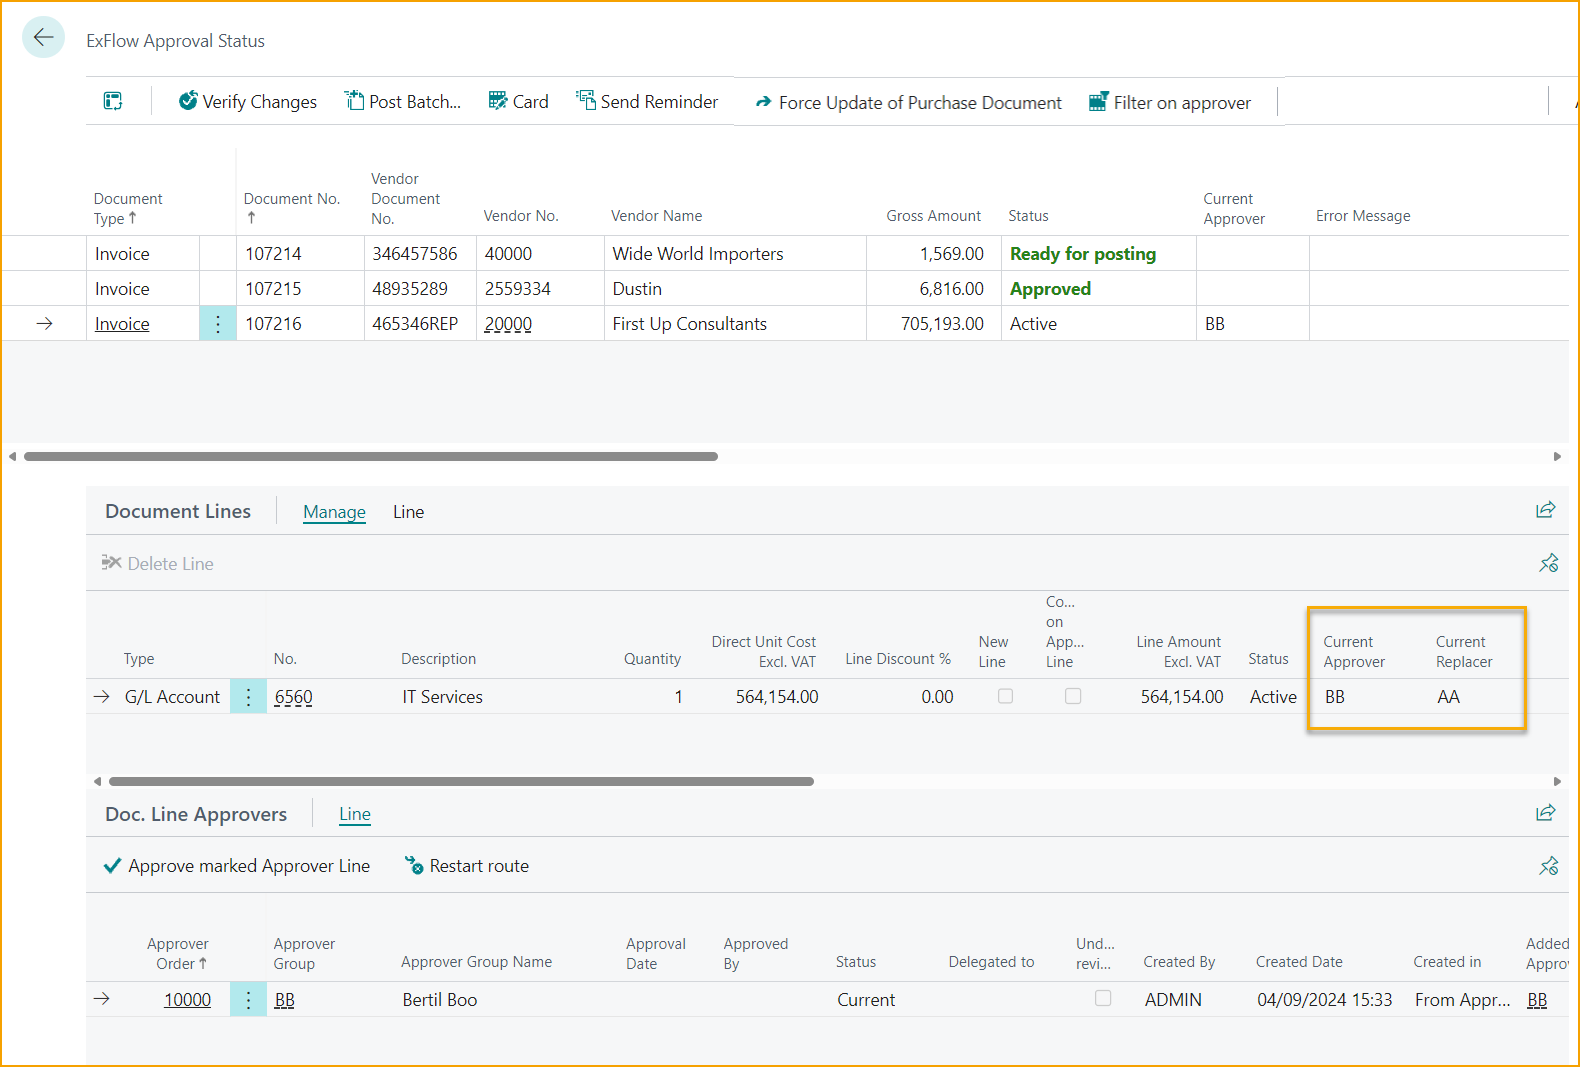
Approval Status show all invoices that are out for approval and/or are approved and ready to be posted. An administrator can see information regarding status. Both for the Invoice as well as the next approver for this specific Invoice.
In this example Anders Andersson has approved all his lines and Bertil Boo is current approver.
The standard purchase document card can be opened from the Approval Status menu.

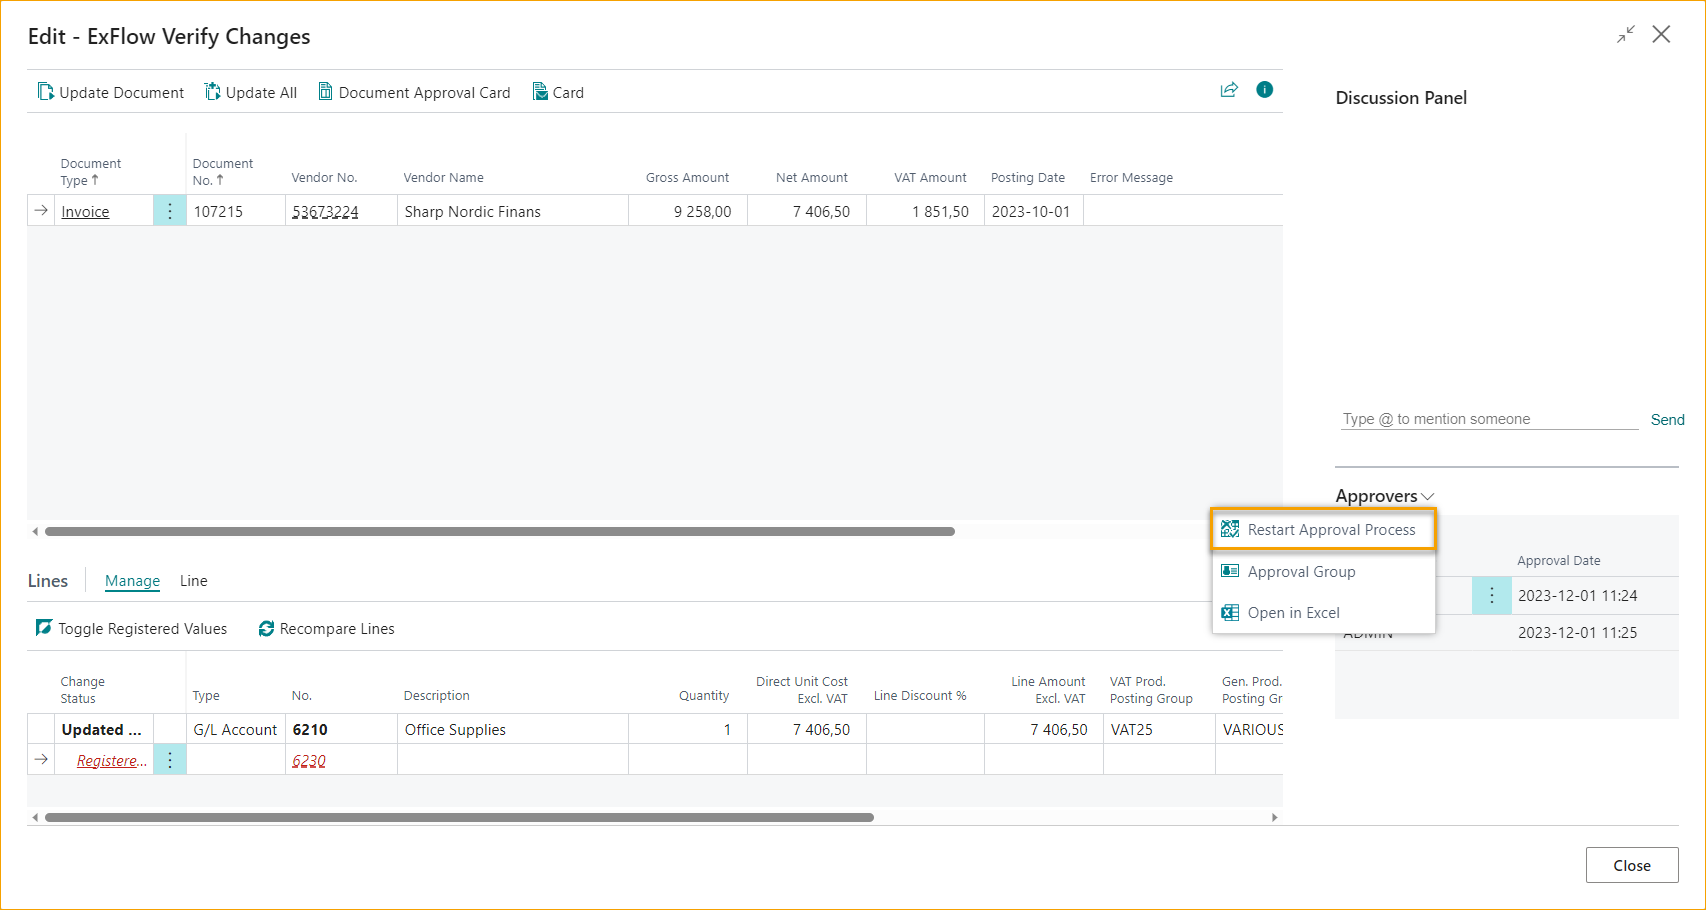
Verify Changes
When document is approved, status is updated to "Approved". But still the document needs to be verified. Click on "Verify Changes" to see if an approver on ExFlow Web have made any changes.
If no filter is set in the Approval Status view, then the function "Verify Changes" acts on all documents with a status of "Approved". If there is an active filter (for example, only documents for a specific vendor are shown) then "Verify Changes" will only be applied to the documents in the filtered view. Any approved documents outside the filter will still have a status of Approved.
Using a filter on Document Type in Approval Status, set to exclude Order and Quote from being verified, can be beneficial if a system user wants to only verify other Document Types like Invoice or Credit Memo.

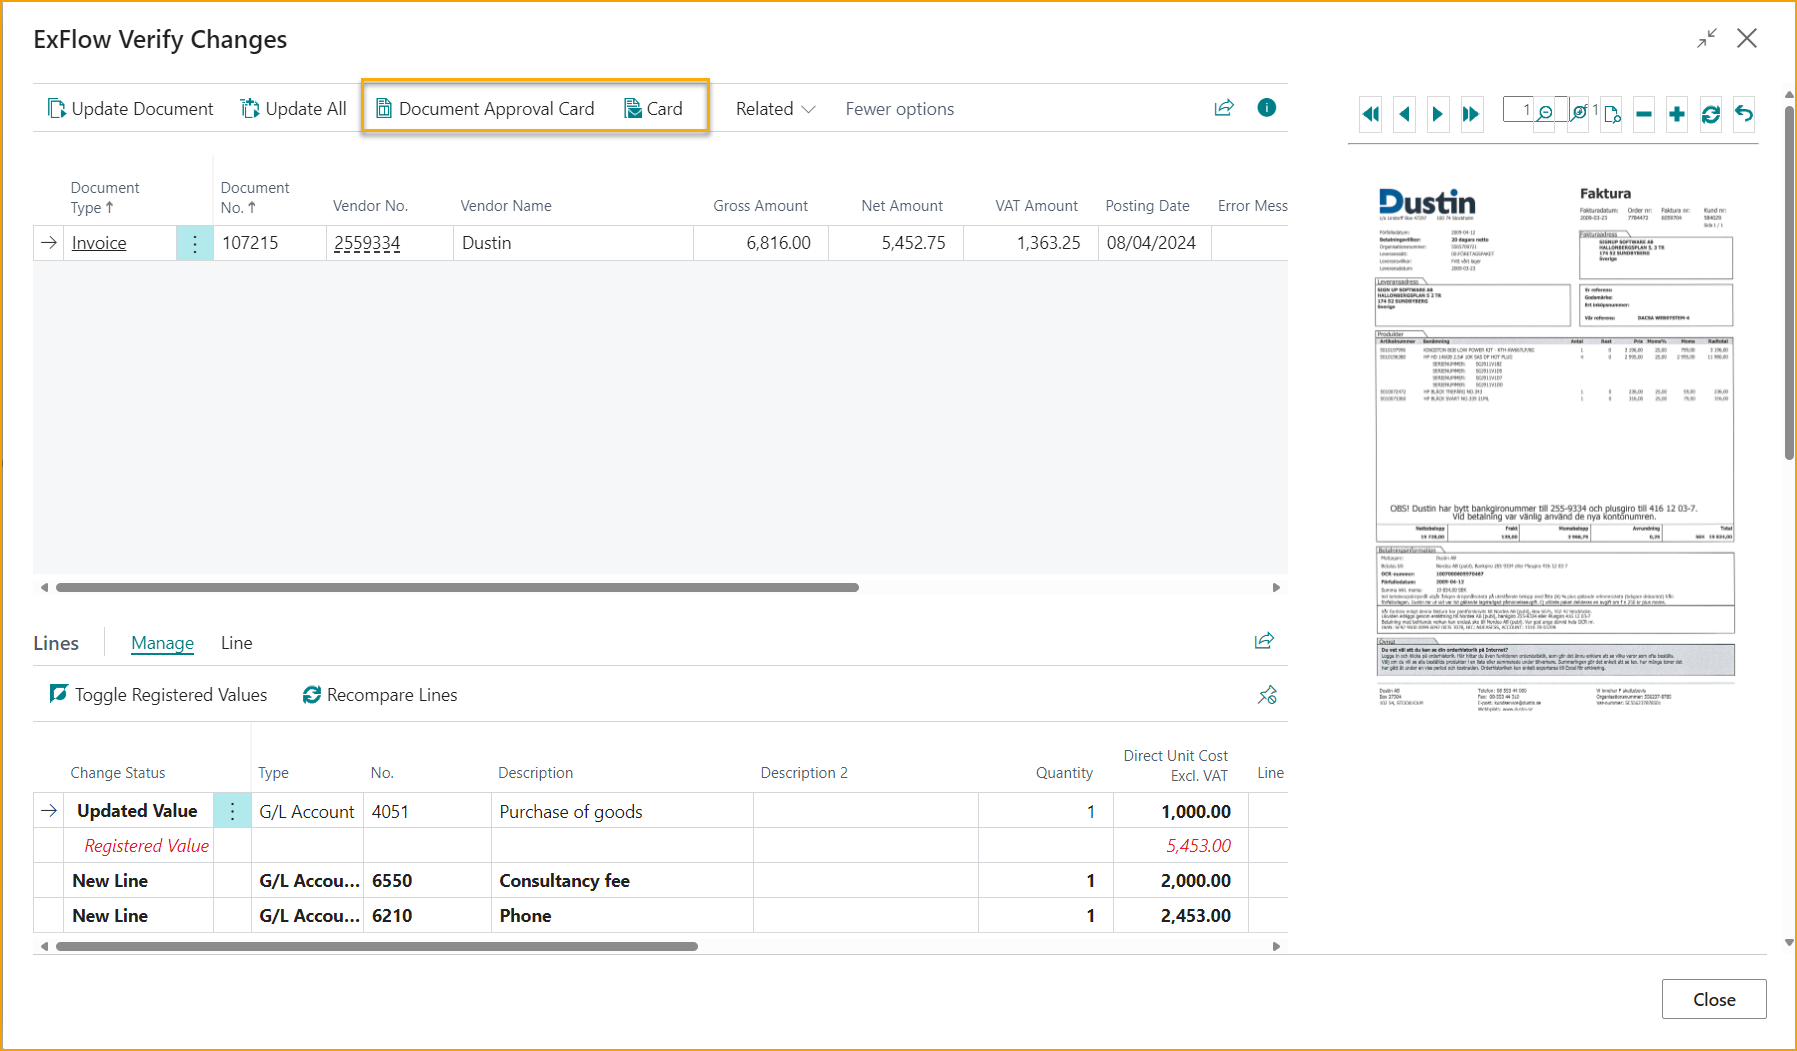
ExFlow Verify Changes will show all lines that have been changed on ExFlow Web. Both Registered Value in red and Updated Value in Black on the document lines.
Lines without changes will get Change Status "No Change".
Use Update Document to update Document Card for a specific document or Update All. When all documents are updated, the page will close automatically.
"Document Approval Card" will open the final approved ExFlow card.
Open the "Card" to get into the original Business Central standard Purchase document card.
The PDF viewer (FactBox) shows the document image. There is also a possibility to utilize Ctrl+I to download the document image or go via Related --> Show Document Image.
If there are no changes done on ExFlow Web, status will automatically update to "Ready for posting" in Approval Status.
There is a possibility to skip the step "Verify Changes" in Approval Status page if no changes were made on the document which was approved. In such case "Verify Changes" action will be run automatically and the document status will be changed to "Ready for posting".
This feature can be enabled in ExFlow Setup under Background Processing by activating Automatically Verify Changes.
This feature can also be found (and setup per vendor) in ExFlow Vendor Setup.
Furthermore, another function called Bypass Verify Changes can be utilized by the AP staff.
Read more about this under section Bypass Verify Changes
Reject changes in Verify Changes
Approval process can be restarted from selected Approver on "ExFlow Verify Changes" page. This function is found on the Approvers FactBox.
Restart Approval Process function has two options.
- Restart from marked Approver - restart the marked “Document Lines” from marked Approver.
- Restart from marked Approver for all lines - restart all “Document Lines” connected to marked Approver.
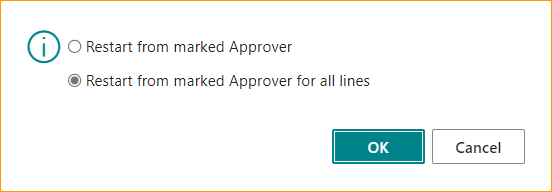
After selecting one of the possible options Discussion Panel Dialog box is opened where a comment can be left for Approver.
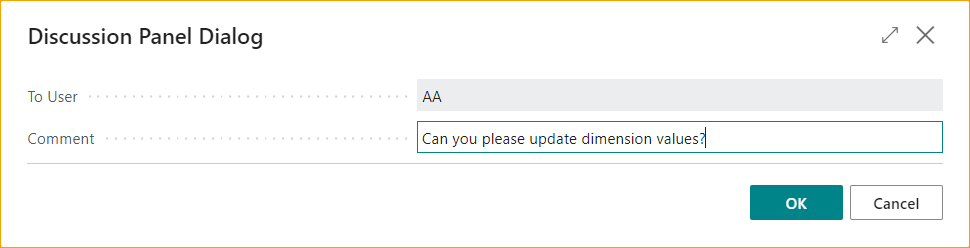
The comment will be saved in Discussion Panel in Approval Status and approver can see comment in Chat on ExFlow Web. Also, if setup is done, the approver can receive an email.

Post Batch
Go to: Post Batch
After Verify Changes, the document is now ready for posting.
To Batch Post all documents that are Ready for Posting use Post Batch.
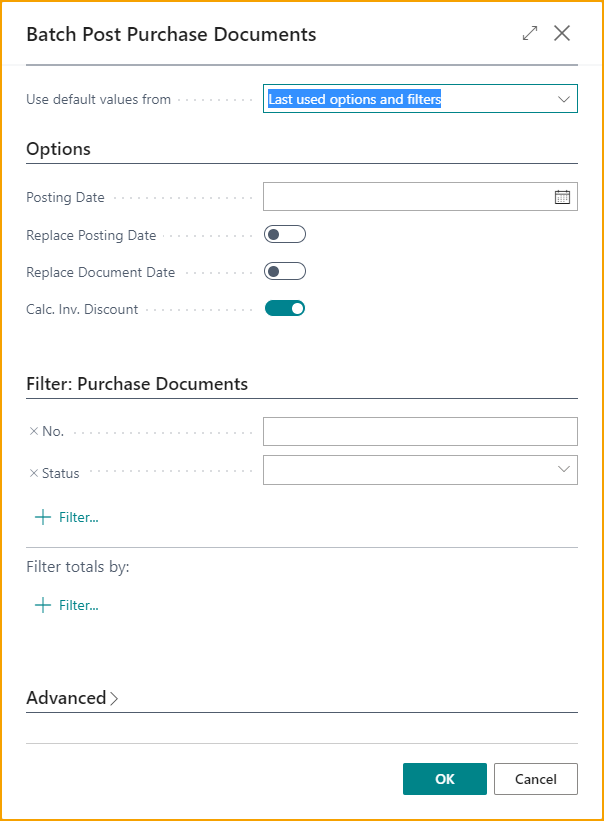
To update Posting Date on all documents, add a new date in field Posting Date and activate Replace Posting Date.

If one or several documents have Deferral Code when using Replace Posting Date, following question will occur:
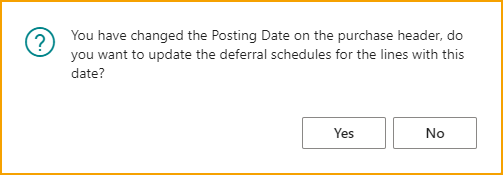
Yes: To update Deferral Starting date according to settings on Deferral Code for all document lines. No: To keep Deferral Starting date as created on all document lines.
Post Document
Go to: Action --> Posting --> Post (F9)
To post one document at a time, use Post (F9).
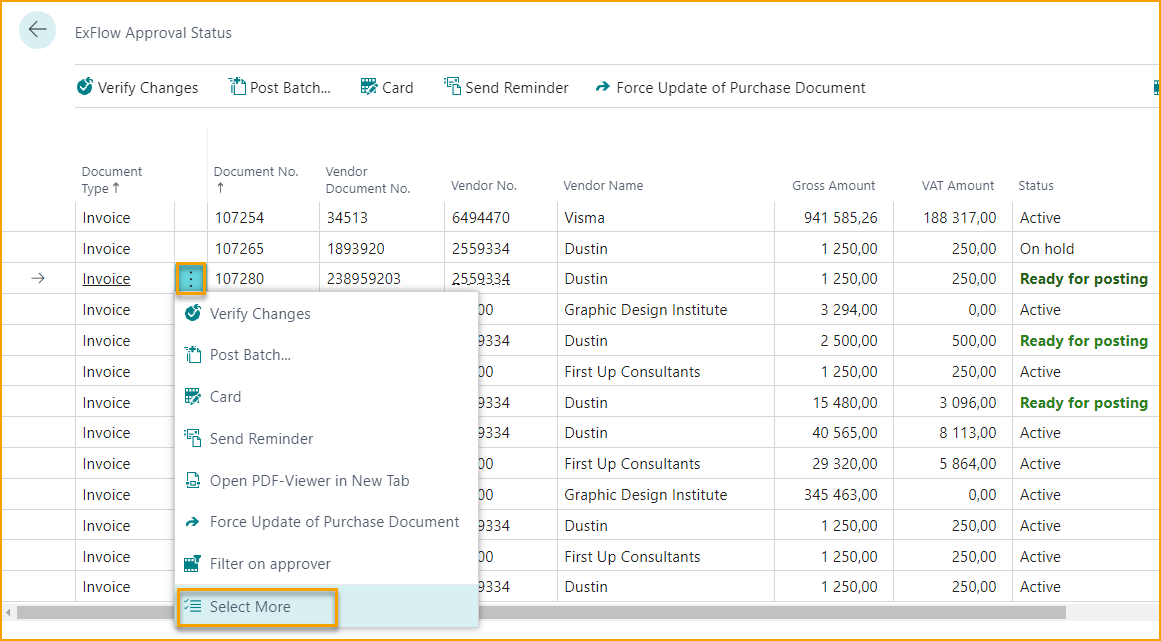
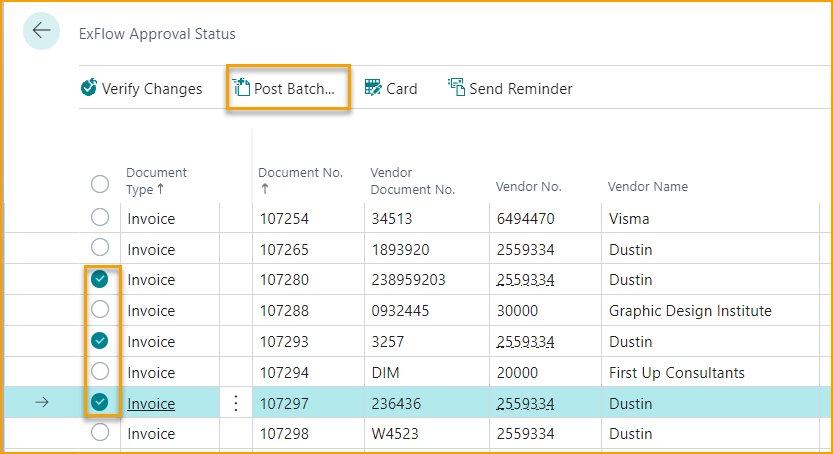
There is also an option to manually select multiple documents and Post Batch to post all marked documents. Use "Select More" to manually choose the documents to be posted.
Then click on Post Batch to proceed with posting.
Preview Posting
Go to: Approval Status --> Actions --> Posting --> Preview Posting (Ctrl+Alt+F9)
Use "Preview Posting" (Ctrl+Alt+F9) to review entries that will be created from current data on Card before the actual posting.
Preview Posting can be used for all document status, not only for documents with status "Ready for posting".
To Preview Posting during approval flow use "Force Update on Purchase Document" to update Card.
Preliminary Posting
If Preliminary Posting is activated, then Posting, Preview Posting, Reverse and Find Entries can be done from Approval Status.
Go to: Approval Status --> Actions --> Posting --> Preliminary Posting
Read more under section Preliminary Posting
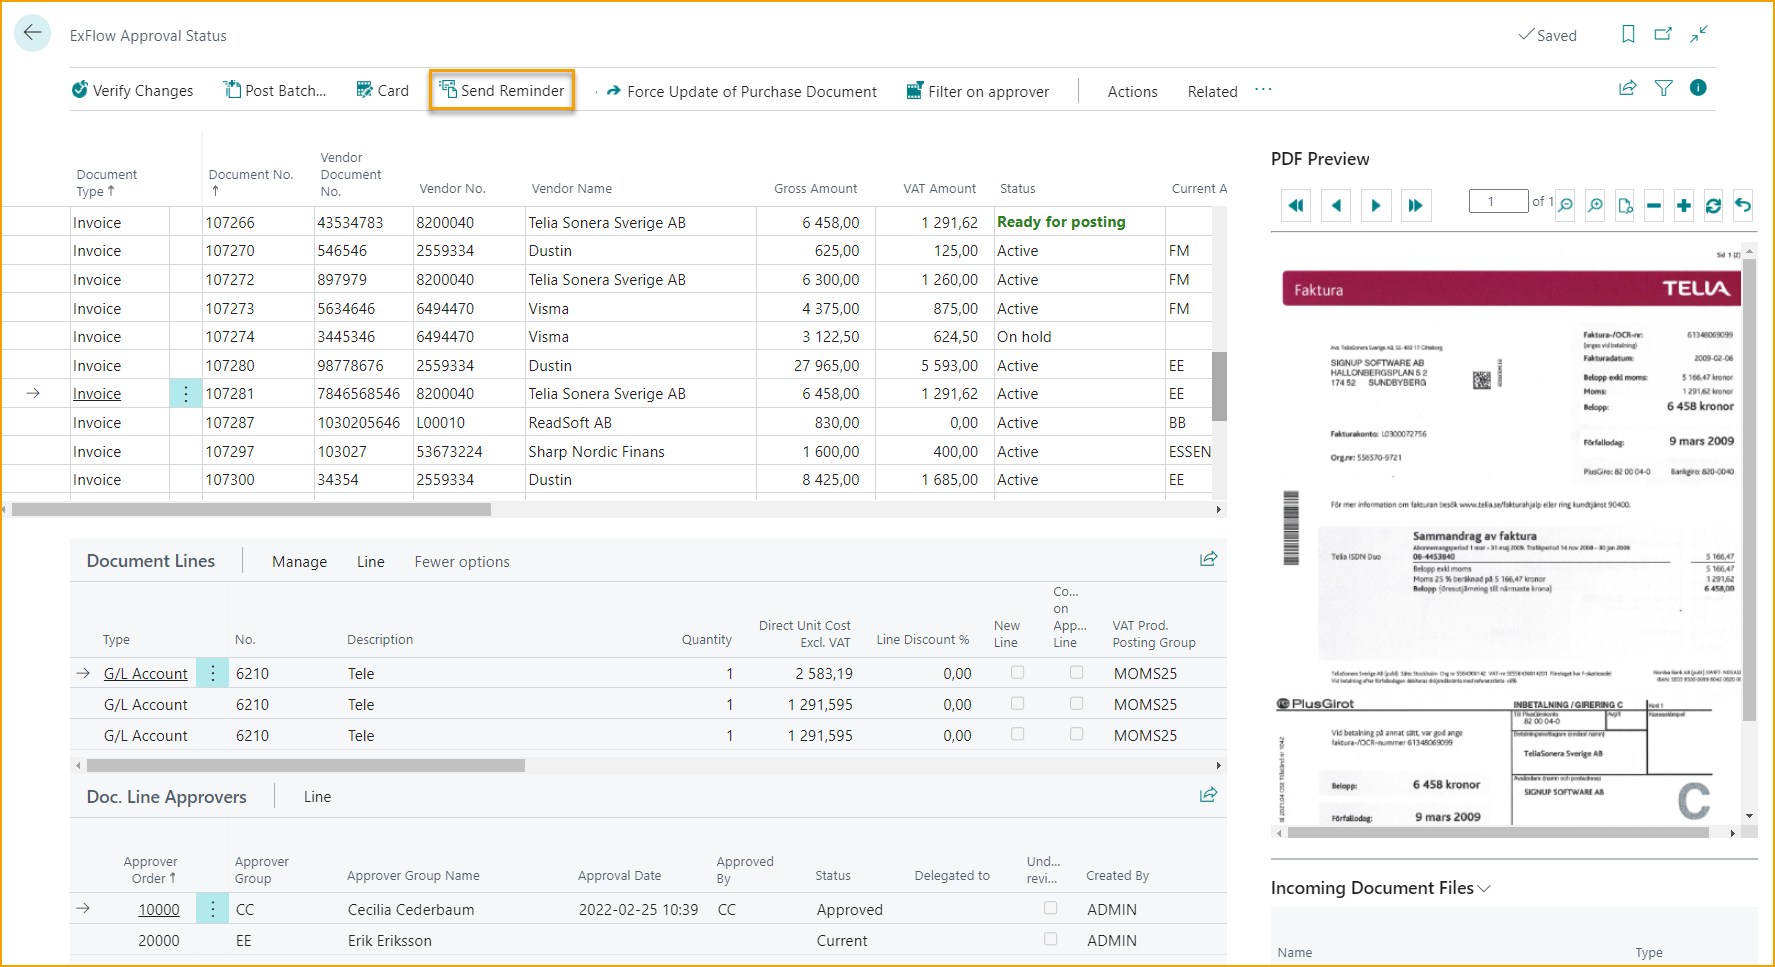
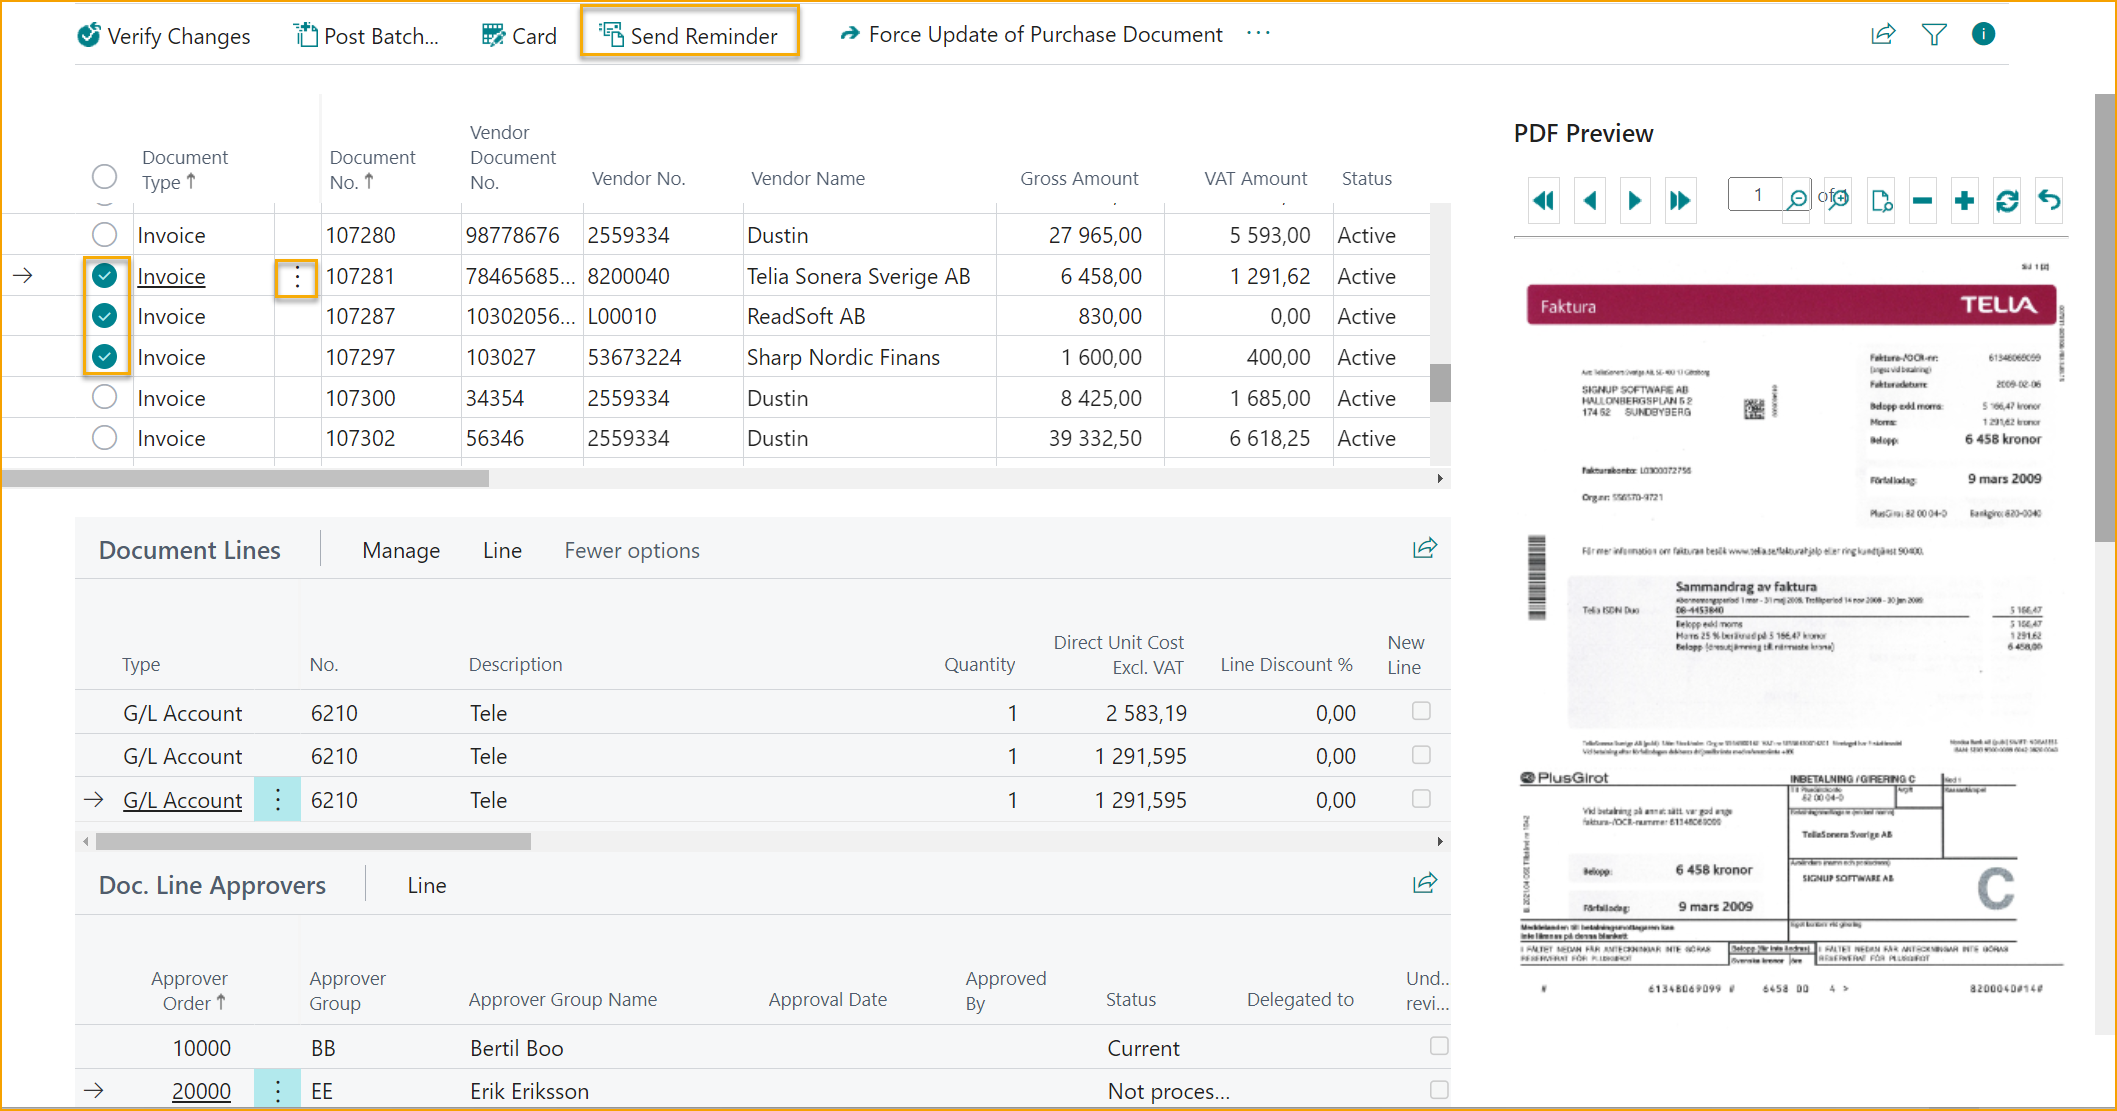
Send Reminder
Send Reminder for this document to current approvers for all lines on one Purchase Document.
Send Reminder for multiple documents
Use "Select More" to mark several documents and click on "Send Reminder". Reminders will then be sent to all current approvers for these chosen documents.
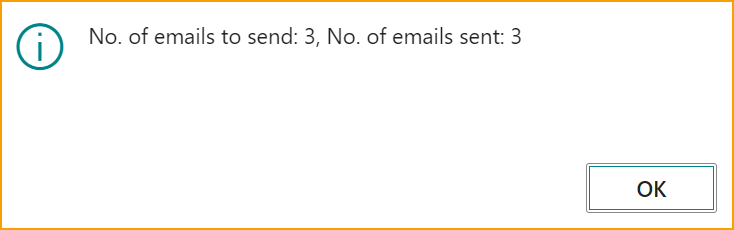
Following message will then pop up:
Send email reminders for rejected documents
Go to: ExFlow Email Setup
It is possible to send email reminders for rejected ExFlow approval documents if a quote, order, invoice, and/or credit memo gets rejected. To be able to send reminders for rejected approval documents, the document status needs to be "Rejected" in Approval Status.
Read more under section ExFlow Email Setup --> Rejected Order, Rejected Quote, and Rejected Invoice/Credit
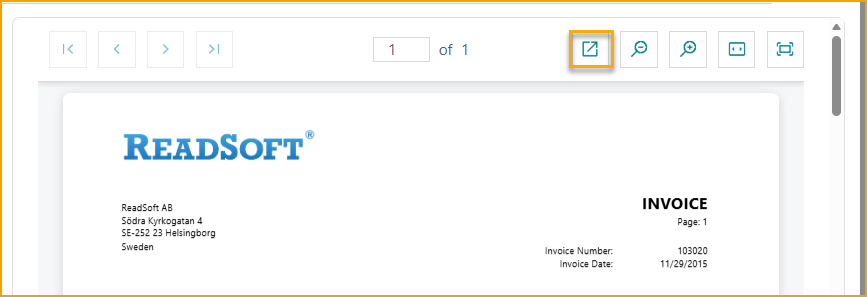
Open PDF- Viewer in New Window
It is possible to open the PDF in a new separate window to get a better view of the document image.
This function is moved from the Approval Status menu to the PDF FactBox on the right side.
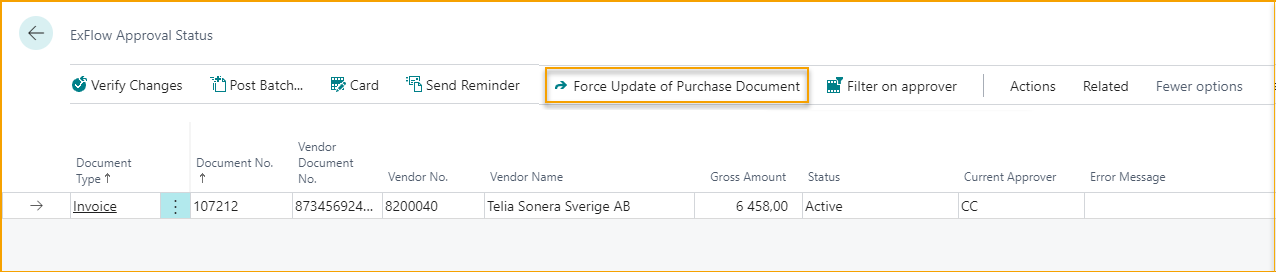
Force Update on Purchase Document
If changes are needed during the approval process, user function "Force Update on Purchase Documents" to update Card. Now changes can be done in the Card without deleting changes done from ExFlow Web.
Use Update Document to update Document Card for the chosen document. When the document is updated, the page will close automatically.
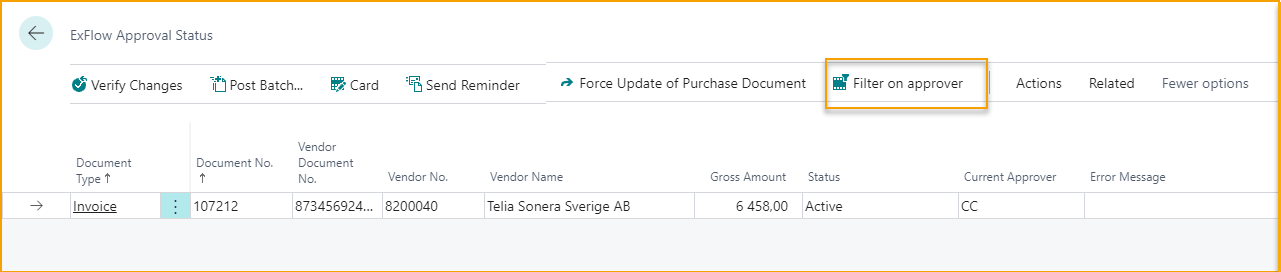
Filter on approver
Filter on a specific approver (approval group) and Status in the Approval Status list.
Show Document Image
Go to: Approval Status --> Related --> Files --> Show Document Image (Ctrl+I)
To download or open PDF.
Show Import Details
Go to: Approval Status --> Related --> Files --> Show Import Details
To show import details.
Import or Replace Image
Go to: Approval Status --> Related --> Files --> Show Document Image
To import or replace PDF.
Change G/L Account during approval
Go to: ExFlow Approval Status --> Card
Changing the number (removes the old number and adds the new) on a G/L Account, that has an approval flow, will remove it, and insert a new if applicable.
Delete a Purchase Invoice in Approval Status
Go to: Purchase Invoice/Purchase Credit Memo
When the document is created but not posted, deleting follows the Business Central standard.
Go to Purchase Invoice/Purchase Credit Memo by clicking "Card" and delete. Approval status card will be saved with Invoice No. In "ExFlow Deleted Documents".
Posted Purchase Invoices should not be deleted. Start by creating a Credit Memo that neutralizes the Invoice. Then, create a new Purchase Invoice if needed.
Revert Document Changes
Go to: ''...'' --> Related--> Approval Status --> Revert Document Changes
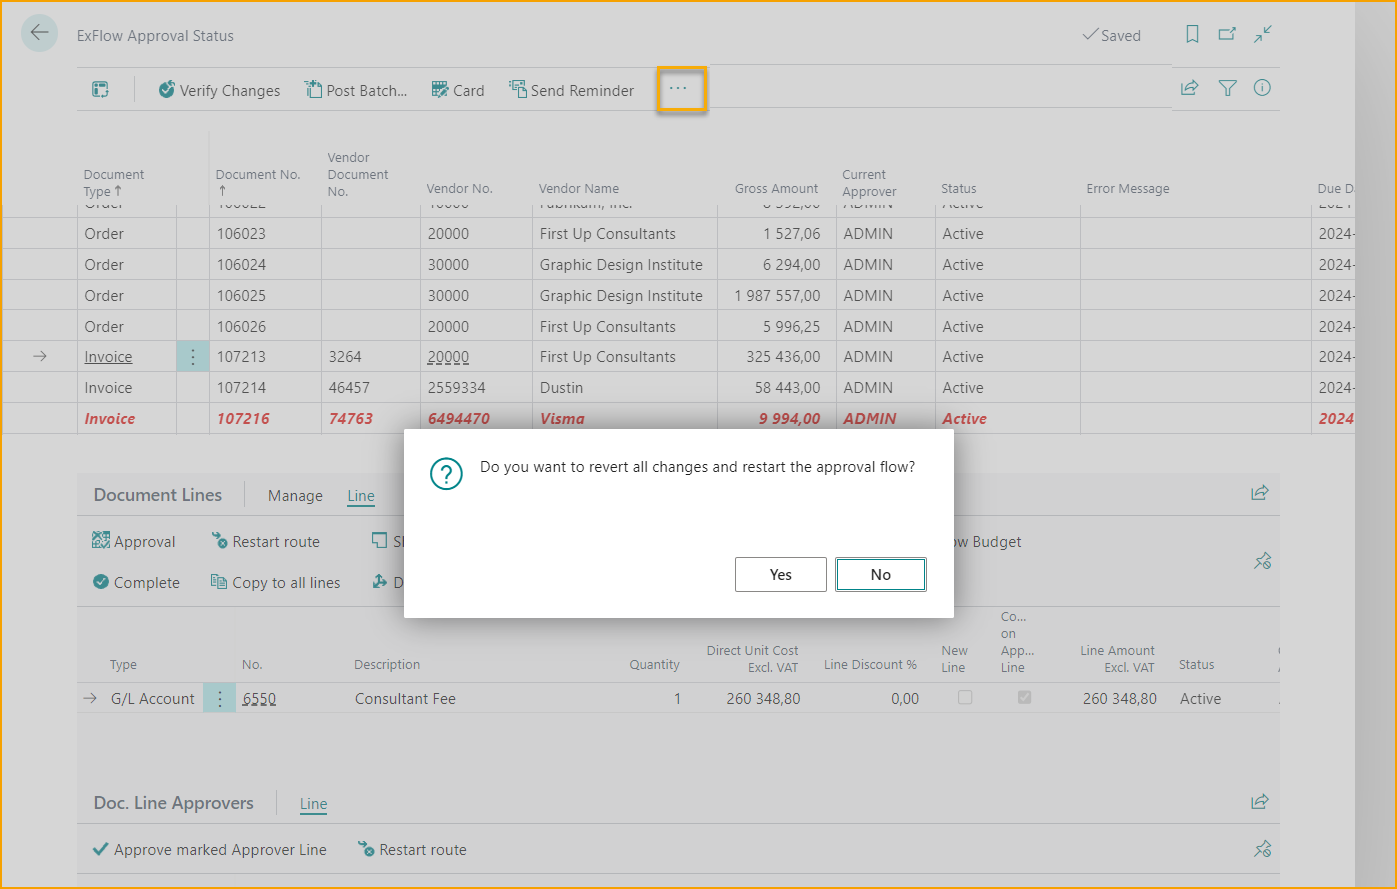
Use Revert Document Changes to reset the document back to original again and discard all changes made on the document lines by approvers.
For modified document lines with Status Approved, Rejected or On hold
To reset the modified document lines, AP users can use this function to reset all changes, instead of manually editing the Approval Status Card.
If AP users answers yes to the question: ''Do you want to revert all changes and restart the approval flow?'', then all changes will be reverted and the approval flow will be restarted.
Reverted documents (approved/rejected/on hold) will also be set back to ''Active''.
Nothing to revert
For documents with status ''Ready for posting'', it will not be possible to revert changes and restart the approval flow. The message: ''Nothing to revert'' will be shown.
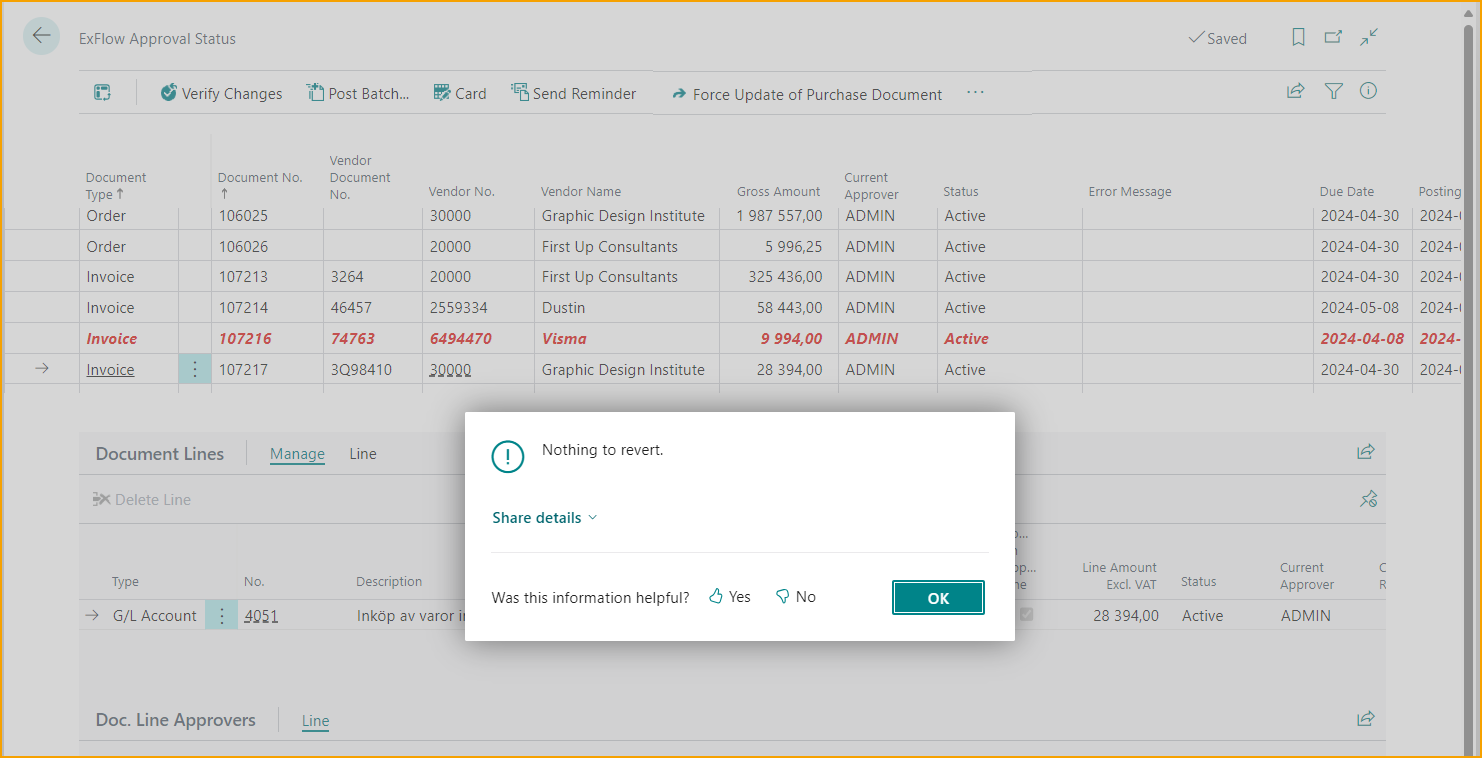
The same message will be applied when it comes to documents with no changes.
This function will not be applied to documents that are set to Approved, On Hold or Rejected on a Header level (without any changes on lines). If the approval flow needs to be restarted in these cases, ''Restart Route'' can be used on the Document Lines in Approval Status as usual.
Discussion panel/chat will not be reverted/deleted when using this function.
Block for Posting
Go to: ExFlow Approval Status --> Card --> ExFlow Block Document
If a document is marked as blocked for Posting in Import Journal, then it will follow to Approval Status.
It is also possible to block the document from being posted in Approval Status via the Purchase Document Card.
On the Approval Status Header, the field ''Block Document'' can be added via personalization for a better overview of all current unposted document, marked as blocked for posting.
Approval Status - Lines
| Document Lines --> Line | |
|---|---|
| Approval | Opens ExFlow Document approval card |
| Complete | Approve marked document line(s) |
| Restart Route | Restart approval flow for document (line(s)) |
| Copy to all lines | Copy the current lines approval flow to other lines on the document. All approvers in the approval rule must approve |
| Show Available Approval Rules | Opens a list of the available approval rules |
| Dimension | Show the dimension on the specific document line |
| Deferral Schedule | Opens the Deferral Schedule if a Deferral Code is set |
| Show Current Dimension Owners | Shows the Dimension Owner |
| Show Budget | Shows Budget Overview |
| Doc. Line Approvers | |
|---|---|
| Approve marked Approver Line | Complete the marked line, the line must have status ‘’Current’’ |
| Restart route | Restart approval flow. Read more about this under section ‘’Handle Rejected Invoice / Restart Approval Flow’’ |
Change Approval Flow
Select line and go to: Document Lines --> Line --> Approval

A new window will open the Invoice line card (title; EDIT - APPROVAL).
Add and/or remove approvers on the "Approver Lines" if needed by clicking Manage.
If an approval group needs to be added/changed in the Approval Document Card, delete the line and add a new line with the new approval group. Column: ''Created in'', will then be updated from ''From Approval Rule BC'' to: ''Manually BC''. Please note that if dynamic approval is used, then the deleted approval group will still be required to approve the document to be final approved.
Propose new approvers
Propose new approvers will delete current and add new approver/approvers from new Approval Rule.
Copy to all lines
If a document contains many documents lines, "Copy to all lines" helps copying the Approval Group (from one line) to all lines.
Handle Rejected Invoice / Restart Approval Flow
This is to be used when the correct approval workflow has been selected but for some reason it needs to be restarted (for example a rejection).
If document is rejected on ExFlow Web the approver must add a comment that will be saved on the Approver Line, and the document needs to be handled in Business Central.
When using automatic Approval Rules, the recommended option is instead to update the data on the invoice card. Then ExFlow will automatically assign a new approval workflow based on the new data.
Another way is to restart the approval flow on the line by clicking "Restart route". Or insert a new Approver manually after Approver that have rejected the document. The new Approver will receive status Current and can then view the rejected Approver's comment.
This function is found on the section "Document Lines".
Document Lines --> Line --> Restart route

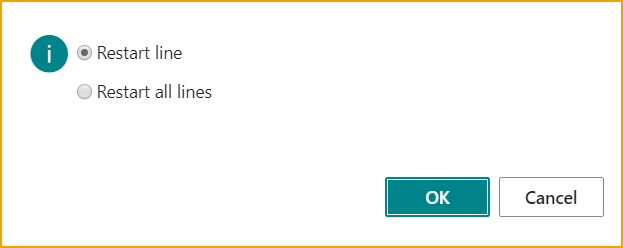
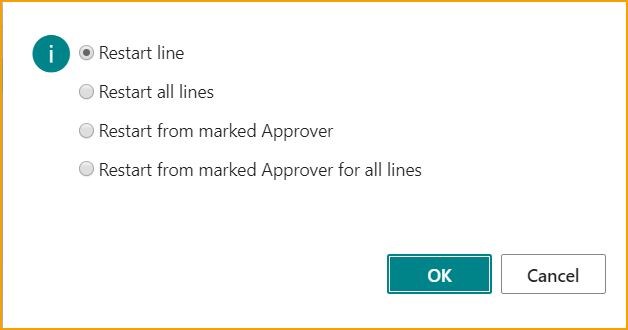
Restarting the route from Document Lines has two options.
Restart line - restart the "Document Lines", all the connected "Doc. Line Approvers" lines.
Restart all lines - restart all "Document Lines" and all connected "Doc. Line Approvers" lines.
To restart from marked approver on one or all lines.
Go to: Doc. Line Approvers --> Restart route

Restart line - restart the "Document Lines", all the connected "Doc. Line Approvers" lines.
Restart all lines - restart all "Document Lines" and all connected "Doc. Line Approvers" lines.
Restart from marked Approver - restart from marked approver on marked line.
Restart from marked Approver for all lines e.g. two "Document lines" with three approvers, all lines approved, restart standing on the second approver this option will restart all "Document Lines" from the same user on lines that contains this user. If this user occurs more than ones the rout will restart from users first line.
View Current Replacer on the Document Lines
On the Document Lines in Approval Status, it is possible to see who the current replacer is for the current approver.
Read more about how to work with replacers under section Add a Replacer During Vacation Time
FactBoxes in Approval Status
Find useful FactBoxes on the right side in Approval Status.
| FactBox | |
|---|---|
| PDF Preview | PDF Preview |
| Incoming Document Files | Incoming Document Files |
| Discussion Panel | Discussion Panel |
| Vendor Statistic and Buy-from Vendor History | Vendor Statistic and Buy-from Vendor History |
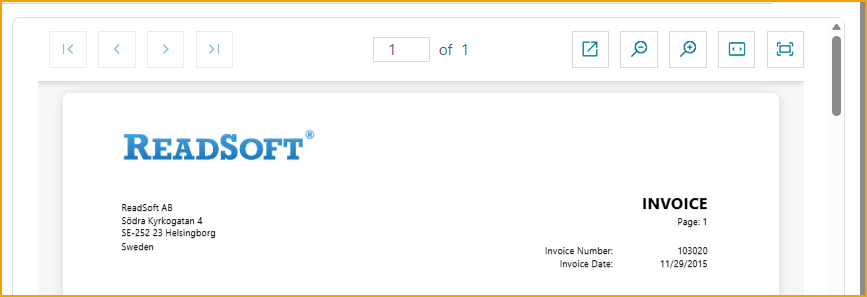
PDF Preview
| PDF Preview | |
|---|---|
 | Browse the PDF page number |
 | Open the PDF in a new separate window to get a better view of the document image |
 | "Zoom Out" and "Zoom In" |
 | Fit to width |
 | Fit to page |
Lastly, a reminder that it's possible to open PDF file in full size via shortcut commando ''Ctrl+I'' or to go via Related --> Files --> Show Document Image
Incoming Document Files
View and add Attach File. To attach a document without replace Main Attachment.
Go to: FactBox --> Incoming Document Files --> Attach File
Click "Choose", browse to the file to attach, and click "Open".
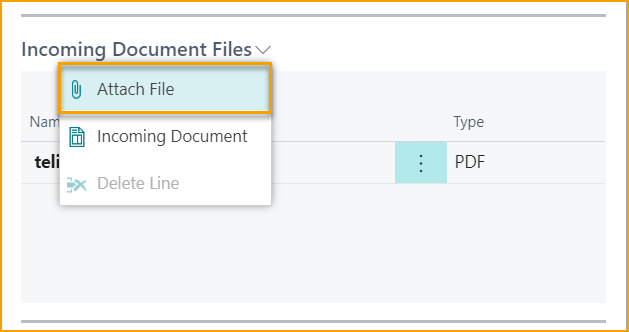
It can also be done from Incoming Document in Business Central standard.
Change PDF Document Image
If PDF Image needs to be change it can be done before posting the
document.
Go to: Related --> Files --> Import or Replace Image
It can also be done from Incoming Document in Business Central standard.
Attach File from Purchase Invoice or Purchase Credit Memo
Attachment made from Purchase Invoice and Purchase Credit Memo Card in Business Central Standard will not show in ExFlow. Therefore, we recommend that Incoming Document Files in FactBox from Approval Status is used instead.
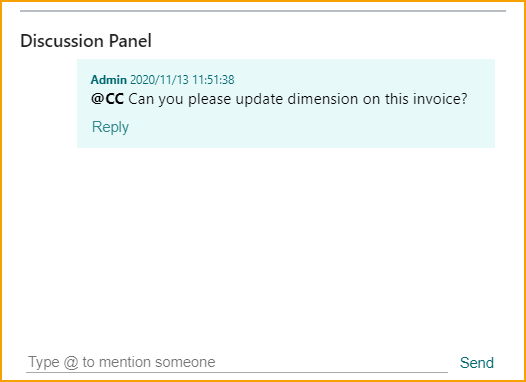
Discussion Panel
When adding a comment in Discussion Panel from Approval Status and click SEND the comment can be seen in FactBox to the right marked with creating Users ID, Date and Time. On ExFlow Web it will display in Chat on the Document.
If a user is mentioned by using @ the user will be able to see this document and comment on ExFlow Web even if the user is not in the approval flow.
Read more about settings and how to use Discussion Panel under section: Notifications in Business Central --> Discussion Panel / Chat and Line Comments.
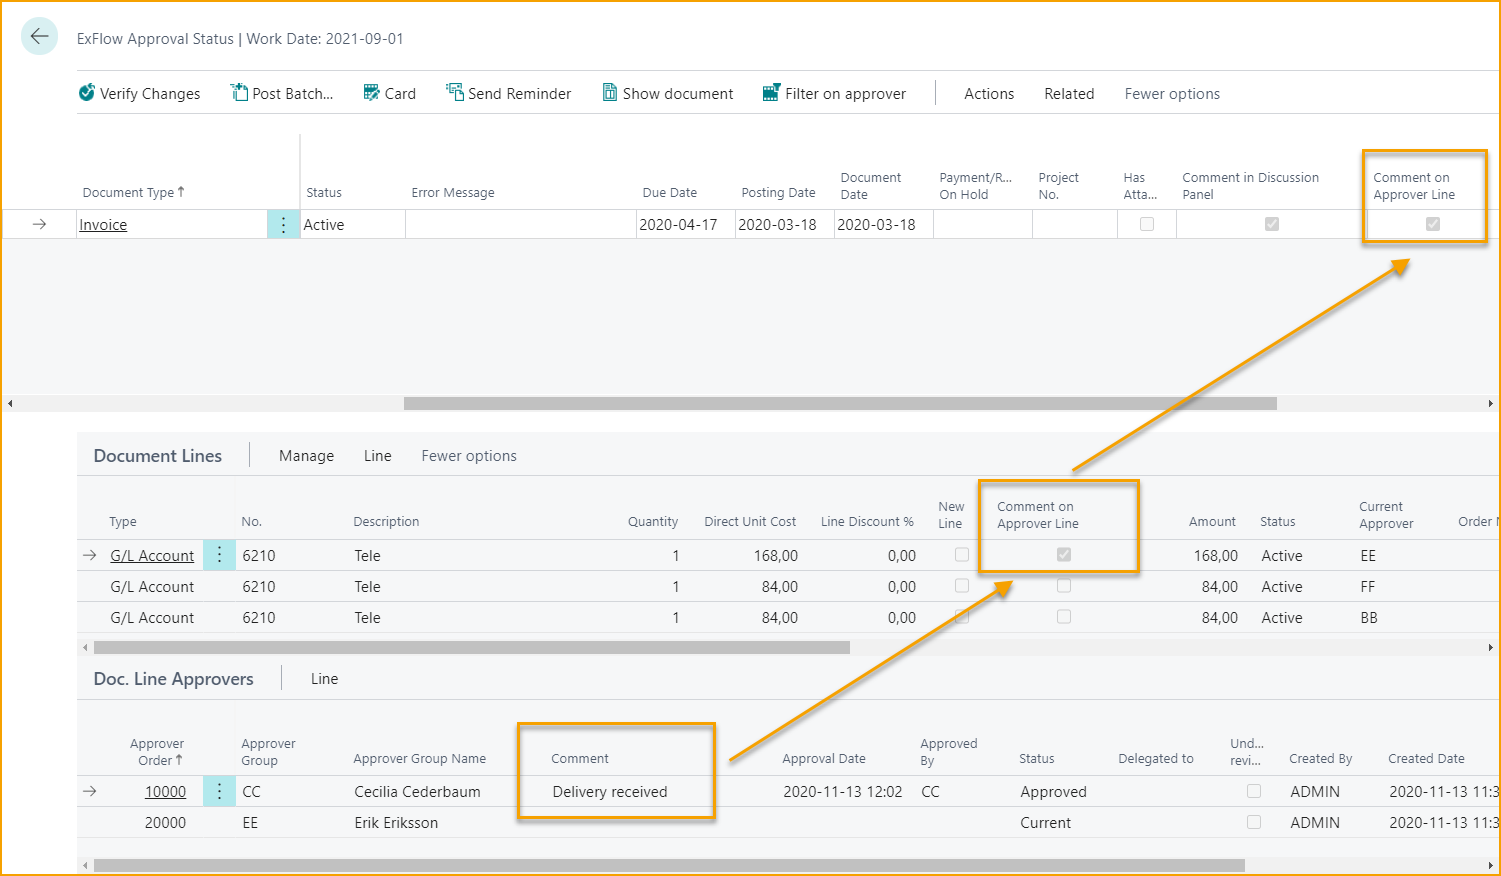
Read Comments from Approvers
When a web approver adds a comment on Chat in header and click "SEND" the comment can be seen in FactBox to the right marked with approvers ID, Date and Time.
Document will also have a tag in header "Comment in Discussion Panel" if there are any comments made from ExFlow or ExFlow Web.
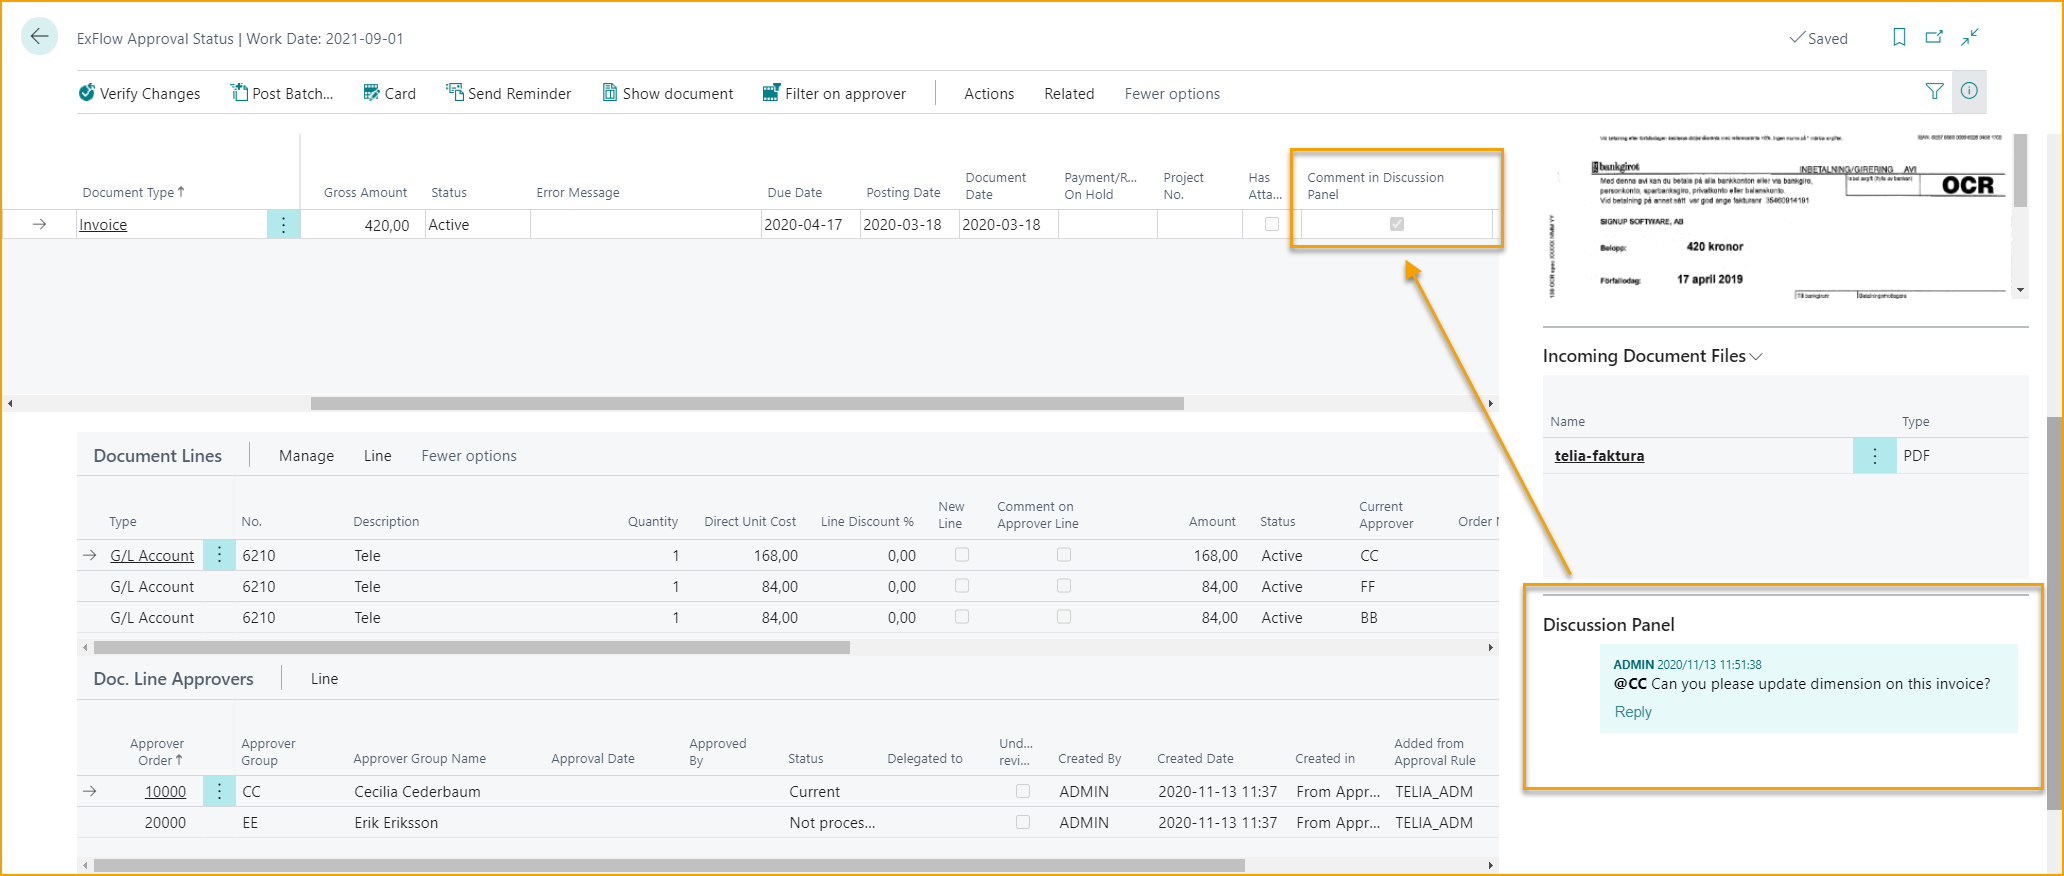
When a web approver adds a comment on a line the comment will be seen on "Doc. Line Approvers" in field "Comment".
Read more about settings and how to use Discussion Panel under section: Notifications in Business Central --> Discussion Panel / Chat and Line Comments.
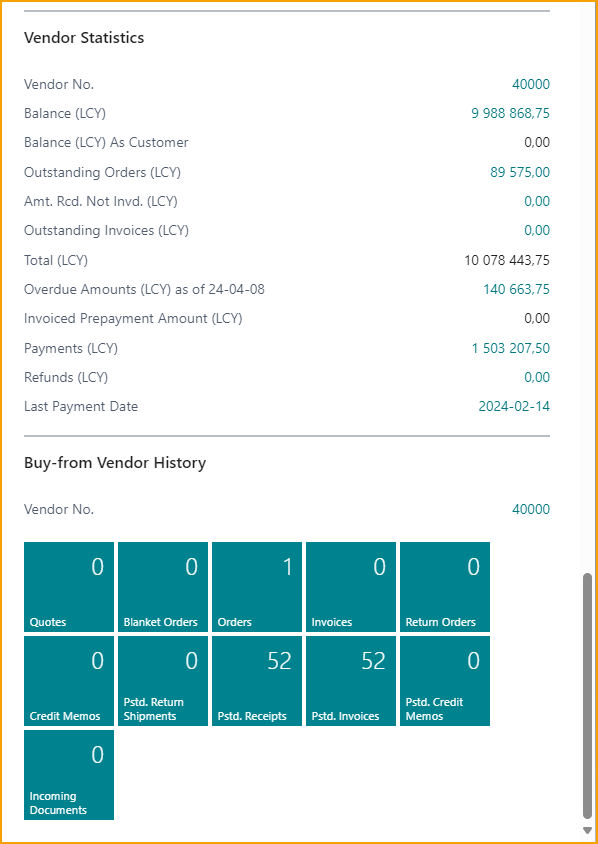
Vendor Statistic and Buy-from Vendor History
Find Vendor information in Vendor Statistic and Buy-from Vendor History FactBoxes.
These FactBoxes can also be found in ExFlow Approval History.
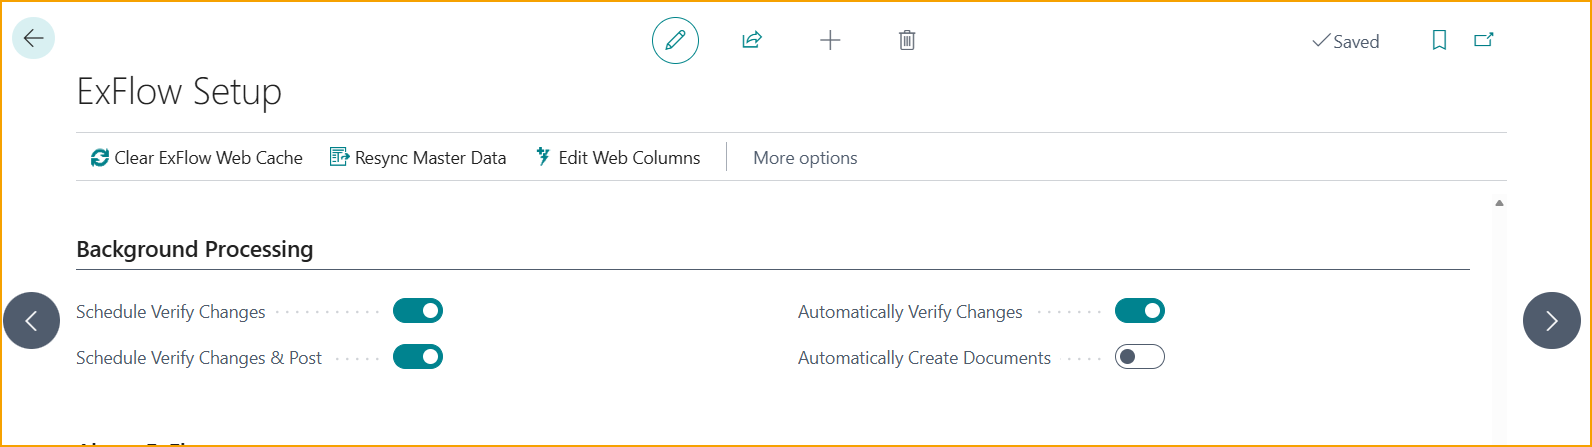
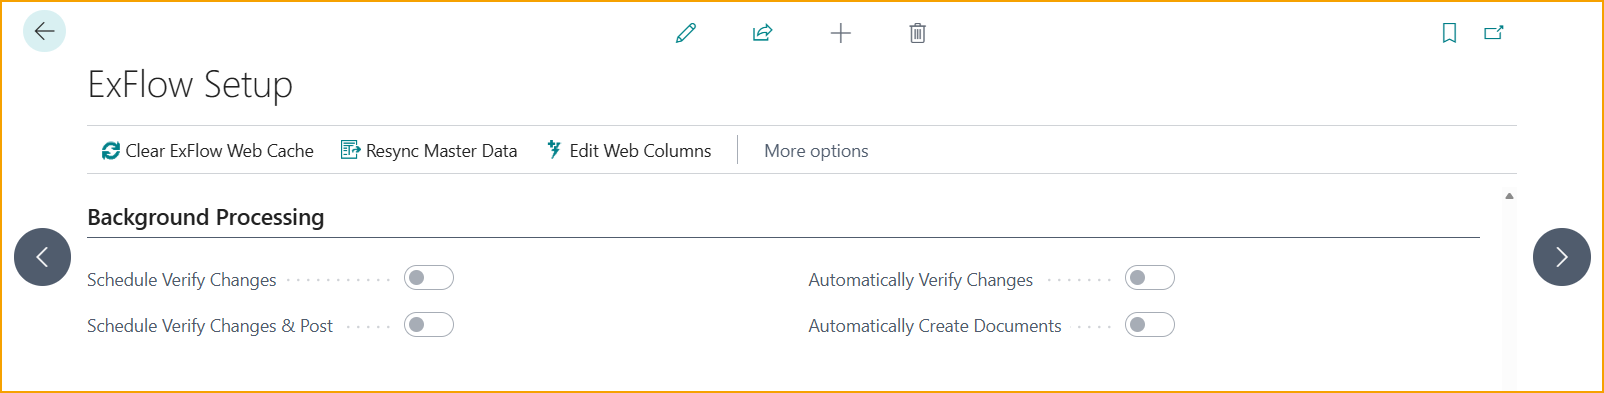
Background Processing
Go to: ExFlow Setup --> Background Processing
Following settings only applies to documents without changes.
If there are any changes done from ExFlow Web, they still need to be updated manually in Approval Status by running Verify Changes.
Schedule Verify Changes
Go to: ExFlow Setup --> Background Processing --> Schedule Verify Changes
This setting specifies if verification of approved documents should be scheduled to run in the background. This will only apply for documents without changes on ExFlow Web.
Schedule Verify Changes & Post
Go to: ExFlow Setup --> Background Processing --> Schedule Verify Changes & Post
Specifies if documents with status "Ready for Posting" in Approval Status should be scheduled to run in the background and post documents after verification.
When enabling this function, then ''Schedule Verify Changes'' will also be enabled automatically.
All "ExFlow web - changed" documents, that requires to be updated in ExFlow Verify Changes in Approval Status, will be excluded from this scheduled job. A message in Error Message field in the ExFlow Approval Status will be visible on these non-updated documents.
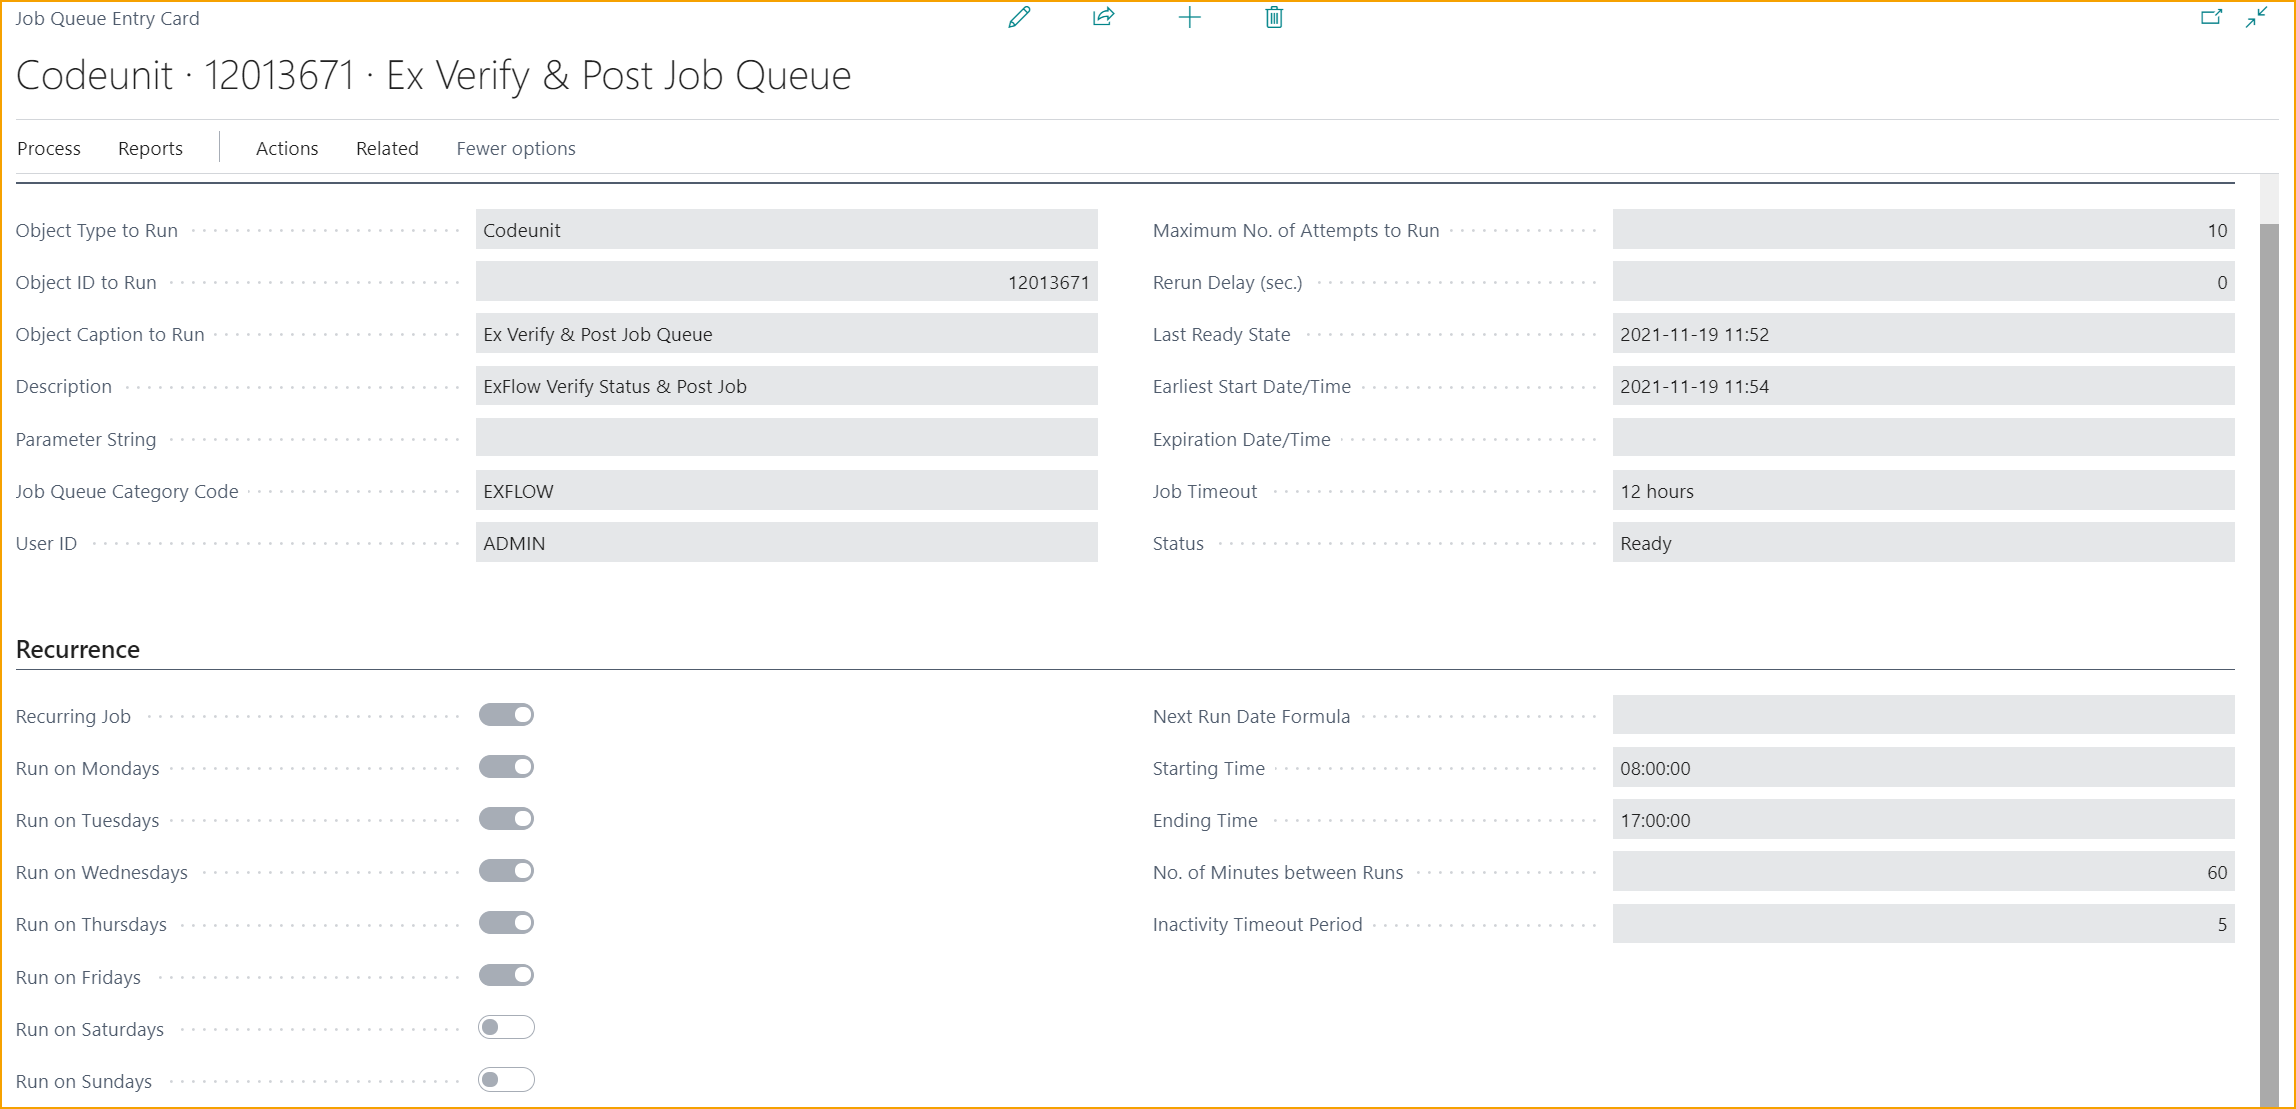
Job Queue "Ex Verify & Post Job Queue" is configured to run every hour on weekdays by default, when enabling one of the mentioned Background Processing settings in ExFlow Setup.
When the function gets disabled, the Job Queue "Ex Verify & Post Job Queue" will disappear from the "Job Queue Entries" list.
Automatically Verify Changes
Go to: ExFlow Setup --> Background Processing --> Automatically Verify Changes
This setting will update documents with status "Approved" to "Ready for Posting" without Job Queue Entry.
This setting allows to skip the step "Verify Changes" in Approval Status page if no changes were made on the approved document. Document status is automatically changed to "Ready for Posting".
The "Automatically Verify Changes " setting can also be found in ExFlow Vendor Setup. It is possible to choose if this feature should be enabled/disabled for a specific vendor. Or enable the setting in ExFlow Setup for all vendors.
Read more about this functionality under section Verify Changes
Automatically Create Documents
Go to: ExFlow Setup --> Background Processing --> Automatically Create Documents
Enable this box if all newly interpreted documents should be automatically created from the ExFlow Import Journal. This function can also be setup per vendor in Vendor Setup if a specific vendor's documents (for instance) should be excluded from this setting.
If the function is enabled, then all newly interpreted documents with no errors or warning messages will be automatically created and sent for approval.
It is possible to personalize the ExFlow Import Journals list page and add + enable the column "Automatically Create Documents" there, to have one dedicated journal for automatically create documents.
This function can be used without any setup on ExFlow Import Journal, simply click on Yes to the pop up question:
''This will update all existing Import Journals to Automatically Create Documents. If you want exceptions from that you have to update the field per journal. Do you want to continue?''
Read more about this under section Batch Import Documents from Interpretation
Doc. Posting Checks
Find all information about Doc. Posting Checks here
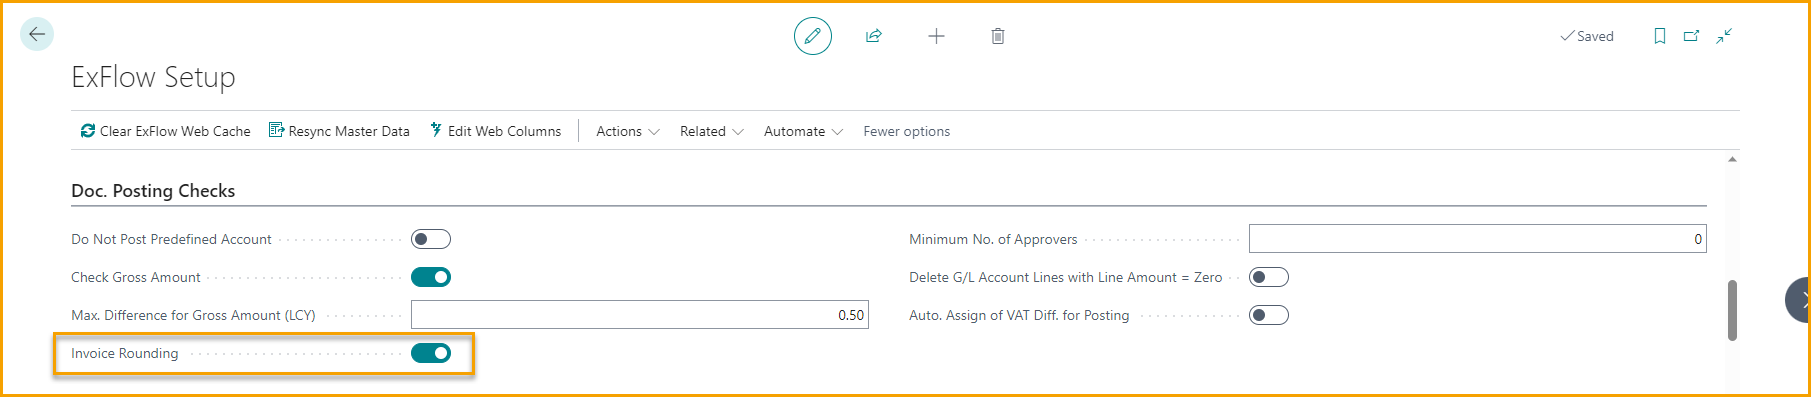
Invoice Rounding
If Invoice Rounding is activated in Business Central --> Purchase & Payables Setup--> General, then ExFlow has support to automatically post invoice rounding to match the Gross Amount on the document.
Go to: ExFlow Setup --> Doc. Posting Checks
Activate "Invoice Rounding" and add value in "Max Difference for Gross Amount". Also make sure the "Check Gross Amount" setting is ticked as well.
ExFlow makes a control between the gross amount on the purchase document head and the document line amount. A rounding line will be created if the gross amount difference is within "Max Difference for Gross Amount" tolerance when posting. Posting is done as per standard Business Central settings.
If SweBase (for Swedish customers) is installed, rounding will be handled by SweBase and ExFlow Rounding can only be done for Preliminary Posting.
Read more under section Preliminary Posting
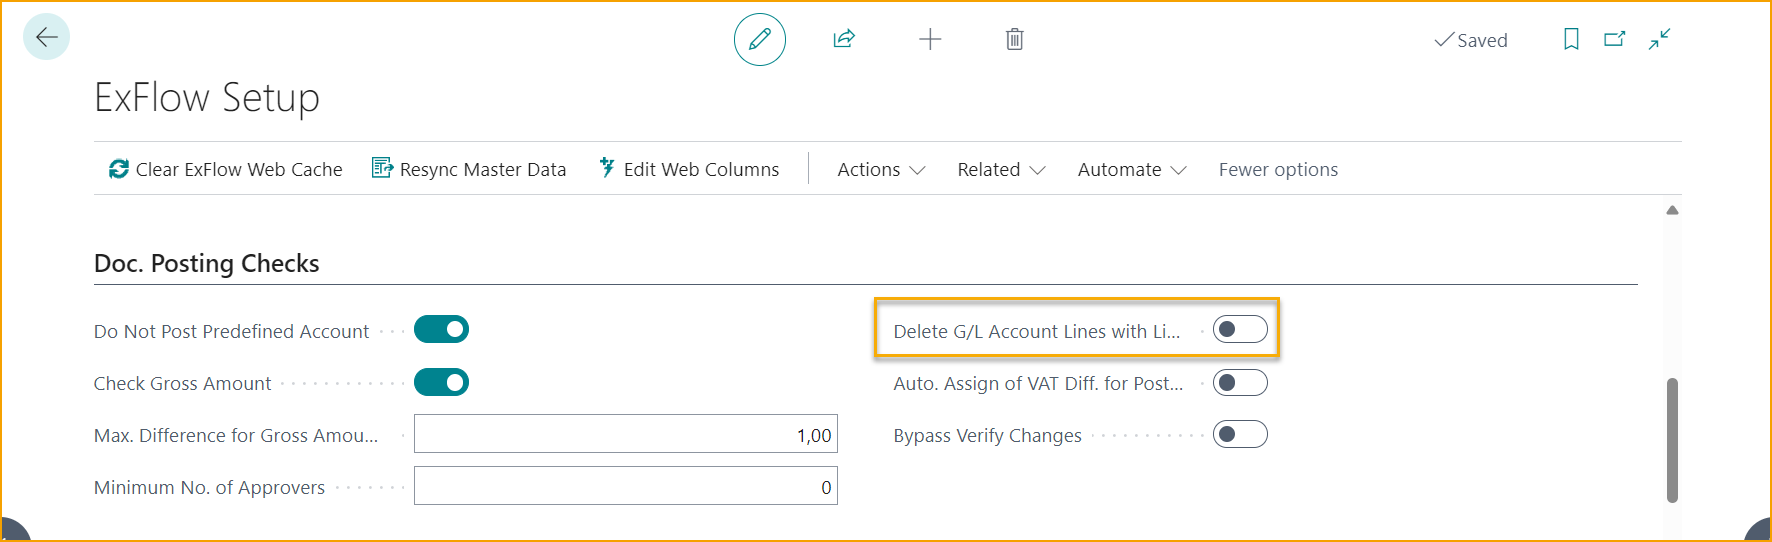
Delete G/L Account Lines with Line Amount = Zero
Go to: ExFlow Setup --> Doc. Posting Checks --> Delete G/L Account Lines with Line Amount = Zero
If account lines with 0 (zero) line amount needs to be added to a document before creating it but not keep it when posting, then it is suitable to activate "Delete G/L Account Lines with Line Amount = Zero" in ExFlow Setup.
When this setting is enabled, any document lines with zero amount will be deleted before posting the document.
Escalation
Find all information about Escalation here
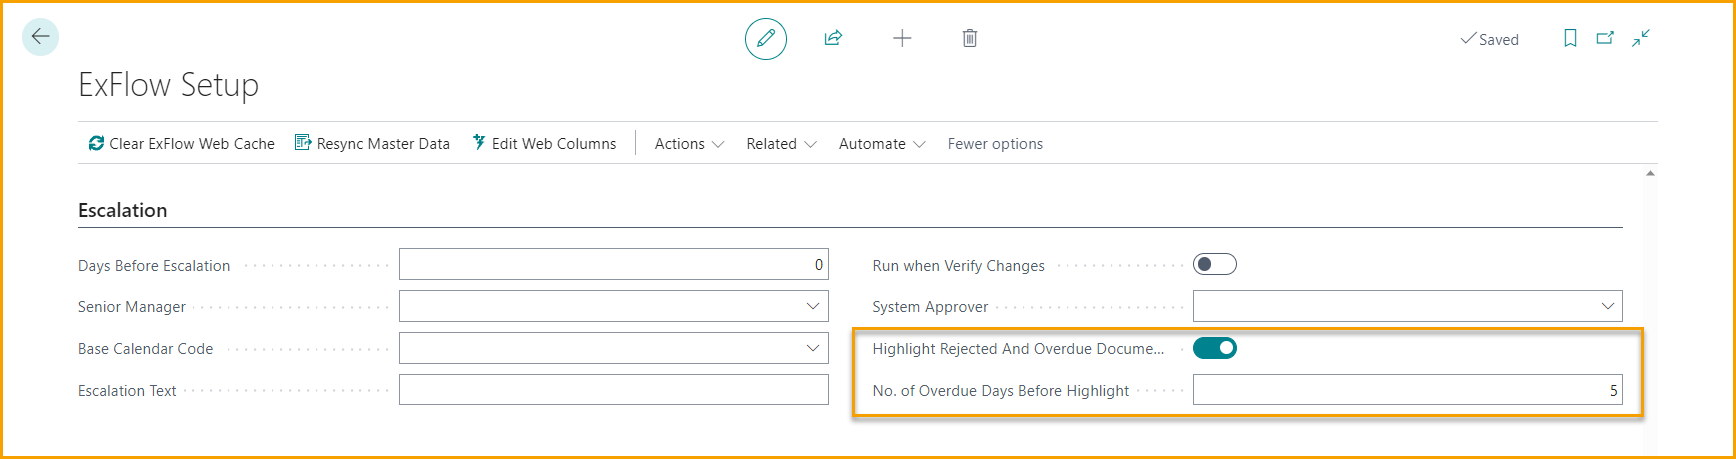
Highlight rejected and overdue documents
To make it easier to see documents that have been rejected or are close to due date, there is a possibility to activate a setting in ExFlow Setup to highlight these documents in Approval Status with red font.

Setup Highlight rejected and overdue documents
Go to: ExFlow Setup --> Escalation
Enable "Highlight Rejected and overdue documents" to activate the setting.
Enter a number in "No. of Overdue Days before highlight" to specify how many days before the due date the documents should be highlighted.
This setting operates in relation with the due date of the document and the users work date "0" will highlight the document on the due date.