ExFlow Web
Please find ExFlow Web Documentation here
Workflow
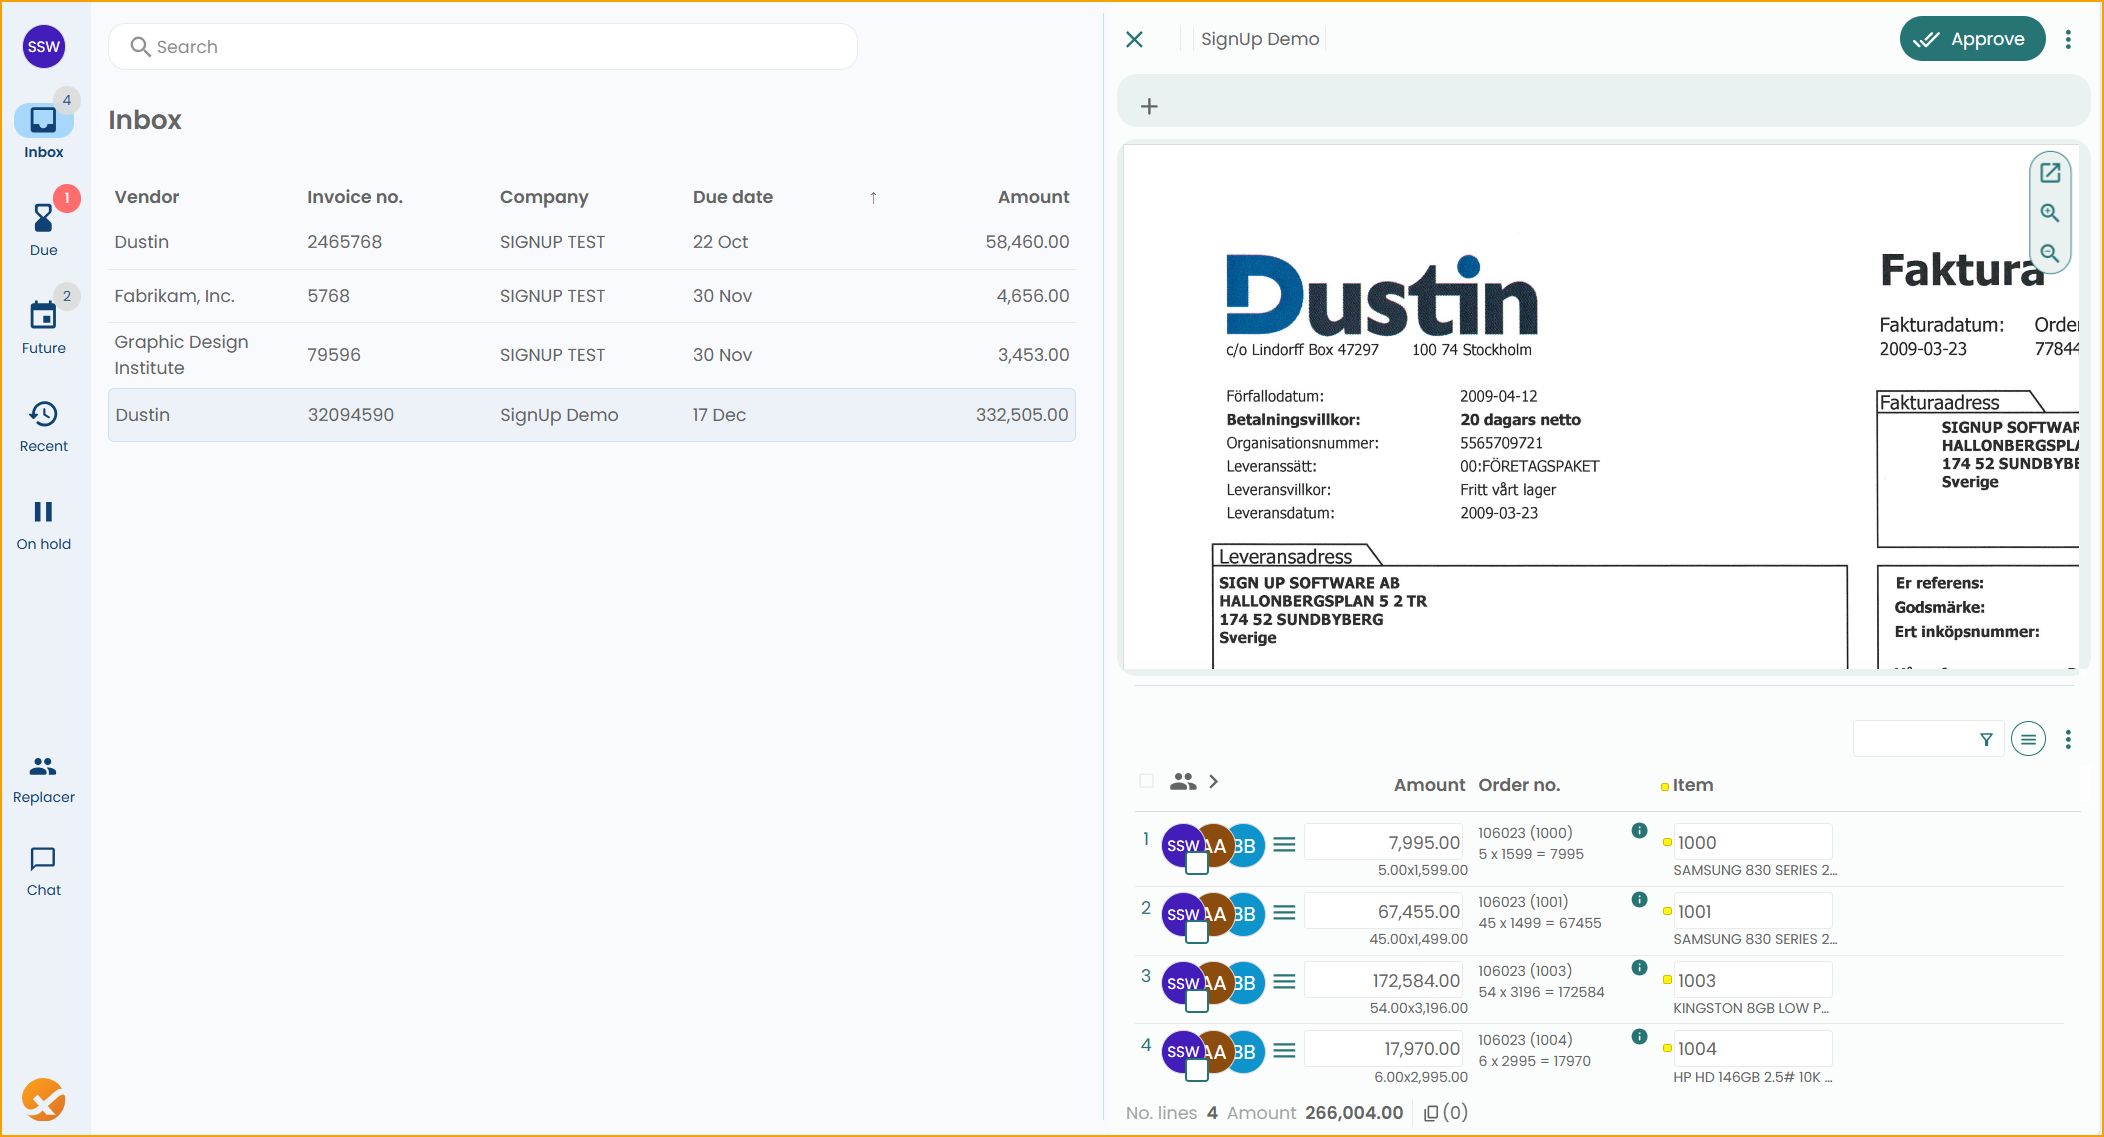
Documents for approval
As soon as documents are created from the Import Journal, the documents will be visible on ExFlow Web and ready to be approved/handled for the current approver.
Click on the document to see all information about the document image and document lines.

Depending on the permission role on ExFlow User in Business Central, the approver may adjust the line regarding dimensions, change G/L Account etc.
In this case, the approver just approves all lines on this invoice by clicking on the "Approve" button, up in the right corner.
After approval, the invoice will be moved to "Recent" (side panel) for this approver. The invoice will then be sent to the next approver, if such exists.
The Approval Status in Business Central will also be updated, since it will mirror ExFlow Web.
Approved documents
When a document is approved by all approvers in the approval flow, then the status will be updated to ''Approved'' in the "ExFlow Approval Status" page for the AP team.

The invoice status is now waiting to be updated to "Ready for Posting".
By using the function "Verify Changes" the AP team updates the "Status" of the invoice and approves all potential executed line changes.

The next step is to post the invoice by using function "Post" or "Post Batch".
There is also a function for Preview Posting.
Go to: Actions --> Posting --> Post / Preview Posting / Post Batch...

Web Attachments
From ExFlow Version 25.2 and ExFlow Web Version 2025.10.8431, web approvers can manage document attachments more efficiently, thanks to the implementation of enhanced attachment management functionality.
Unsure of your ExFlow Web version? Log in to ExFlow Web, and click on your profile image and then on ''About'' to find out.
Technical information
More technical information about ExFlow web can be found here