Web Services - EXFID
Introduction
ExFlow depends on the import of documents from a multitude of sources, Local File System, Azure Storage or Web Services.
Web Services will be described in this text; functionality, setup, usage, and sample code as a project in C#/.NET 4.8 and Visual Studio 2019 to integrate with it. Coding can be done in any language that support Web Services requests using the SOAP protocol. The listed sample code can be easily converted to VB.Net.
Using Web Services enables 3’rd party integrators or Business Central partners to send electronic invoices to ExFlow using a standardized protocol.
General
Importing invoices into ExFlow usually requires two files, one XML that contains the invoice in a known structure and the PDF file containing a presentation of the invoice. The PDF file may be optional if there exist an XSL file that can generate an HTML convertible to PDF.
Using Web Services for import is initiated externally and not by ExFlow or any Job Queue Entries. External systems connect to Web Services in Business Central and invoke methods to upload documents into Incoming Documents and Incoming Document Attachments. When triggering import in ExFlow, documents are processed based on Incoming Documents imported by the Web Service.
Business Central / ExFlow
Install ExFlow and run the Wizard to get a setup.
Import a useful Data Exchange Definition (DED), either one from ExFlow or use an existing DED in Business Central.
ExFlow Setup
Go to: ExFlow Setup --> OCR Import --> Web Def. Data Exchange Type
ExFlow Setup, set a value in field “Web Def. Data Exchange Type”, selecting from the list of Data Exchange Types. If there are none available, then run “Import Data Exchange Definitions” and import one or more Data Exchange Definitions.
Import Journal
Go to: ExFlow Import Journals
Create or configure an ExFlow Import Journal to process what is imported through the EXFID Web Service.
To create a new ExFlow Import Journal, simply edit the list and set a Name and Description for the new journal.
Then set Source Type to ''Web Service''.
Process imported invoices through the Web Service by running “Import Documents” in the newly created ExFlow Import Journal or by running “Batch Import Documents”.
Optional Attachments
Optional attachments may be uploaded to include more documents than the default XML and Pdf. Data Exchange Definition configurations such as Peppol and OIOUBL support embedded optional attachments by including the attachments as BASE64 encoded data in the XML, please import Peppol Data Exchange Definition to see how it is configured as it can be used for any XML format.
Pre-Sent Attachments
If the XML format used does not support embedded attachments or if it is technically difficult to embed the attachments, attachments may be sent before the actual XML invoice. Optional attachments may be sent before the actual XML invoice.
Embedded Attachments
Embedded attachments are BASE64 encoded, optionally compressed using gzip, streams as can be seen in Peppol and OIOUBL XML formats.
To see how to import embedded attachments from XML, then import either Peppol to ExFlow or OIOUBL to ExFlow Data Exchange Definitions.
Authentication
Web Service Access Key
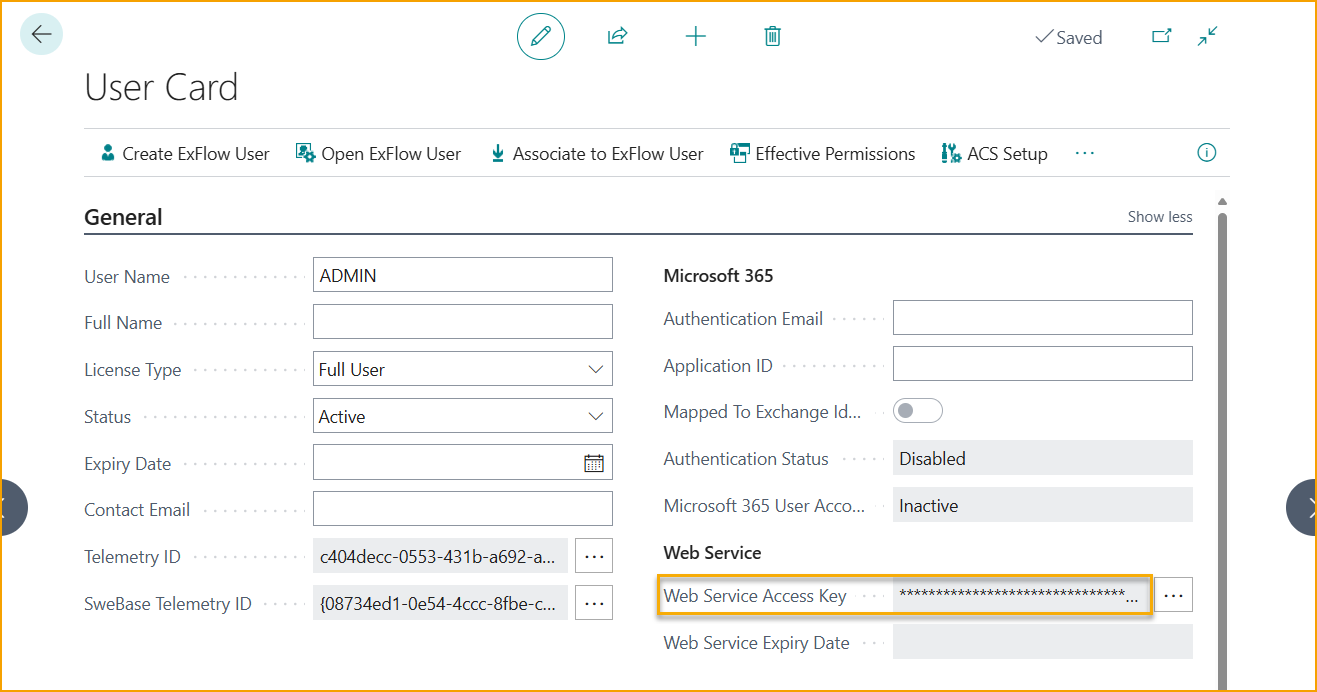
For a local container, create a Web Service Access Key on the user to use in Visual Studio. Open the user card in Business Central and activate a Web Service Access Key. Copy the key and replace the key on the line with NetworkCredentials.

OAuth
From ExFlow 19.2 and onwards ExFlow supports authentication to our Web Service through OAuth.
First a Microsoft Entra Application needs to be created, if none exist already. Add a relevant Name for the import and assign permission set: ''EX WEB SERVICE'' under th User Permission Sets. This Permission Set should have the company field left blank.
After this is done a client ID will be generated and this will be needed for the authentication.
Now an App Registration needs to be created in the Azure Portal. Note that a Global Admin will have to grant consent for this app.
Register an application, name it and select the relevant tenant type.
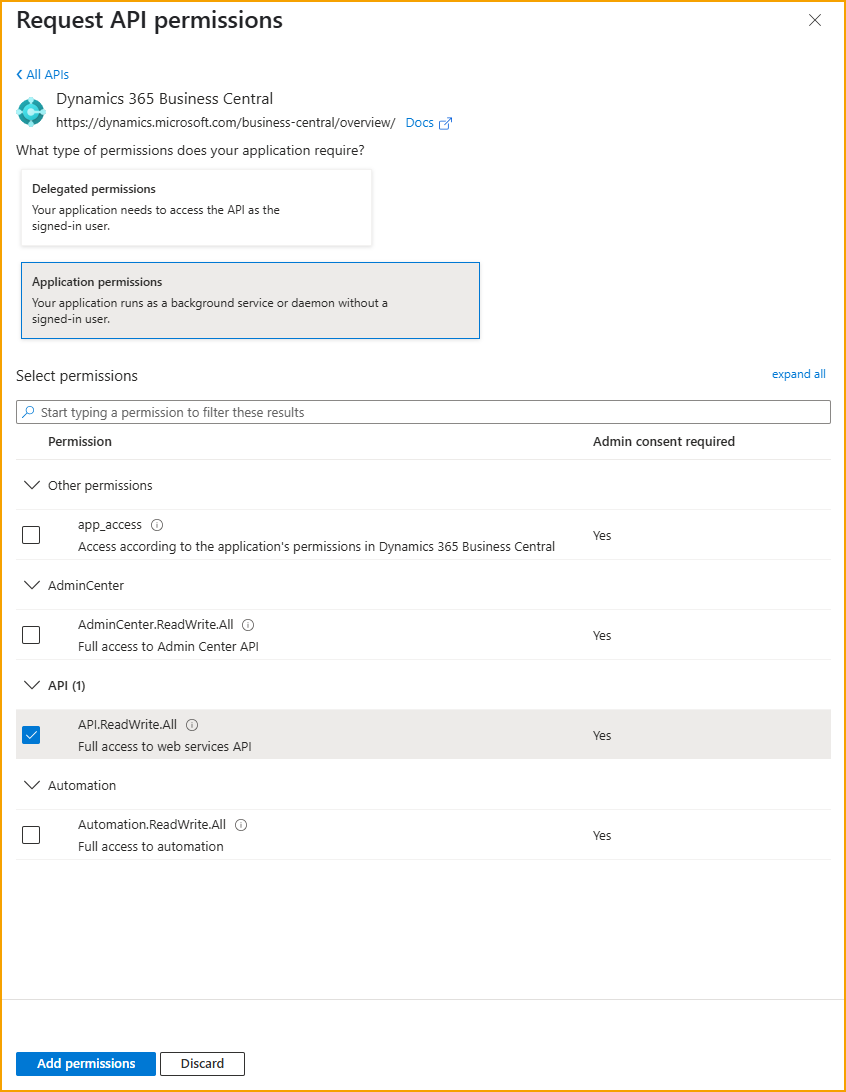
Now set the API permissions to “Application permissions” and add ''API.ReadWrite.ALL''.

Lastly grant admin consent on the App Registration.
When this is done all setup is done that is needed to be able to authenticate through OAuth.