OCR Overview
The OCR Import settings can be found in ExFlow Setup and Vendor Setup
This page will give an insight in the ExFlow AP OCR Overview
Go to: ExFlow Setup - Overview --> OCR
Data Capture Accounts
Go to: ExFlow Data Capture Accounts
An ExFlow Data Capture Account must be setup to be able to import documents to an Import Journal via ExFlow Data Capture.
Read more about how to get started with ExFlow Data Capture
| ExFlow Data Capture Accounts | |
|---|---|
| New | Add a new EDC Account |
| Manage | Edit/View or Delete |
| Home | |
| Home --> Test Connection | Will test the service connection with given settings to confirm valid service setup |
| Home --> Update Document Templates for All Accounts | Updates document templates for all accounts |
| Home --> Update Buyer List for All Accounts | Checks for new buyers and updates the buyers list for all accounts |
| Home --> Import Data Exchange Definitions | Opens a page to Import Data Exchange Definitions |
| Home --> Enable Automatic Document Receiving | Enables electronic documents receiving and creates job CU 12013655 (ExKFDocumentReceiveJob) |
| Home --> Disable Automatic Document Receiving | Disables electronic documents receiving and removes job CU 12013655 (ExKFDocumentReceiveJob) |
| Navigate | |
| Navigate --> ExFlow Data Capture Setup | Opens ExFlow Data Capture Setup |
| Navigate --> Job Queue Entry | Opens Job Queue Entries filtered ocr list |
| Navigate --> Activity Log | Opens the activity log. This Log will be shown if the Event Log is enabled in ExFlow Data Capture Setup |
| Data Capture Account Card Menu | |
|---|---|
| Home | |
| Home --> Set URLs to Default | If the Service section URL's have been changed, this action will reset the actions back to default values. |
| Home --> Test Connection | Test if the connection is valid, with given settings. Also checks so the Exchange Service connection is correct |
| Home --> Update Document Templates | Updates the document templates |
| Home --> Update Buyer List | Updates buyers list, it will check for new buyers and add them to the list |
| Home --> Resync Master Data | Resync the master data (vendor ID Fields) and vendor bank accounts with connected ExFlow Data Capture/OCR Service |
| Home --> Force Master Data Synchronization. This option will resync and replace the master data | Force Master Data synchronization on connected ExFlow Data Capture account |
| Navigate | |
| Navigate --> ExFlow Data Capture Setup | Opens the ExFlow Data Capture Setup page |
| Navigate --> Job Queue Entry | Opens a filtered job queue entry list on the Master data sync job to provide details on status etc. |
| Navigate --> Activity Log | Opens the activity log (if Event Log is enabled) to give details about the EDC Service |
| Data Capture Account Card --> General | |
|---|---|
| Code | Specifies the EDC Account code |
| Type | Specify the Account type, if it's a Purchase or Sales |
| User Name | Specifies the user name that represents your company's login to the EDC service |
| Password | Specifies the password that is used for your company's login to the EDC service |
| Authorization Key | Specifies the authorization key that is used for your company's login to the EDC service |
| Default EDC Doc. Template | Specifies the EDC template that must be used by default for electronic documents that are received from the EDC service. You can change the EDC template on the individual incoming document card before sending the related file to the EDC service. |
| Data Exchange Type | Specifies the data exchange type that is used to process the incoming document when it is an electronic document. |
| Buyer Filter | Buyer Name will be shown in the list, according to given credentials. Options will be given to select to enable for Master Data Filter and/or Buyer Filter |
| Master Data Filter | Buyer Name will be shown in the list, according to given credentials. Options will be given to select to enable for Master Data Filter and/or Buyer Filter |
| Master Data Sync Enabled | Specifies whether or not the master data sync has been enabled. |
| Enabled | Specifies if the EDC account service has been successfully enabled. |
| Job Queue Entry User | Specifies the user that will be used to run the scheduled jobs. The user must have the necessary permissions to perform the tasks that the jobs will execute. |
| Additional Data Exchange Definitions | Opens Import Data Exchange Definitions page to make selection and view details |
| Data Capture Account Card --> Service | |
|---|---|
| Sign-up URL | Opens Tungsten Store |
| Service URL | Opens Tungsten Service Service Connections |
| Sign-in URL | Opens Tungsten login page Edit the page to change link url to SignUp login, if this link should be used instead |
The Service tab links (two last one) will update depending on used EDC and BC localization (NA,AUS,EUR).
| Data Capture Account Card --> Customer Information | |
|---|---|
| Name | Specifies the company name at the provider of the EDC service |
| ID | Specifies the company's customer ID at the provider of the EDC service |
| Status | Specifies the company's status at the provider of the EDC service |
Data Capture Setup
Go to: ExFlow Data Capture Setup
| ExFlow Data Capture Setup | |
|---|---|
| Resync Master Data | Resync the master data and vendor bank accounts with ExFlow Data Capture/ OCR Service |
| Force Master Data Synchronization | Force Master Data synchronization for all listed ExFlow Data Capture accounts |
| Restore Settings | Restore modified Data Capture Setup to the default values |
| General | |
|---|---|
| Token Lifetime (min) | Specifies cookie lifetime (min). Default value is 25 minutes. Authentication tokens are saved in a cookie and expire after 30 minutes of inactivity. |
| Http Request Timeout (min) | Specifies the HTTP request timeout (min) |
| Max Lock Time (Min) | Specifies the maximum lock time (min) after which the lock is considered invalid |
| Enable Event Log | Enable/Disable event log on the Data Capture Account. The log can be found in the ExFlow Data Capture Accounts --> Navigate --> Activity Log or in the ExFlow Data Capture Account Card --> Navigate --> Activity Log |
| Service | |
|---|---|
| Max Page Size | Specifies the max number of vendors to be uploaded to ExFlow Data Capture via Force master data synchronization |
| Max Document Download Count | Specifies the max document download count. |
File Import Setups
Go to: ExFlow File Import Setups
Configure the File Import Setup to use, when importing documents to ExFlow Import Journal.
Import Journal Source Types
Import documents to Import Journal via below Import Types.
In the Import Journal list, batches can be setup to import with following Source Types: ExFlow Data Capture, Web Service, Manual and Import Files.
| Source Types | |
|---|---|
| ExFlow Data Capture | Import document via ExFlow Data Capture |
| Web Service Import | Import document via Web Services |
| Manual | Manual import of a document image |
| Import Files | Import via an Azure FileShare |
| E-Document | This Source Type is shown as an option if Microsoft's published E-Document Connector app is installed and used to handle the electronic documents. No document import to ExFlow Import Journal will be made via this option. Read more about E-Documents here |
| ExFlow E-Invoicing Pro | Choose this Source Type if ExFlow E-Invoicing Pro app is installed and used to handle the electronic documents. Documents can then be imported to Import Journal, verified, created and then sent for approval. Read more about this here |
Azure FileShare
Go to: ExFlow File Import Setups to import images/PDF documents.
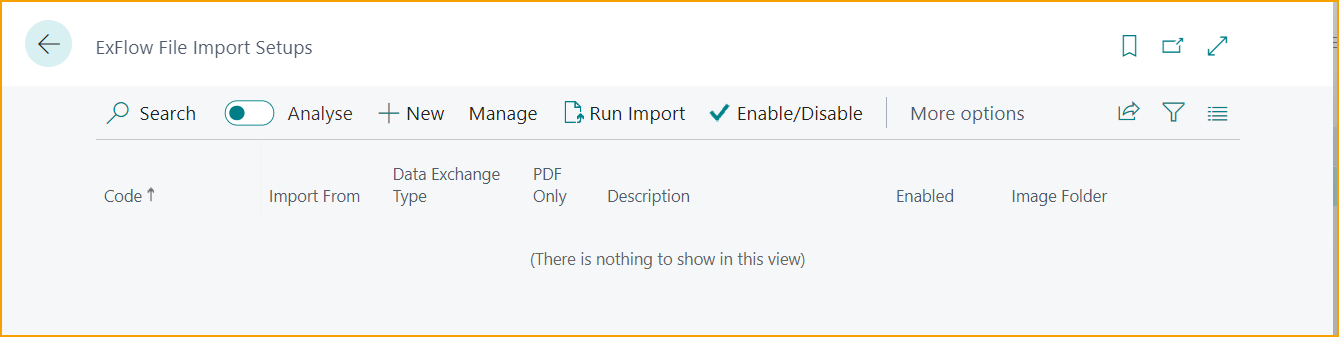
| File Import Setups | |
|---|---|
| New: | Create a new File Import Setup |
| Manage: | Edit, view or delete the setup |
| Run Import: | Run the import process |
| Enable/Disable: | Enable/disable the import source |
| More options--> Actions--> Show Ongoing Imports | Shows a list of pending import files |
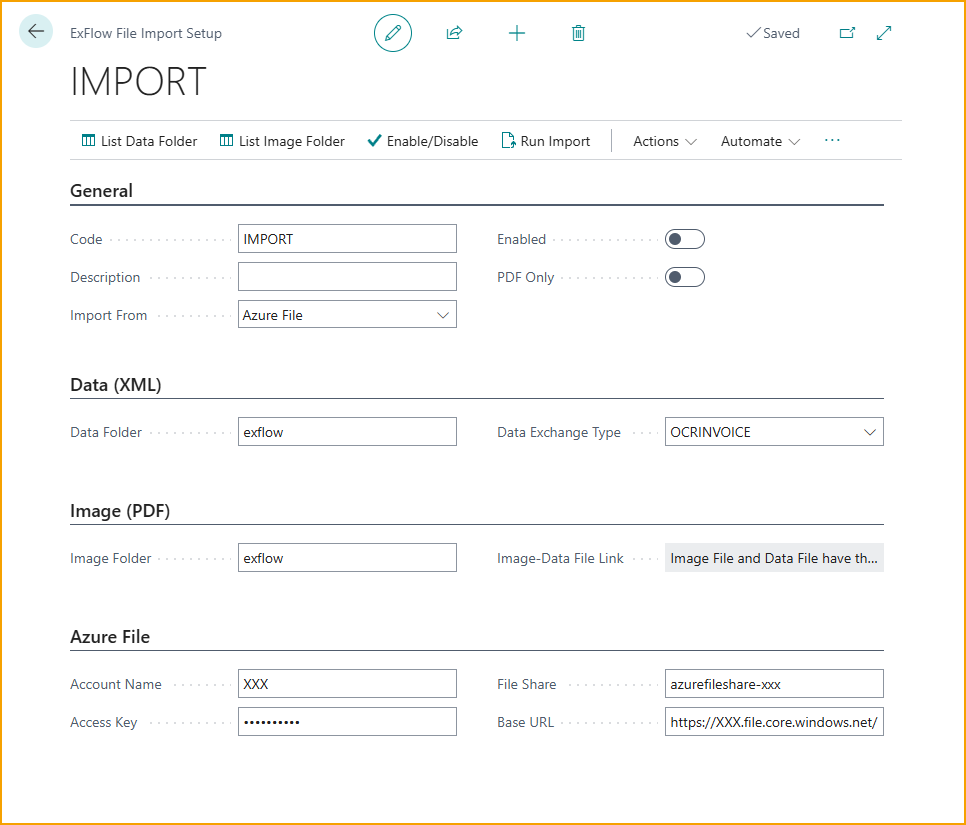
Click on New to create a new File Import Setup.
Under the General -section, enter a Code, description and choose ''Import From: Azure File''.
When ''Azure File'' gets selected, then both ''Image Folder'' and ''Image Folder'' will be set to ''exflow'' per default under the ''Data (XML)'' -section and ''Image (PDF)'' -section.
Add ''Data Exchange Type'' under the ''Data (XML)''- section. Under the ''Azure File''- section, add information about the Account Name, Access Key, File Share and the base URL.
Enable the setup.
OCR Import Mapping
Go to: ExFlow OCR Import Mapping
Utilize ExFlow OCR Import Mapping to assign vendor-specific coding that populates document lines in ExFlow Import Journal.
Read more about this under OCR Import Mapping
Advanced OCR Mapping
Go to: ExFlow Advanced Mappings to setup more advanced mapping, for instance when a field is not included in the used Data Exchange Definition per default or if there is a need to concatenate values from imported documents etc.
| Advanced Mapping | |
|---|---|
| Code | Specify the Mapping Code |
| Description | Specify the Mapping Code Description |
| Disabled | Specifies if a mapping is active or not |
| Formula | Formula describing the calculation or mapping to be done |
| Data Exch. Def. Code | Linked data exchange definition code, can be left blank to match any DED |
| Table ID | Specify the Table destination of mapping when importing, if it on header (Table ID Table ID 12013648 - ExFlow Purch. Import Header) or line level (Table ID 12013649 - ExFlow Import Document Line) |
| Table Name | Specifies the Table Name: ExFlow Purch. Import Header or ExFlow Import Document Line |
| Field ID | Specify the relevant Field ID, to be used for the ExFlow Purch. Import Header mapping. |
| Field Name | Specifies the Field ID name |
| Target Table ID | Specify if the mapping also should be set to the ExFow Purchase Document Header (Target Table ID 12013587). Only applicable if ''Table ID 12013648 - ExFlow Purch. Import Header'' is set. |
| Target Table Name | Specifies the name of the Target Table ID -ExFlow Purchase Document Header. |
| Target Field ID | Specify the Target Field ID to map in the Purch Document Header. |
| Target Field Name | Specifies the Target Field ID name |
Data Exchange Definitions
To start, go to Data Exchange Definitions (DED) and choose the definition to be used with advanced mapping.
Once opened the exchange definition, two line definitions are displayed, one for header and one for line.
Header will be used in this scenario. When header is highlighted, click on field mapping and then ExFlow Advanced Mapping.
Examples of Advanced Mappings
Target Mappings
If we would like to map an interpreted value to a specific field, that is not apart of the DED Table ID, then we can create an advanced mapping.
Let say that there is a need to interpret and map Location Code on ExFlow Purch. Import Header (Table ID 12013648), and put it to the ExFlow Purchase Header. Next step is to choose the Field ID fot the Location Code to be mapped to. For this example MiscHead6 is chosen (Field ID 12013626)

- Add a code, and name the code
- enable it and add formula if needed.
- choose the DED
- If no formula is used, add the Table ID to map towards, which is to choose Header och Line
- If the ExFlow Purch. Import Header (Table ID 12013648) is chosen, then it's possible to map the Field ID to a Target Table ID, if needed. However this is not applicable when setting up an advanced mapping on the ExFlow Import Document Line (Table ID 12013649).
- If mapping is set for ExFlow Purch. Import Header (and not Document Line), then its also possible to specify Table ID 12013587 (ExFlow Purch. Document Header) and Target Field ID of choice.
- Lastly, remember to enable the newly created advanced mapping by unticking the ''Disabled'' checkbox.
Formula Mappings
Formula example 1
For this example, lets say that we have one invoice with two values; these values are 1234 and 5678 and are in MiscHead1 and MiscHead2. If there is a wish to concatenated these two values and to populate the reference field with the sum, we could achieve this in this following way:
Create a new code of choice, such as in the example: ''Referencecont'' with the description Reference concatenate.
The used formula is $MiscHead1+MiscHead2, defined that this is only for XML definition, since this is on header level I pick Table ID: 12013648 which is ExFlow header level, and then Field ID: Reference.
Outcome: After the document interpretation, the result would be that the Reference Code will get ''12345678'' in the ExFlow Import Journal header.

Formula example 2
There is also a way to use advanced mapping with math formulas. By removing the dollar sign (string) in the formula we are now telling ExFlow to add 1234 and 5678 and to sum up in the Reference field.
Outcome: After the document interpretation, the result would be that the Reference Code will get ''6912'' in the ExFlow Import Journal header.
Formula example 3
It is also possible to hardcode the formula by using hashtags, for ex. ‘’$MiscHead1-#66#-MiscHead2’’, it would give the result:
Outcome: After the document interpretation, the result would be that the Reference Code will get ''1234-66-5678'' in the ExFlow Import Journal header.
More information about mapping can be found under Field Mapping