For users
ExFlow Travel and Expense covers multiple steps in the expense and mileage submission process. It includes various roles with different responsibilities, all contributing to the best possible experience and the fastest process available.
This section documents the different roles within ExFlow Travel and Expense, detailing their functions and interactions. It also provides information on where to learn how to fulfill each role optimally.
The user submits expenses and mileage. Simply take a photo of the receipts and submit them through the app within moments, or record mileage in the same app.
-
Link to mobile app section
-
Link to web portal section
The intended way to use ExFlow Travel and Expense is through the app, which can be accessed on any device normally used for apps. The app allows taking a photo of an expense directly, or plotting a route from one place to another, and immediately sending it for approval.
ExFlow Travel & Expense mobile app
ExFlow Travel & Expense app, available on Android and iOS, allows effortless and quick submission of expenses and mileage from a mobile device. The created documents will be available to approvers and the finance department as soon as they are submitted.
The app is the intended method by which employees should submit their expenses and mileages, as it takes but a few clicks and inputs to submit while on the go.
Below are examples of how the app appears on various pages.
Getting started with ExFlow Travel & Expense app
To start using the app, downloading it is the first step. It is available for download from both Google Play and the Apple App Store. Users can find it using the links below or by searching for ''Travel and Expense'' in the respective store.
Go to: Link to Google Play and Apple App Store

Login
Login into ExFlow Travel and Expense app requires two steps on your first login. Here is the customer ID screen below.
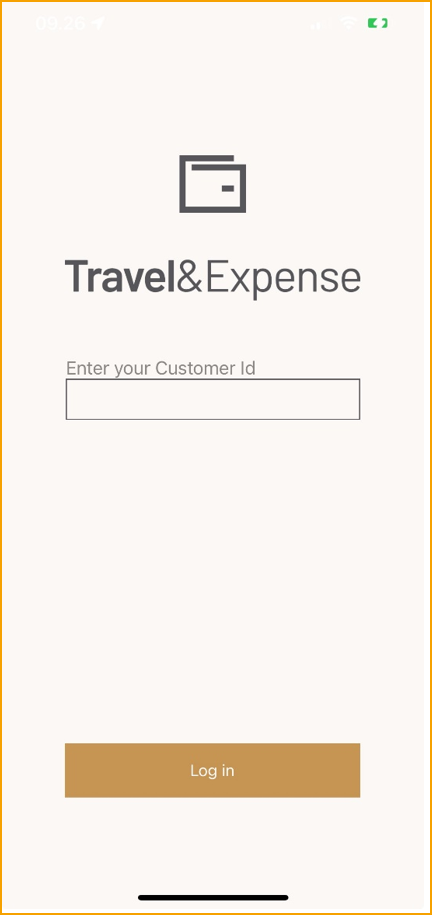
When opening the app for the first time, enter a Customer ID and login credentials in that order. These details were provided by email when your account was set up. Alternatively, contact your Business Central administrator or IT department for assistance. The app will remember your customer ID and login for subsequent uses, but it is essential to keep them accessible in case of switching phones or encountering unforeseen circumstances.
App interface
This section documents the different relevant elements in ExFlow Travel and Expense app.
Home screen on phone
After downloading the app, the Travel and Expense icon will appear on your home screen.

If the icon shows an indicator, it means there are unsent expenses or mileages.
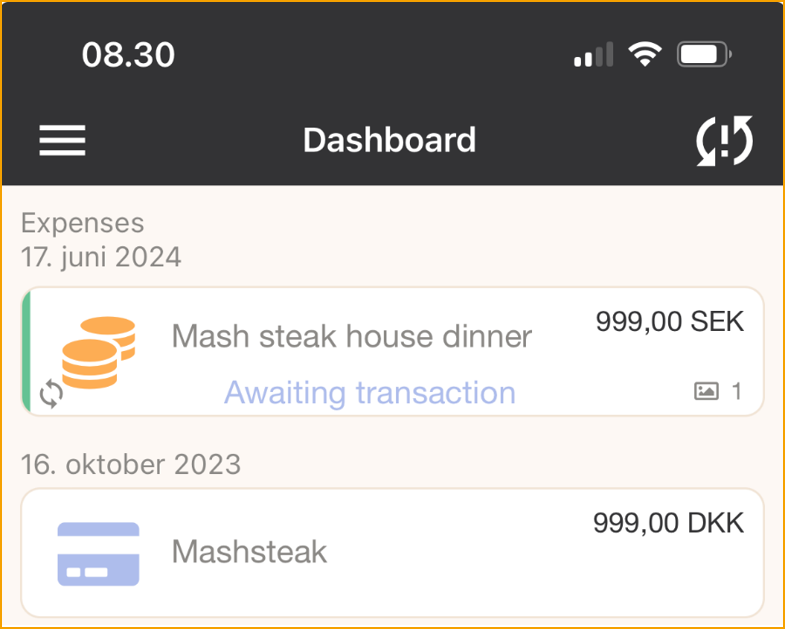
Dashboard
The dashboard is the first page of the app, and it's where users will land upon opening it, assuming they are logged in.
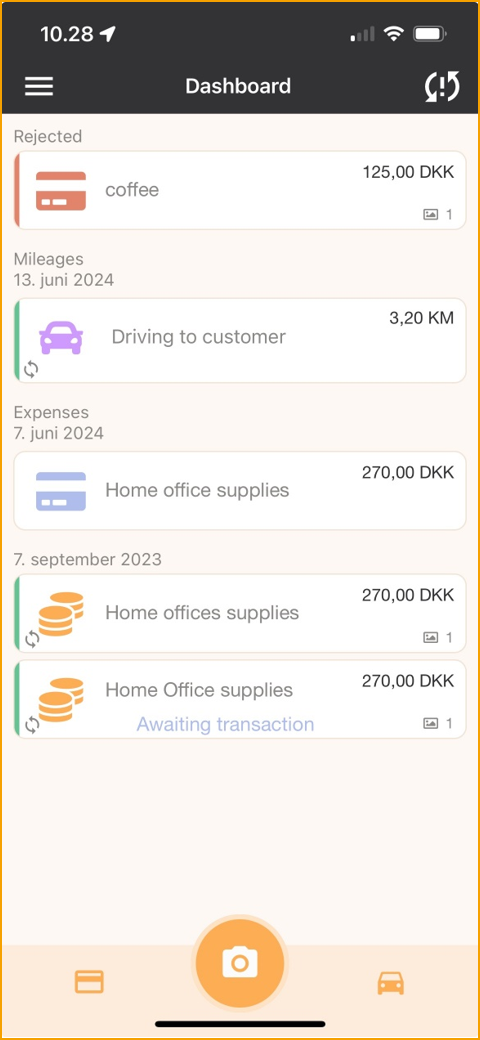
At the top is a refresh icon that indicates if synchronization with the cloud is needed. This occurs if it has been a while since the last synchronization or if there are pending entries.

Synchronizing the data with the cloud can be done at any time, and can be achieved by:
-
Tapping the refresh icon in the top right.
-
Dragging down from the top of the dashboard.
The middle part of the Dashboard shows a list of Mileages, Expenses and Credit card transactions.
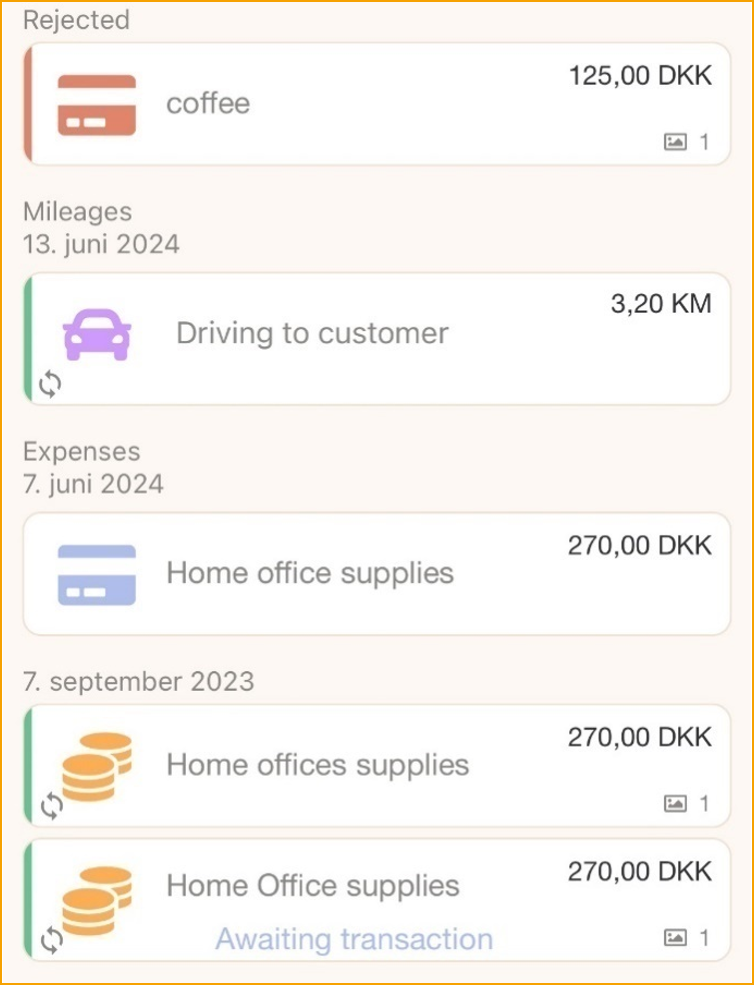
If there are any rejected expenses or mileages, they will be listed at the top highlighted in orange.
The Expenses list will display your expenses that have not been sent for approval yet. Each item will show a title (if any) - taken from the description details, an amount with corresponding currency, and an indicator showing the number of attached photos.
The Mileages list will display your mileages that have not been sent for approval yet. Each item will show a title (if any) - taken from the description details, a distance, and the starting and destination address.
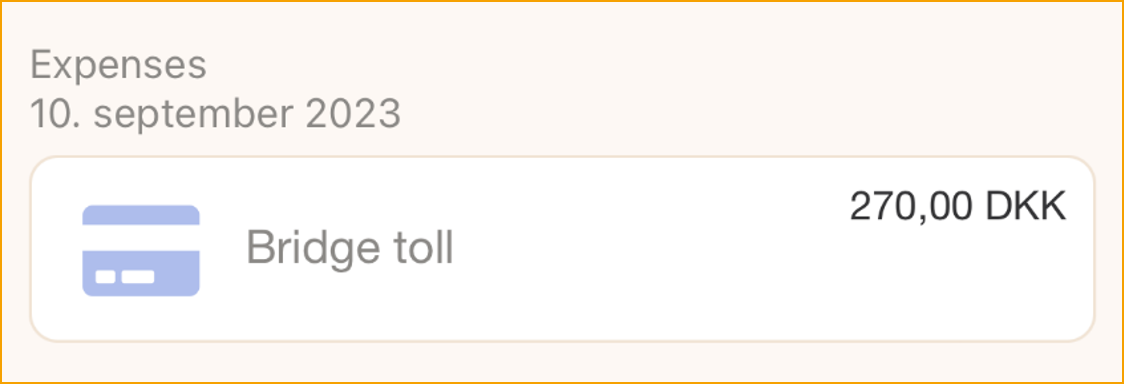
The Credit card transactions are credit card transactions made with your employee credit card. Each item will show a title, taken from the transaction details, and an amount with corresponding currency.
A red synchronization indicator will appear on expenses that have not been synchronized with the server.
Bottom menu
At the bottom of the screen, initiate the creation of a new Expense from scratch by selecting the credit card icon.
Selecting the Camera icon will immediately enable taking a photo of an expense receipt.
Finally, clicking the car icon will open the Mileage reporting tool.

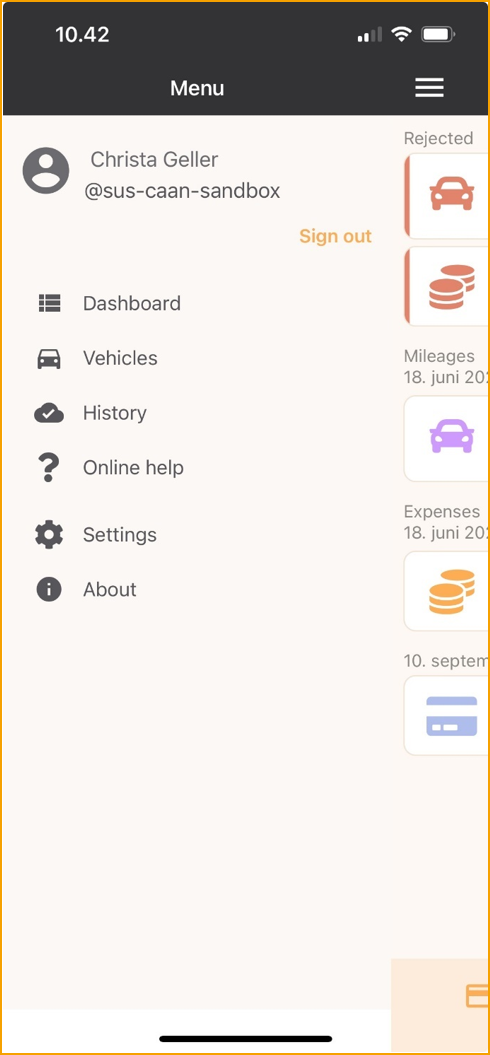
Menu
The Menu, accessed in the top left corner, gives the user the following options:
-
Sign out: Allows signing out.
-
Dashboard: Jump to the Dashboard.
-
Vehicles: Show the vehicle list. Add or edit vehicles by entering a Name and a Registration No.
-
Use document scanner: This option is only available on iOS 13+. Enabling this option will allow the camera to use the Document Scanner to capture one or more documents. Read more about the feature Apple support. This will also move the Photos option to the front of an expense (now a button).
Submitting an expense
Go to: Travel & Expense app
Initiate the process of submitting an expense in four different ways:
Go to: Credit card icon in the bottom menu to start creating an expense from scratch.
Go to: Camera icon in the bottom menu to start the process by taking a photo of a receipt.
Share a photo from the photo gallery and select the ExFlow Travel & Expense app icon. If sharing multiple photos, options include creating one expense with all photos or creating one expense per photo.
Touch and hold the app icon on the home screen to access the following options: New mileage or New expense. Shortcuts to these options can be created by dragging them onto the home screen.
After initiating an expense report, such as by taking a photo, the following view will be presented:
At the top, choose to return to the dashboard. If any information or photos are added, the expense will be saved as a not-yet-sent expense.
If wishing to discard an expense, tap the Delete button at the top.
Photos
Photos are crucial in ExFlow Travel and Expense, enabling discarding receipts immediately after capturing them. Below are some key details regarding expense photos.
Photo preview: Tapping a photo opens a preview where options include deleting or rotating it. At the bottom, select which photo to preview.
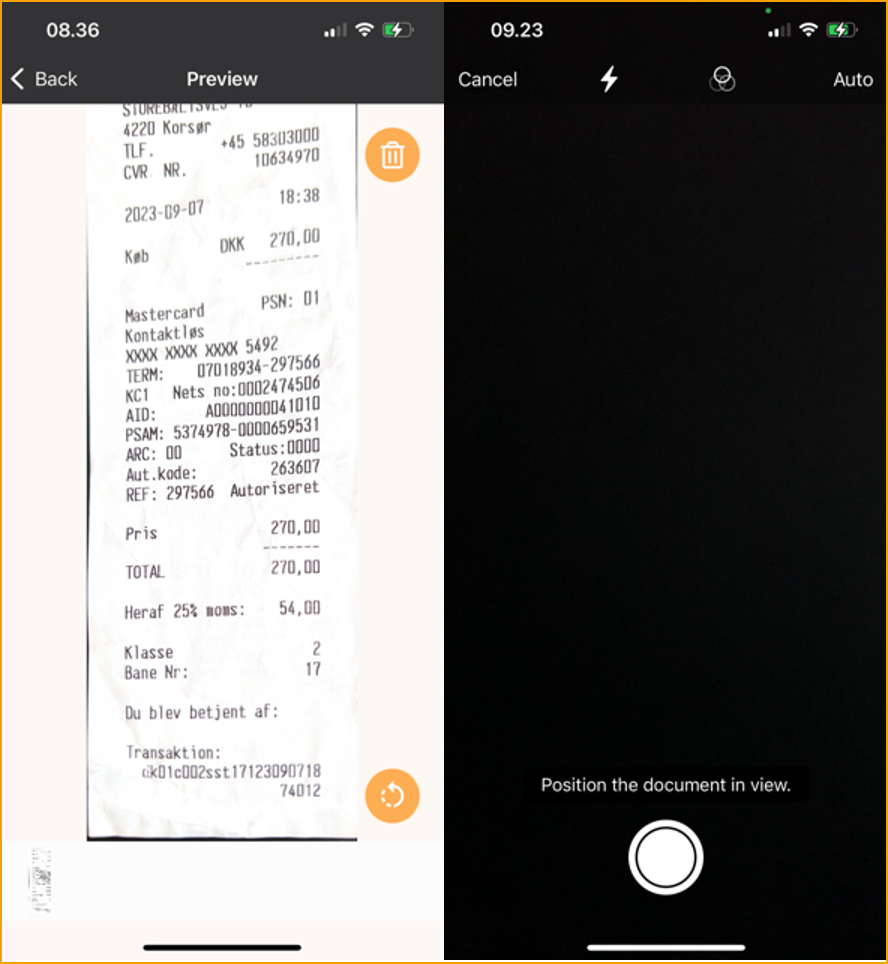
Photos: Enables selection of a photo from the gallery on the device. App permissions are required to access photos, media, and files.

Take photo: Allows taking a photo

In the image above, the user can see the available options when using the camera.
Flash icon: Enable or disable the flash on your device.
Camera icon: Take a photo.
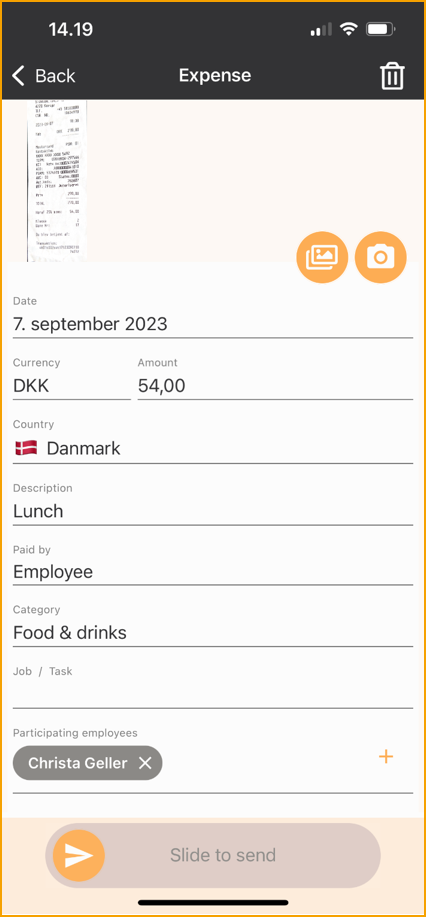
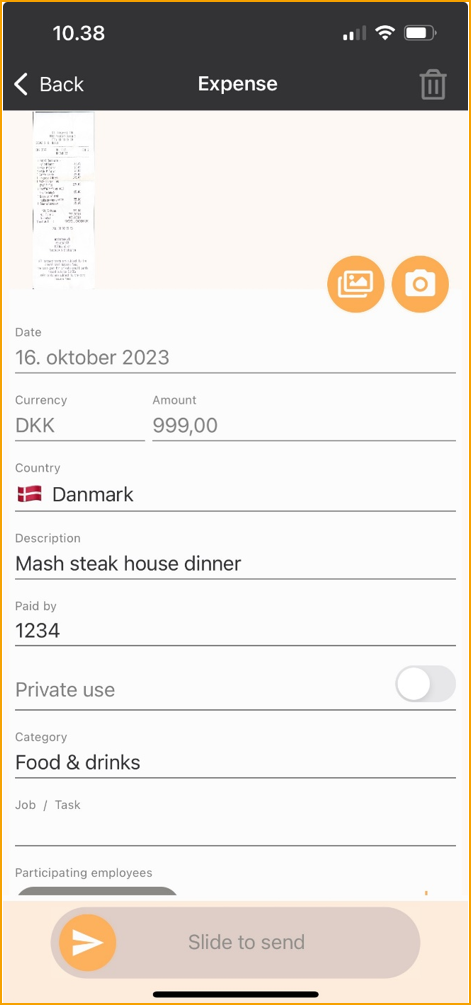
Expense details
Below is a description of each term in an expense report. In the app, items highlighted in red are mandatory.
Date: Modify the date of the expense. If a photo is attached, the date defaults to the day the photo was taken. If using the app to take a photo, today's date will be applied.
Currency: Select the correct currency from a list. Initial currency is based on the GPS location of the device.
Amount: The camera will interpret the amount from the receipt or enter the total amount of the expense manually.
Country: Select the country from a list. Initial country is based on the current GPS location of the device.
Description: The description will be the title for the expense.
Paid by: Choose between Employee, Company card or Allowance.
Private use: If the company card was used privately, mark the transaction as personal use.
Category: Select a category out of the ones provided by your company.
Employees: Add or remove employees. Your name is added by default.
Attendees: Add or remove attendees such as customers or guests.
Job: Enter a job. This is primarily used by consultancy firms. Once a job is entered, the Job description will display additional information.
Task: Enter a task. This is primarily used by consultancy firms. Once a task is entered, the Task description will display additional information.
Additional info: Enter any additional information.
Slide to send: Use this slider to send the expense for approval.
Discussion: The speech bubble icon in the top right corner displays any comments made by the approver. This is only relevant if the expense has been rejected.
Submitting credit card transactions
Credit card transactions are commonly used for various expenses, including those paid on behalf of your company. ExFlow Travel & Expense simplifies reporting these transactions, especially when Credit Card Agreements are set up to automatically match them with appropriate expense reports.
Report an expense report when using company credit card
Go to: Follow the step in "Submitting Expense"
Report your expenses, add the details from your receipt, and swipe. The expense report will then wait in the dashboard until the transactions are imported to ExFlow Travel & Expense.

When the match is done, your expense report is sent to your manager for approval.
No match between expense report and credit transaction
If the transaction and the expense report does not match automatically the credit card transaction will be shown in the dashboard**.**
Go to: Credit card transaction
At the top of an opened credit card transaction, the button below will show how many expenses match this transaction. Whether these expenses are considered matches depends on their date, currency, and amount.

The color will indicate how precise the matches are:
-
Red: No match
-
Yellow: Partial match
-
Green: Good match
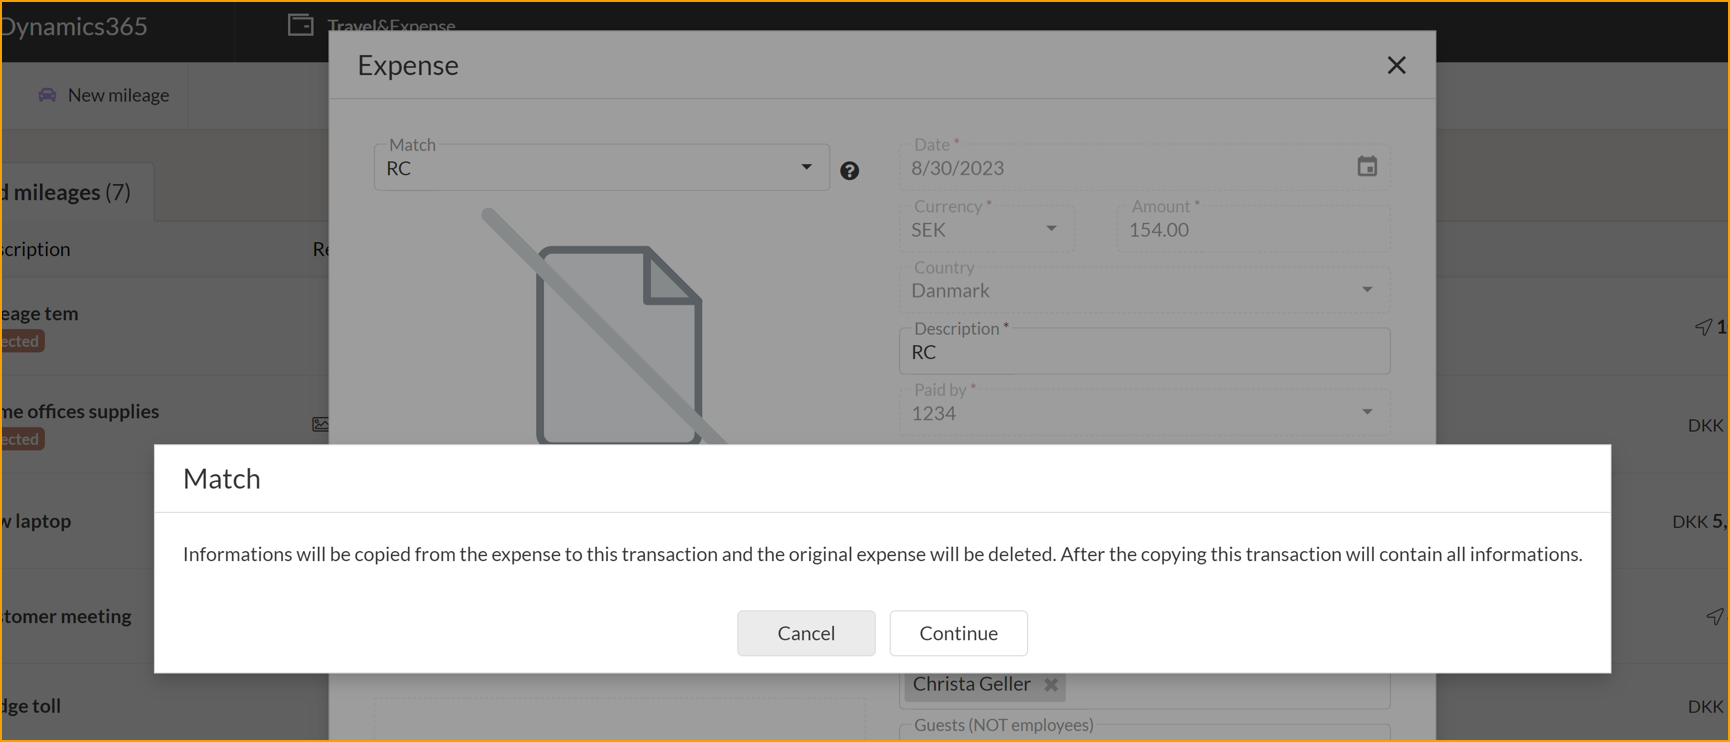
Tapping the expense button will allow the user to merge the transaction with an expense by pressing the check mark button. Again, the color to the left of an expense will indicate the quality of the match.

A warning will pop up telling the user that this operation will copy the expense to the credit transaction and the expense will be deleted, and the transaction will contain all information.
Click on continue

Slide to send.
The transaction is now sent for approval to the manager.
Submitting mileage
Submitting mileage is part of the ExFlow Travel and Expense and is made to be as easy as possible for the user, the use, to do. The user has the option to easily send in their mileage for approval with only a few clicks.
Go to the ''car''

The map at the top will display the current position. Drag and zoom on the map. Once a route is entered, tapping the Alternative route icon will switch between any alternative routes.
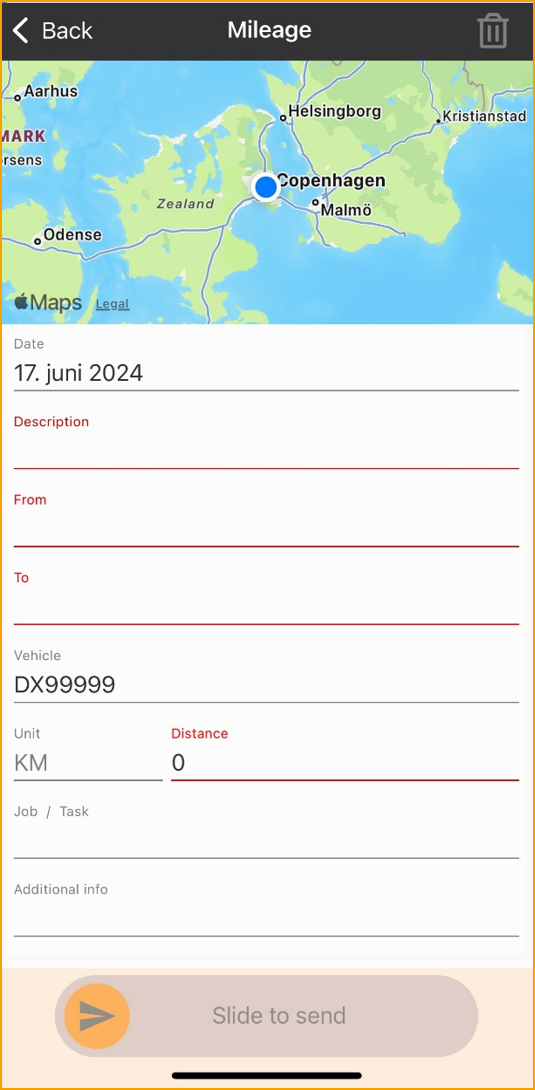
Below are the fields that need to be completed for mileage to be sent for approval. A red line indicates that a field is mandatory.
Description: Enter the description of the trip.
From: Enter the address where the trip started.
To: Enter the address where the trip ended.
Vehicle: Choose the vehicle that has been used.
Distance: The distance is calculated automatically. It is possible to change the distance in this field manually.
Description: Enter a fitting description for the trip.
Job: Enter a job. This is primarily used by consultancy firms. When the job has been entered, the Job description will display additional information.
Task: Enter a task. This is primarily used by consultancy firms. When the task has been entered a task, the Task description will display additional information.
Date: Change the date of the trip.
Additional info: Enter any additional information.
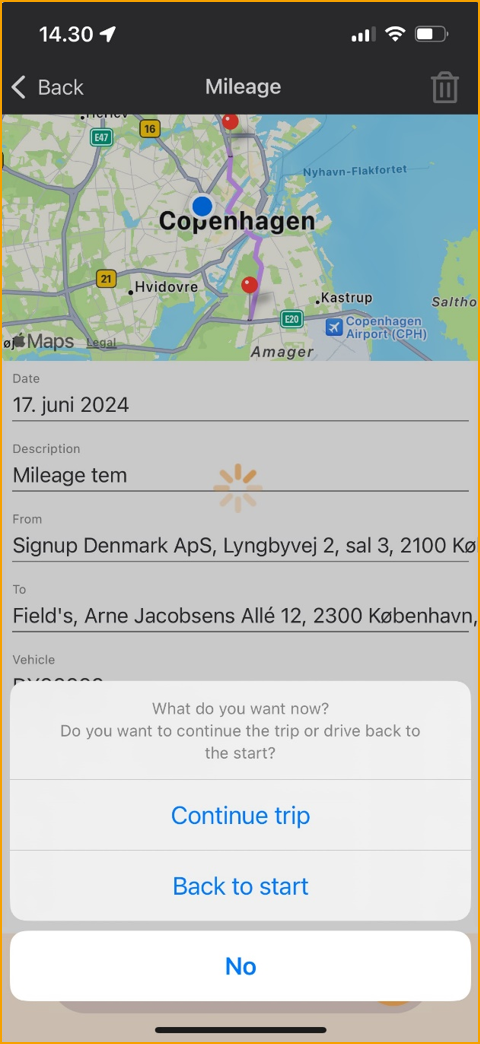
Slide to send: Use this slider to send the expense for approval. The user will be asked if it is a returned trip. Here is the three options:
Continue: If the user is on a trip with more stops on the way, then choose to continue trip.
Back to start: This will return our trip back to the start, so there's no need to register for the trip twice.
No: This will end the trip.
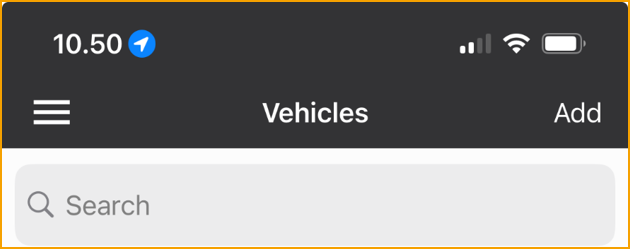
Vehicles
Before the user can submit mileages in ExFlow Travel & Expense, a vehicle must be added.
Go to: Menu item --> Vehicles --> Add
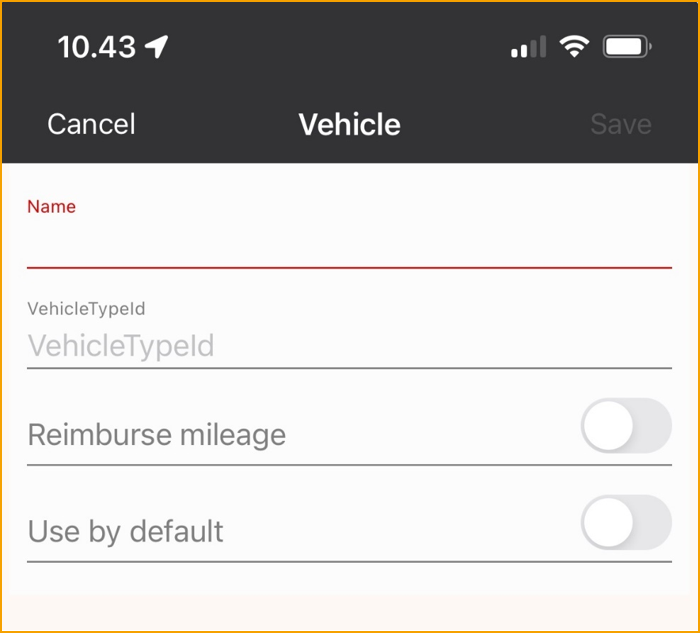
Name: Enter a name for the vehicle that describes, good to add the registration number.
Reimburse mileage: If using your private vehicle, choose this option.
Use by default: Active it if it the preferred vehicle.
ExFlow Travel & Expense AppsForDynamics365.com portal
Just like the mobile app any user can access the AppsForDynamics365.com web portal to create expenses and mileages.
Login into the portal
Logging into the AppsForDynamics365 Portal requires login information provided by email when the account is set up. The login can be done in two different ways:
Username and password or Sign in with Microsoft.
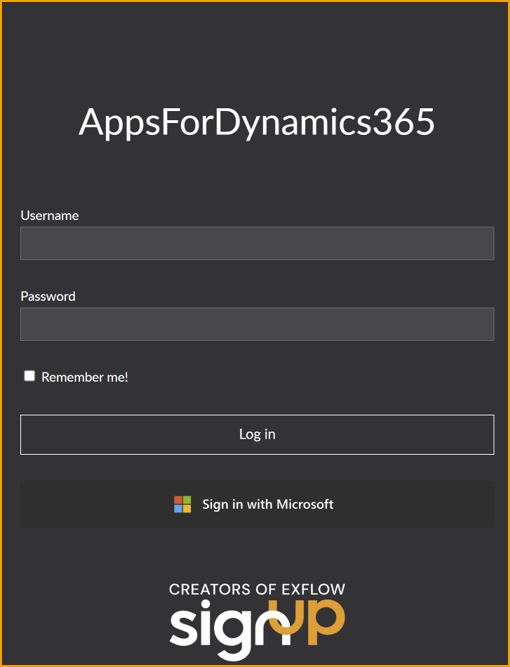
Alternatively, contact the Business Central administrator or IT department if logging in is not possible.
After logging in, this page will be displayed.
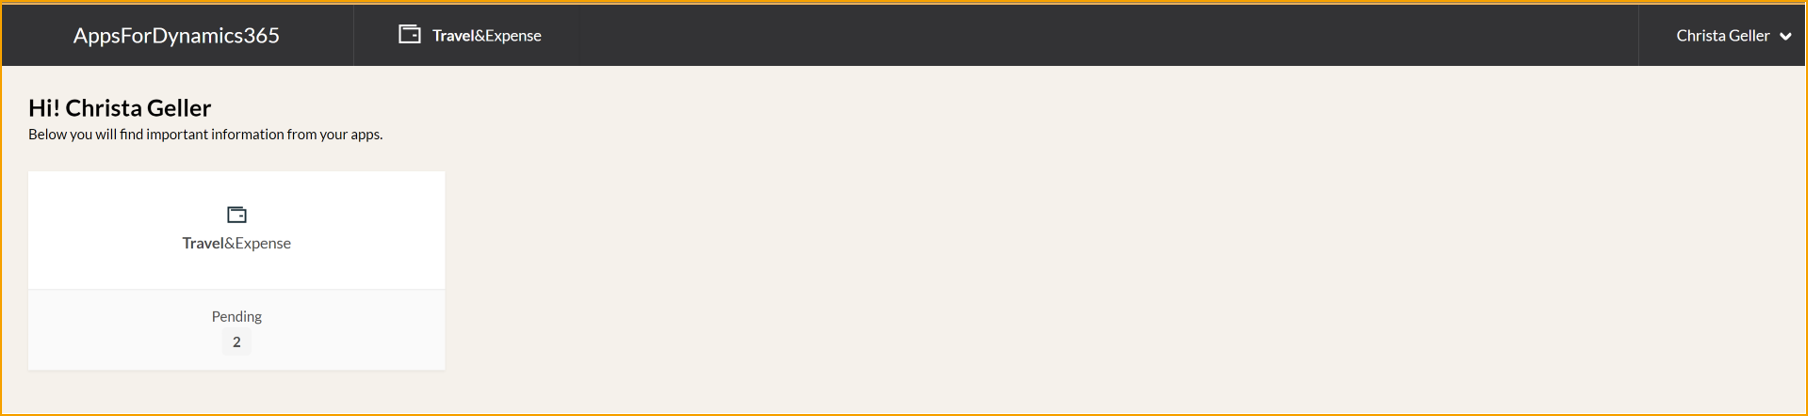
Dashboard
Go to: Travel & Expense
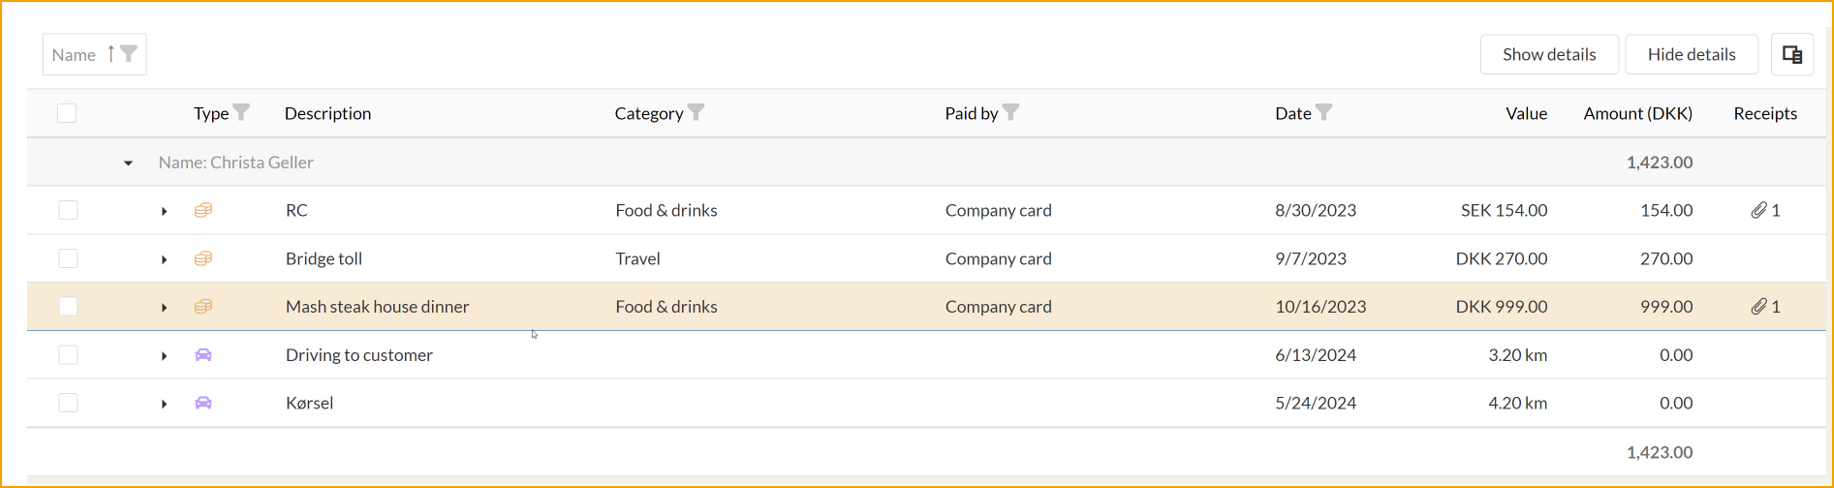
The dashboard is the next page in the portal.
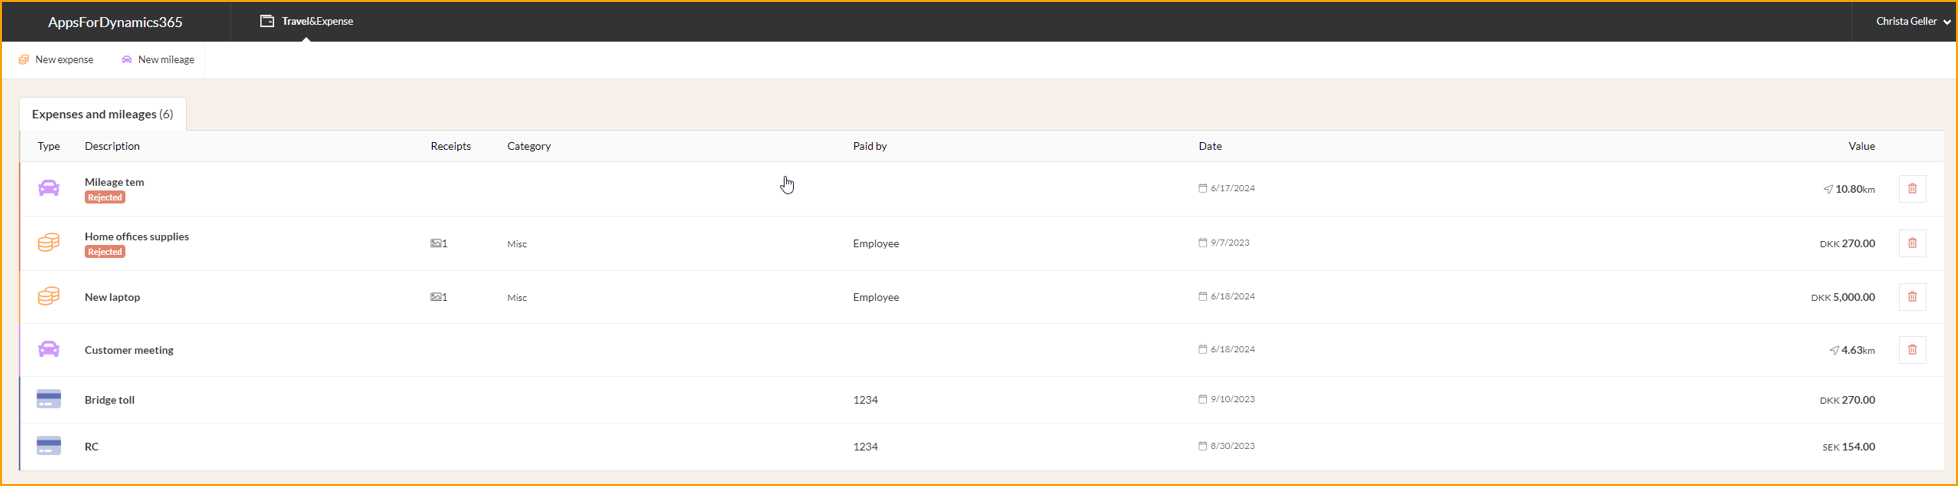
Any rejected expenses or mileages will be listed at the top.
The Expenses list will display your expenses that have not been sent for approval yet. Each item will show this icon

The Mileages list will display your mileages that haven't been sent for approval yet. Each item will show with this car icon

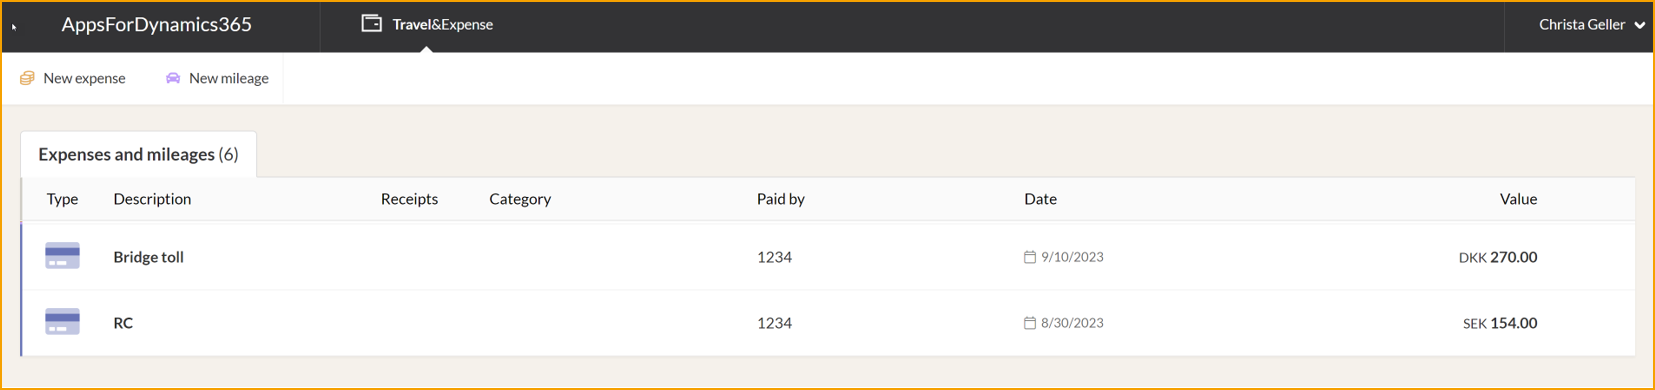
The Credit card transactions are credit card transactions made with your employee credit card. Each item will show this card icon

Submitting expenses
Though expense submission is suggested to be done via the app, it can be done through the web portal as well, almost the same way.
Go to: Travel & Expense --> New Expense

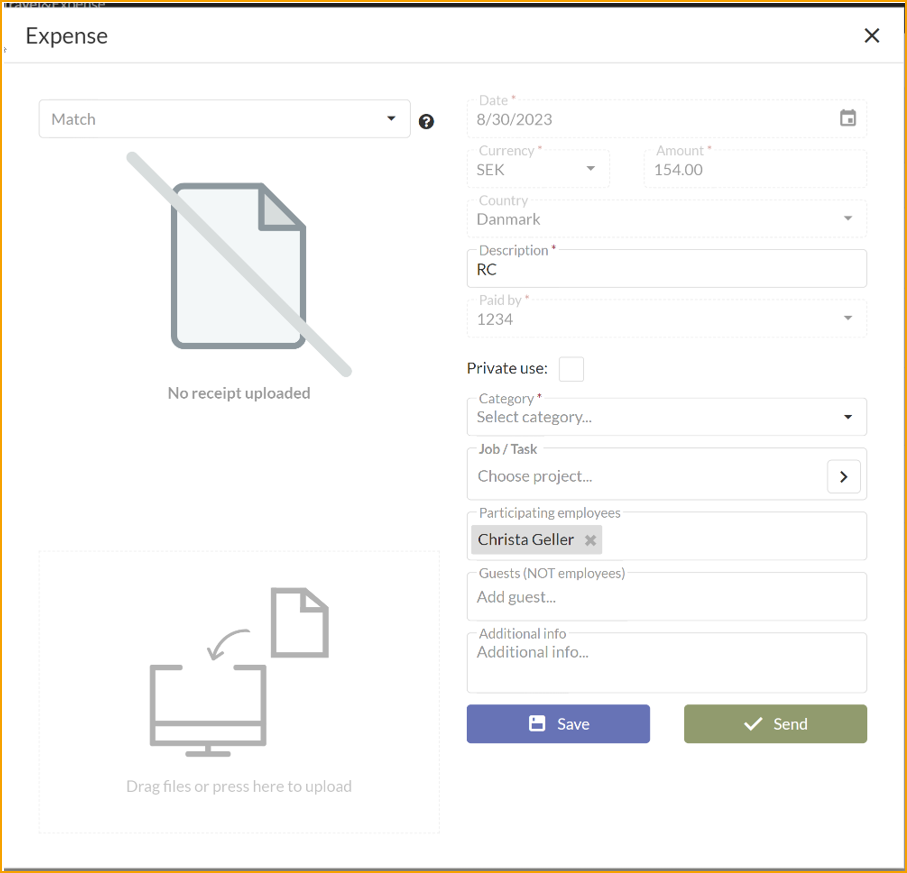
Start the process of submitting an expense by filling out the following view:

File or photo: Add a file or photo of the receipt or any relevant file by clicking on left hand side area, or just drag them onto the area. Supported file types are PDF and most common image types.
Date: Select the date. Today's date is set by default.
Currency: Change the currency if needed.
Amount: Enter the amount.
Country: If needed, change the country for the expense. This defaults to your country setting in Business Central.
Description: Enter a description. This will be the title for the expense.
Paid by: In the field, choose between Employee and Company Card.
Category: Choose a category for the expense between the ones provided by your company.
Save or Send: Save the expense and send later or send immediately.
Below are optional fields when creating an expense, depending on your company policies.
Employees: Add or remove employees. Your name is added by default.
Attendees: Add or remove attendees. Examples include guests or customers.
Job: Type a job. This is primarily used for consultancy firms.
Task: Type a task. This is primarily used for consultancy firms.
Additional info: Enter any additional information that may be relevant.
Credit card transactions
Credit card transactions are a popular way to pay for several things, and this also extends to paying on behalf of the company. ExFlow Travel & Expense simplifies reporting these transactions, especially if Credit Card Agreements have been set up, as automatic matching with fitting expense reports becomes possible.
A credit card transaction can be opened from the dashboard, details filled in, and then sent as an expense. If an expense has already been created for the credit card transaction, it can be merged with the credit card transaction.
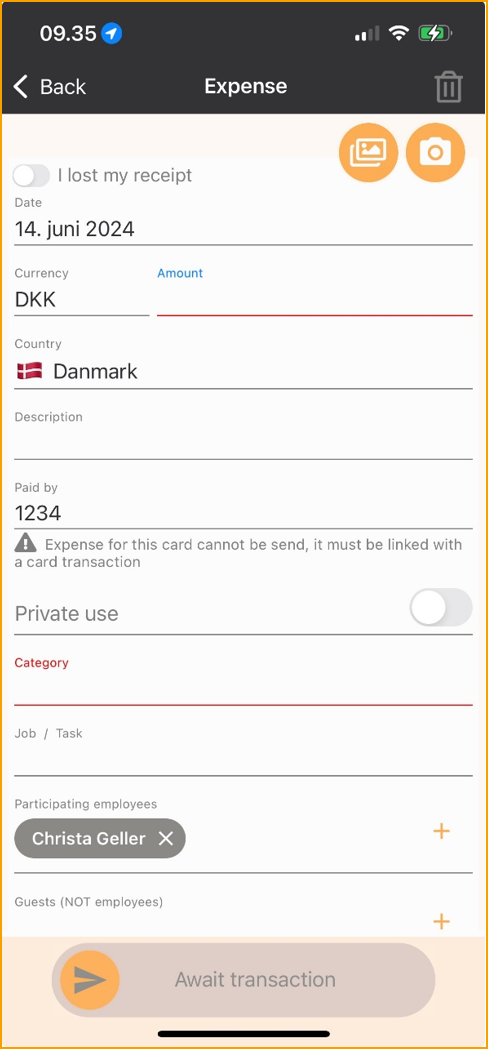
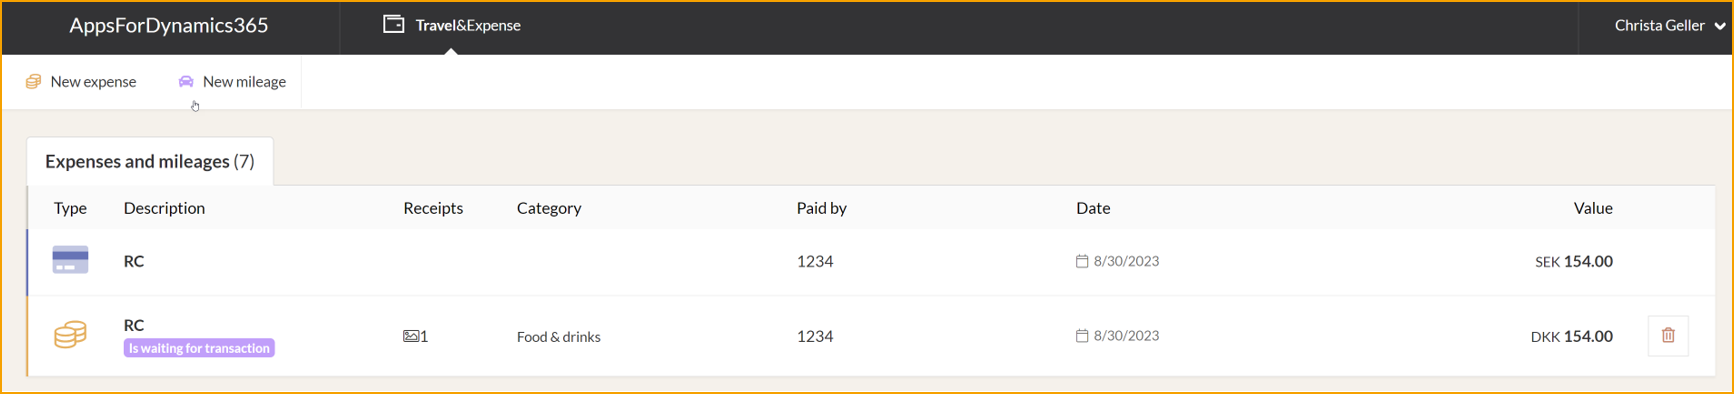
Submitting credit card transactions before transaction is imported
Go to: Travel & Expense --> New expense
The process of submitting an expense begins by filling out the following view.
Important! This is the process for reporting an expense before the credit card transaction is imported to ExFlow Travel & Expense.
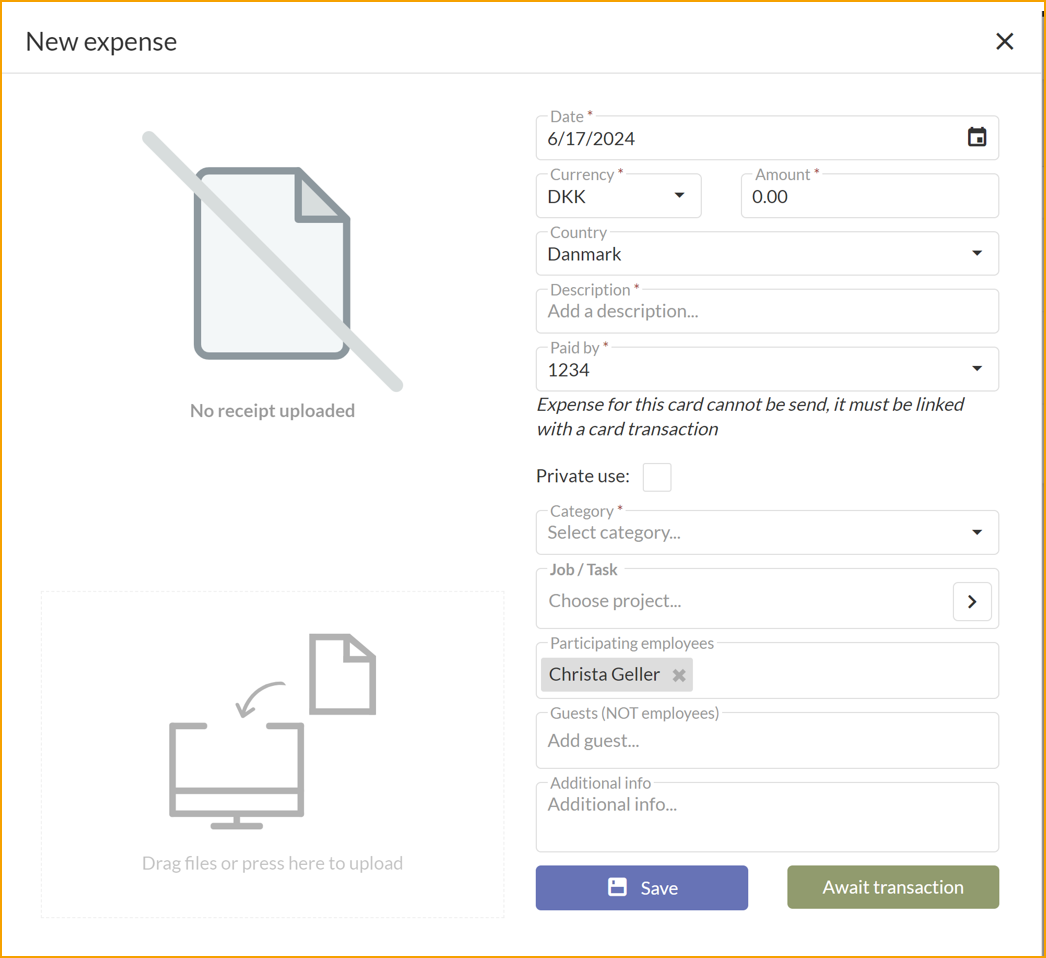
File or photo: Add a file or photo of the receipt or any relevant file by clicking on left hand side area, or just drag them onto the area. Supported file types are PDF and most common image types.
Date: Select the date. Today's date is set by default.
Currency: Change the currency if needed.
Amount: Enter the amount.
Country: If needed, change the country for the expense. This defaults to your country setting in Business Central.
Description: Enter a description. This will be the title for the expense.
Paid by: In the field, choose between Employee and Company Card.
Category: Choose a category for the expense between the ones provided by your company.
Save or Send: Save the expense and send later or send immediately.
Below are optional fields when creating an expense, depending on your company policies.
Employees: Add or remove employees. Your name is added by default.
Attendees: Add or remove attendees. Examples include guests or customers.
Job: Type a job. This is primarily used for consultancy firms.
Task: Type a task. This is primarily used for consultancy firms.
Additional info: Enter any additional information that may be relevant.
Await transaction: Choose this option, if the expense should be matched to a credit card transaction.
Submitting credit card transactions when transaction is imported
Go to: Travel & Expense --> Choose the credit card transaction
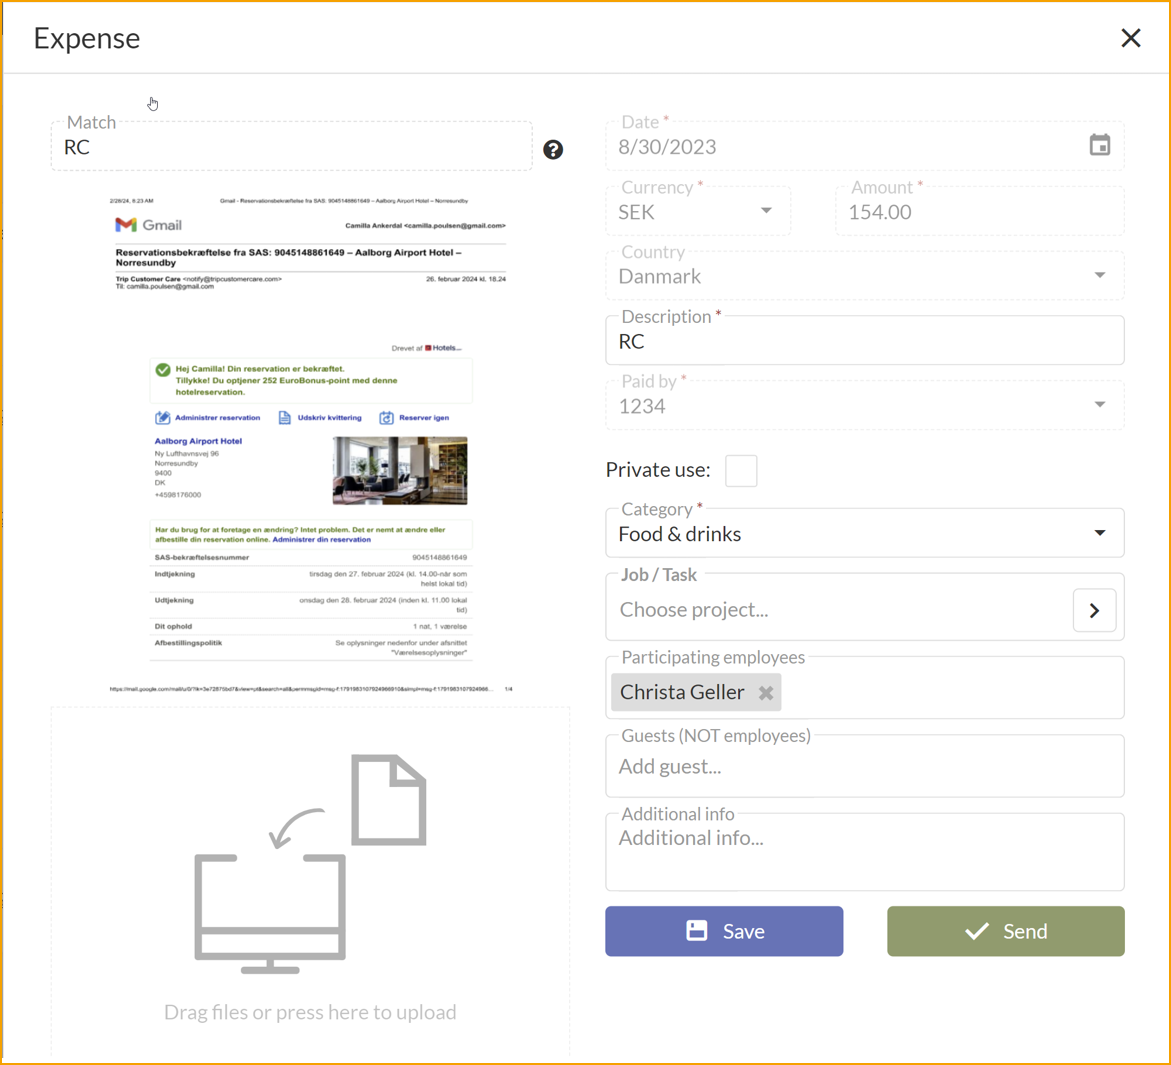
Start the process of submitting an expense by filling out the following view.
File or photo: Add a file or photo of the receipt or any relevant file by clicking on left hand side area, or just drag them onto the area. Supported file types are PDF and most common image types.
Description: Enter a description. This will be the title for the expense.
Private use: If the company card was used privately, mark the transaction as personal use**.**
Category: Choose a category for the expense between the ones provided by your company.
Save or Send: Save the expense and send later or send immediately.
Below are optional fields when creating an expense, depending on your company policies.
Employees: Add or remove employees. Your name is added by default.
Attendees: Add or remove attendees. Examples include guests or customers.
Job: Type a job. This is primarily used for consultancy firms.
Task: Type a task. This is primarily used for consultancy firms.
Additional info: Enter any additional information that may be relevant.
Await transaction: Choose this option, if the expense should be matched to a credit card transaction.
Matching issue between expense report and credit card transaction
If the expense report and the credit card transaction cannot be matched automatically, the user needs to match them manually.
Go to: Travel & Expense --> Choose the credit card transaction
On the left corner you find a drop down called Match.
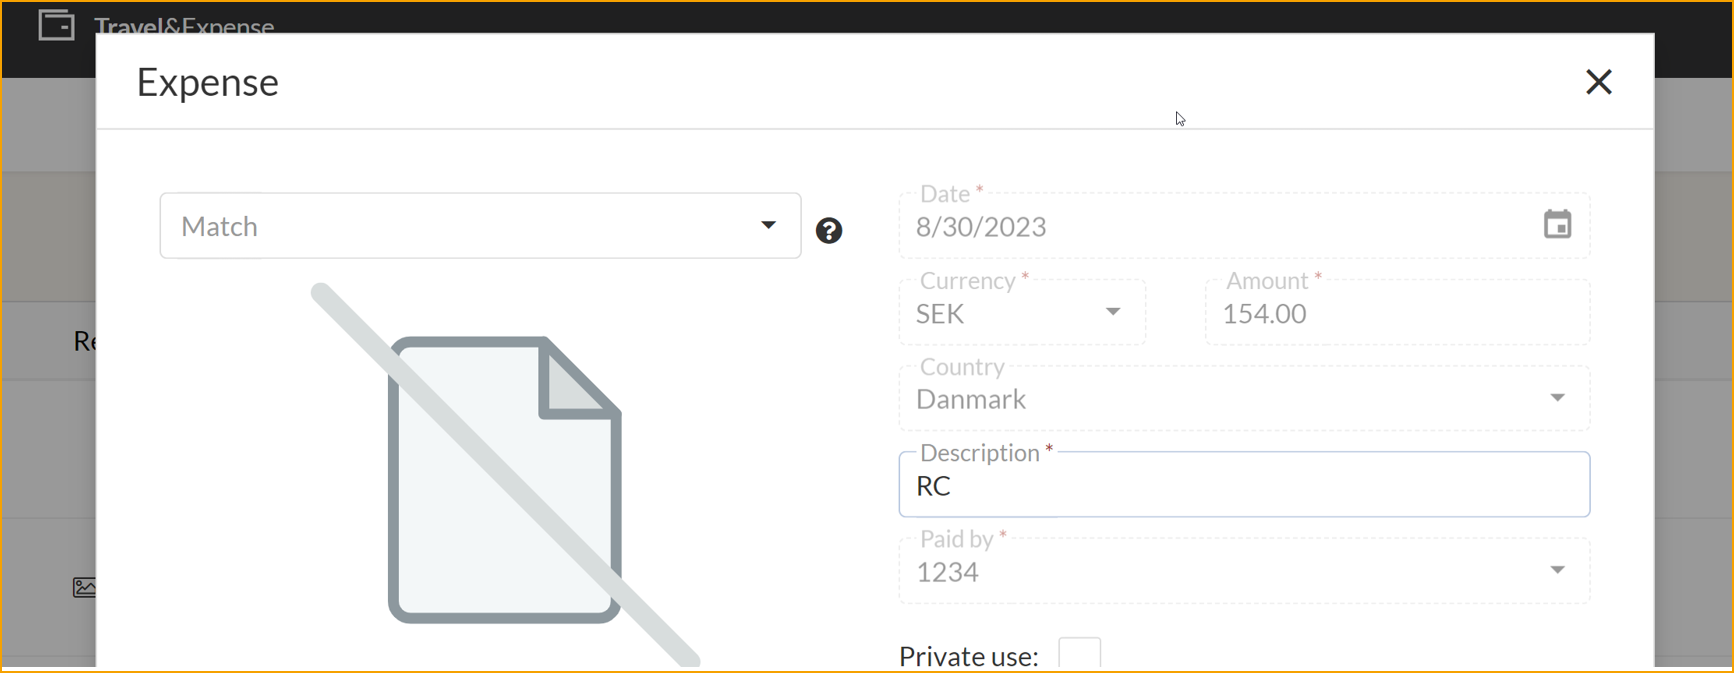
Find the expense report that is connected to the credit card transaction.
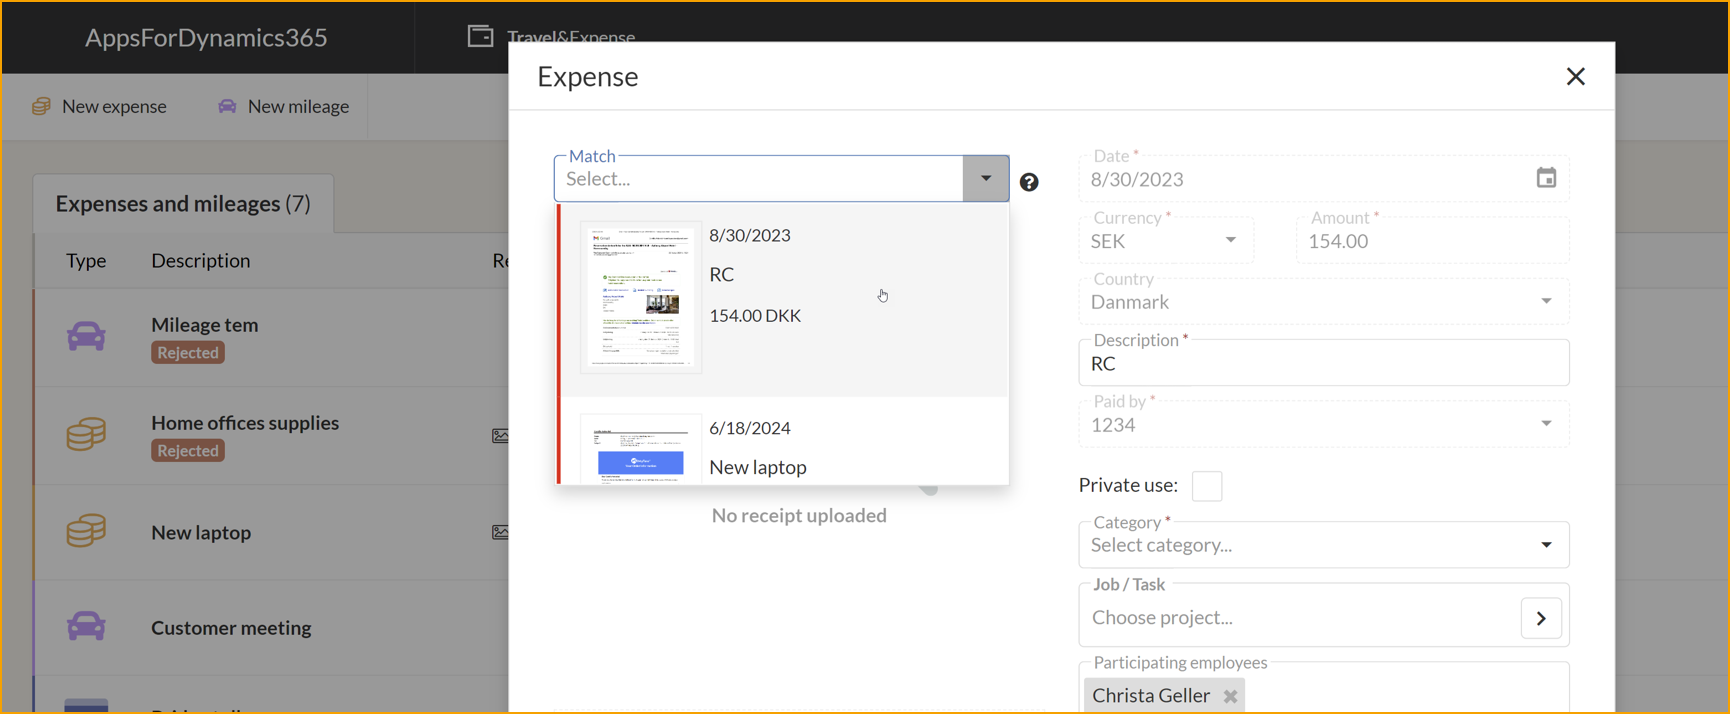
Choose Continue and Send.
Approver
As an approver, your role involves reviewing and deciding on expense and mileage submissions from assigned users. This includes receiving submissions, evaluating them, and either approving or rejecting them for further processing by the bookkeeping department.
This task is performed on the AppsForDynamics365.com portal, which provides a convenient overview of all expenses and mileage submissions awaiting approval. The portal also enables filtering the view for easy identification and approval of relevant expenses, as illustrated below.
Approval
Go to: Travel & Expense --> For Approval
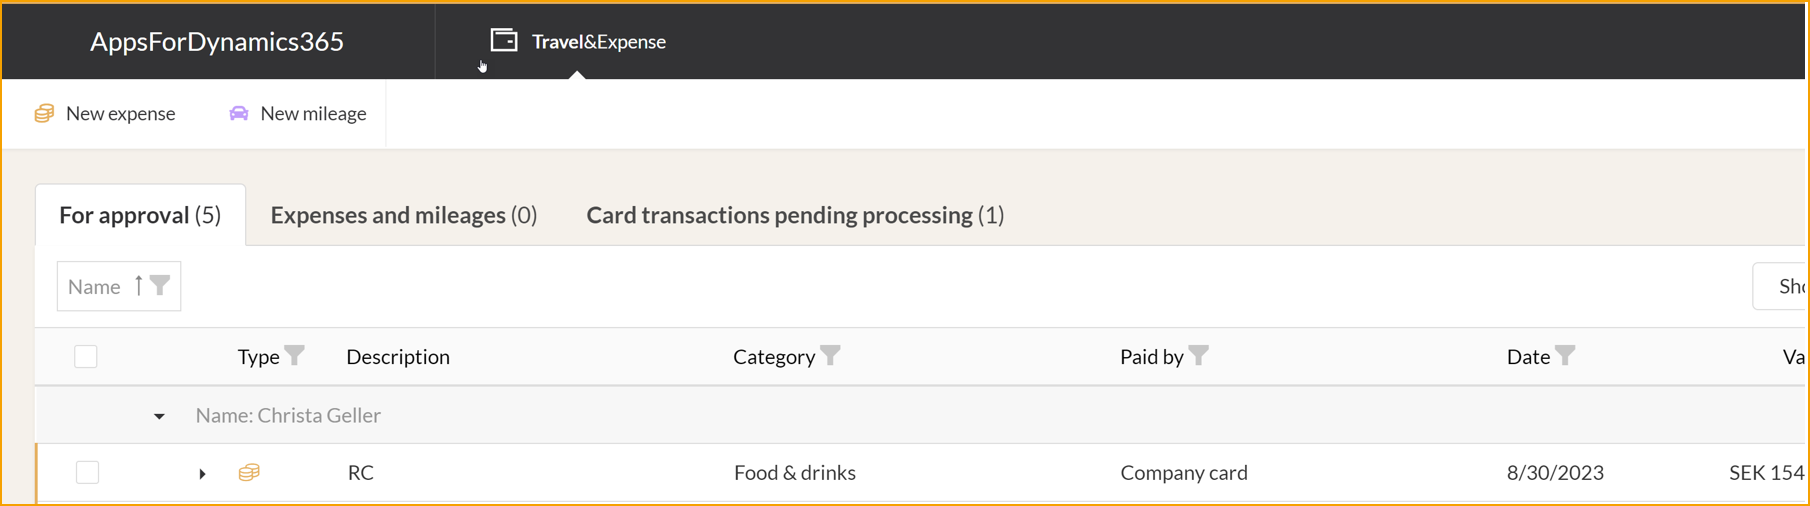
The Approval list gives the approver two easy ways to approve or reject expenses and mileages.
- Open an item, review the attachments and details. Then choose Approve or Reject.
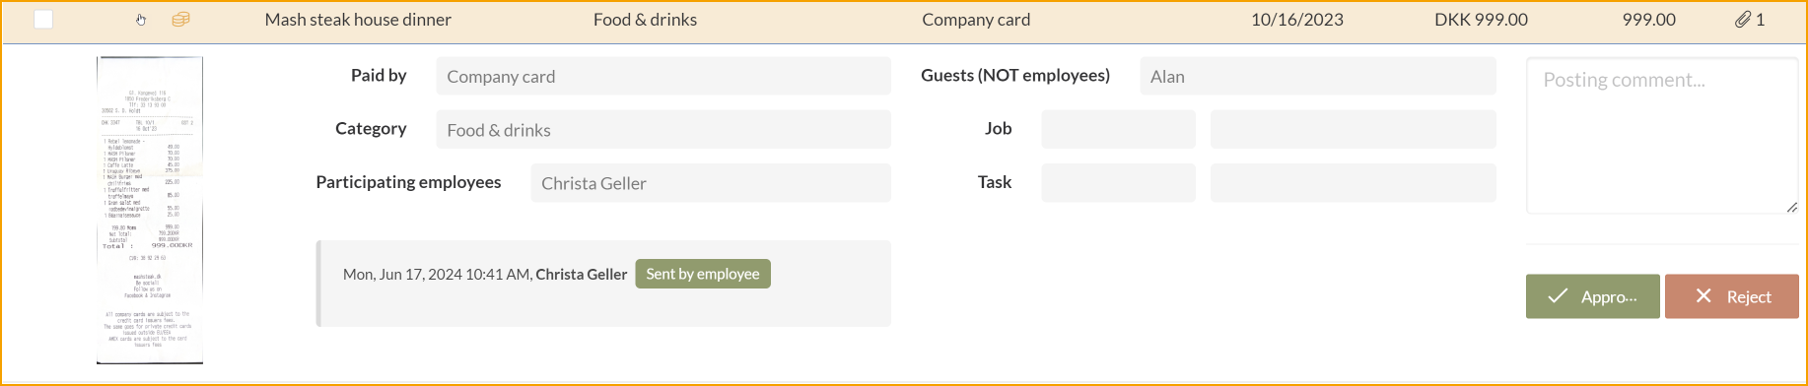
- Use the checkboxes and select one or several items, then use the Approve or Reject buttons at the end of the list for all items at once.

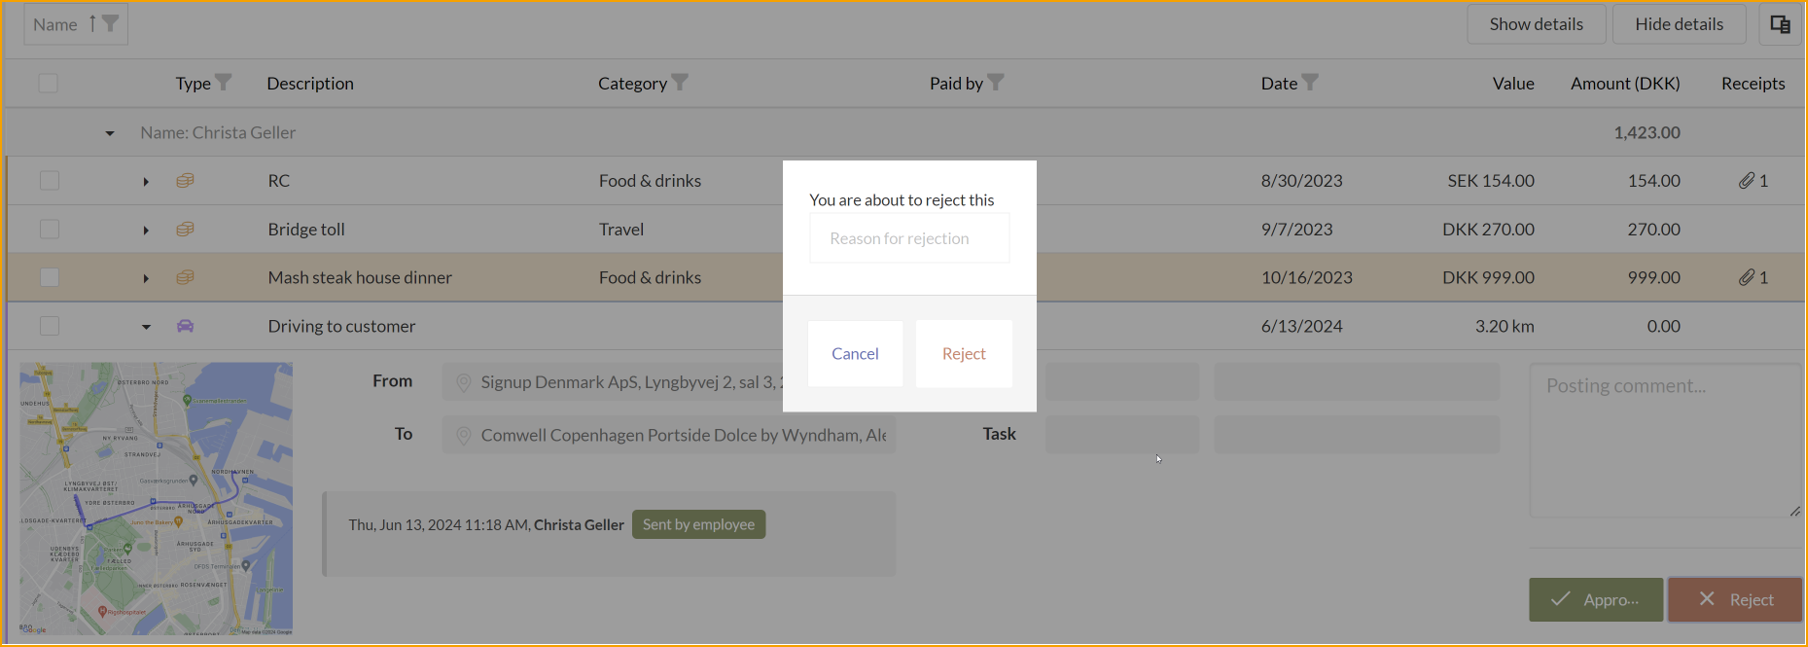
Rejection
If the approver rejects an expense or mileage, the approver are required to leave a reason for the rejection, such that the person receiving the rejection may change the issues in question.