Localization USA
US Sales Tax
ExFlow Setup
Go to: ExFlow Setup --> Doc. Creation Checks tab
Enable "Allow Sales Tax" in ExFlow Setup.
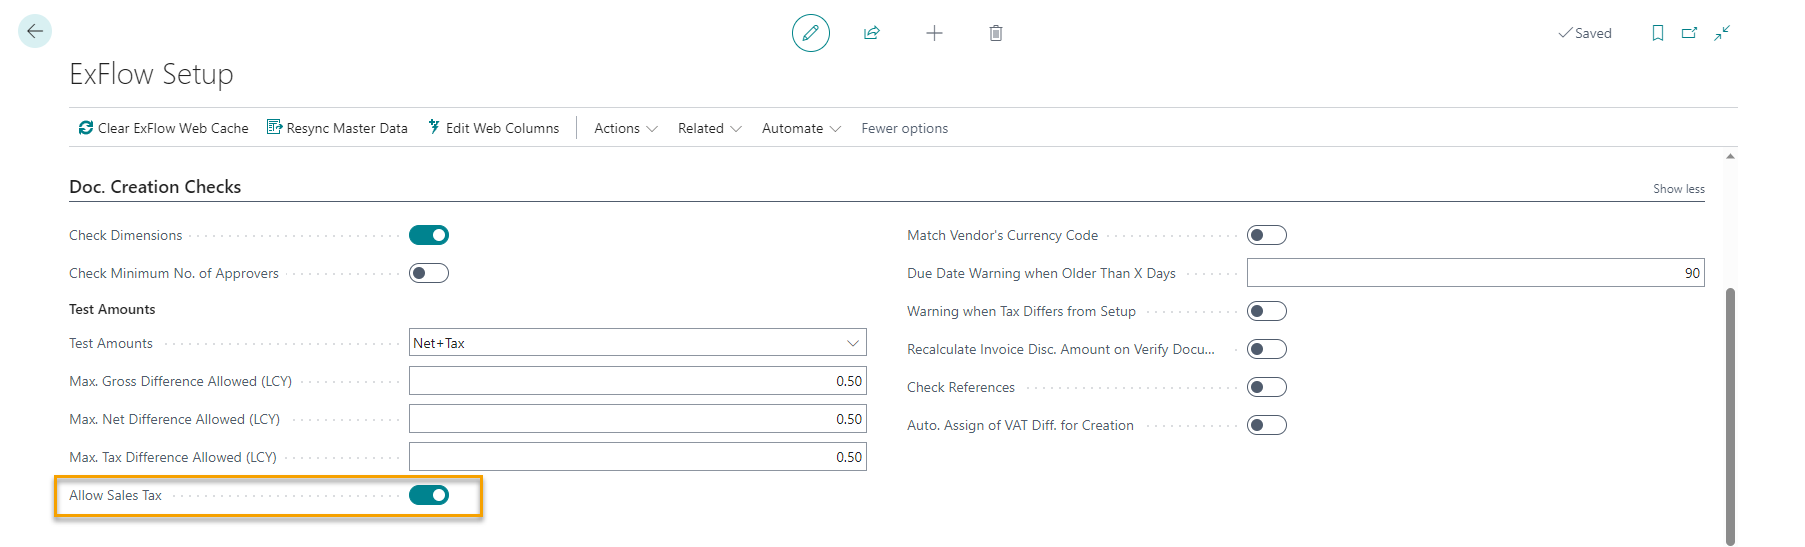
With this setting VAT Product Posting Group will not be mandatory in the ExFlow Import Journal. This setting is normally combined with the Tax Posting Setup of Sales Tax.
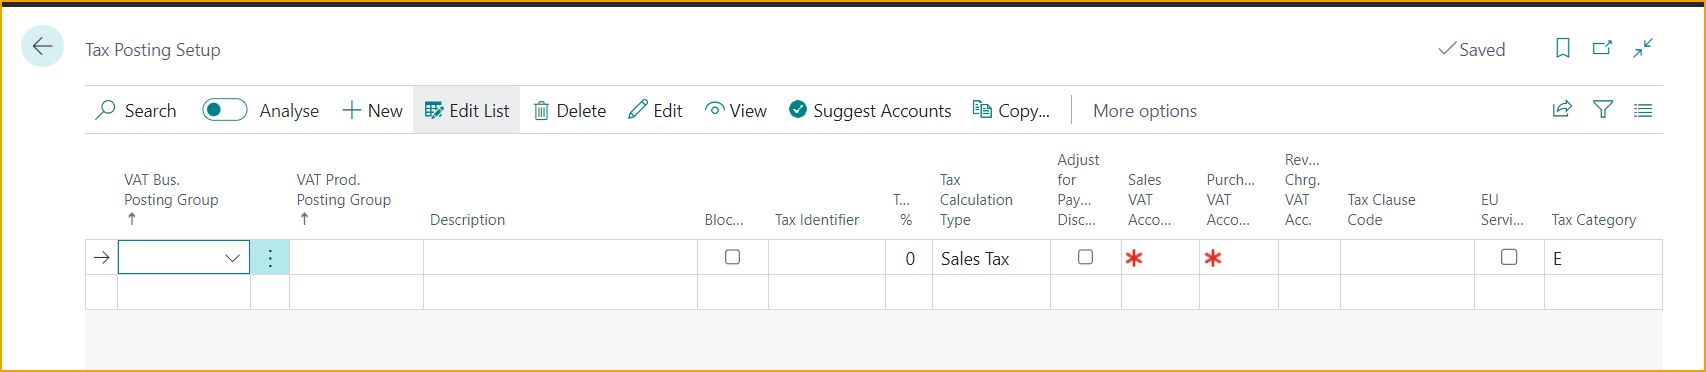
To make "VAT Prod. Posting Group" optional, both of the following are required:
| Requirement | Description |
|---|---|
| Allow Sales Tax | Enabled in ExFlow Setup, as described above. |
| Blank VAT Posting Setup record | A VAT Posting Setup record with both "VAT Bus. Posting Group" and "VAT Prod. Posting Group" left blank must exist, with "VAT Calculation Type" set to either "Sales Tax" or "Normal VAT". |
Some companies do not use Business Central's Tax Posting Setup for sales tax at all, in which case the blank VAT Posting Setup record commonly defaults to "Normal VAT" instead of "Sales Tax". Both calculation types are accepted, so "VAT Prod. Posting Group" will not be required in these cases either.
ExFlow Import Journal
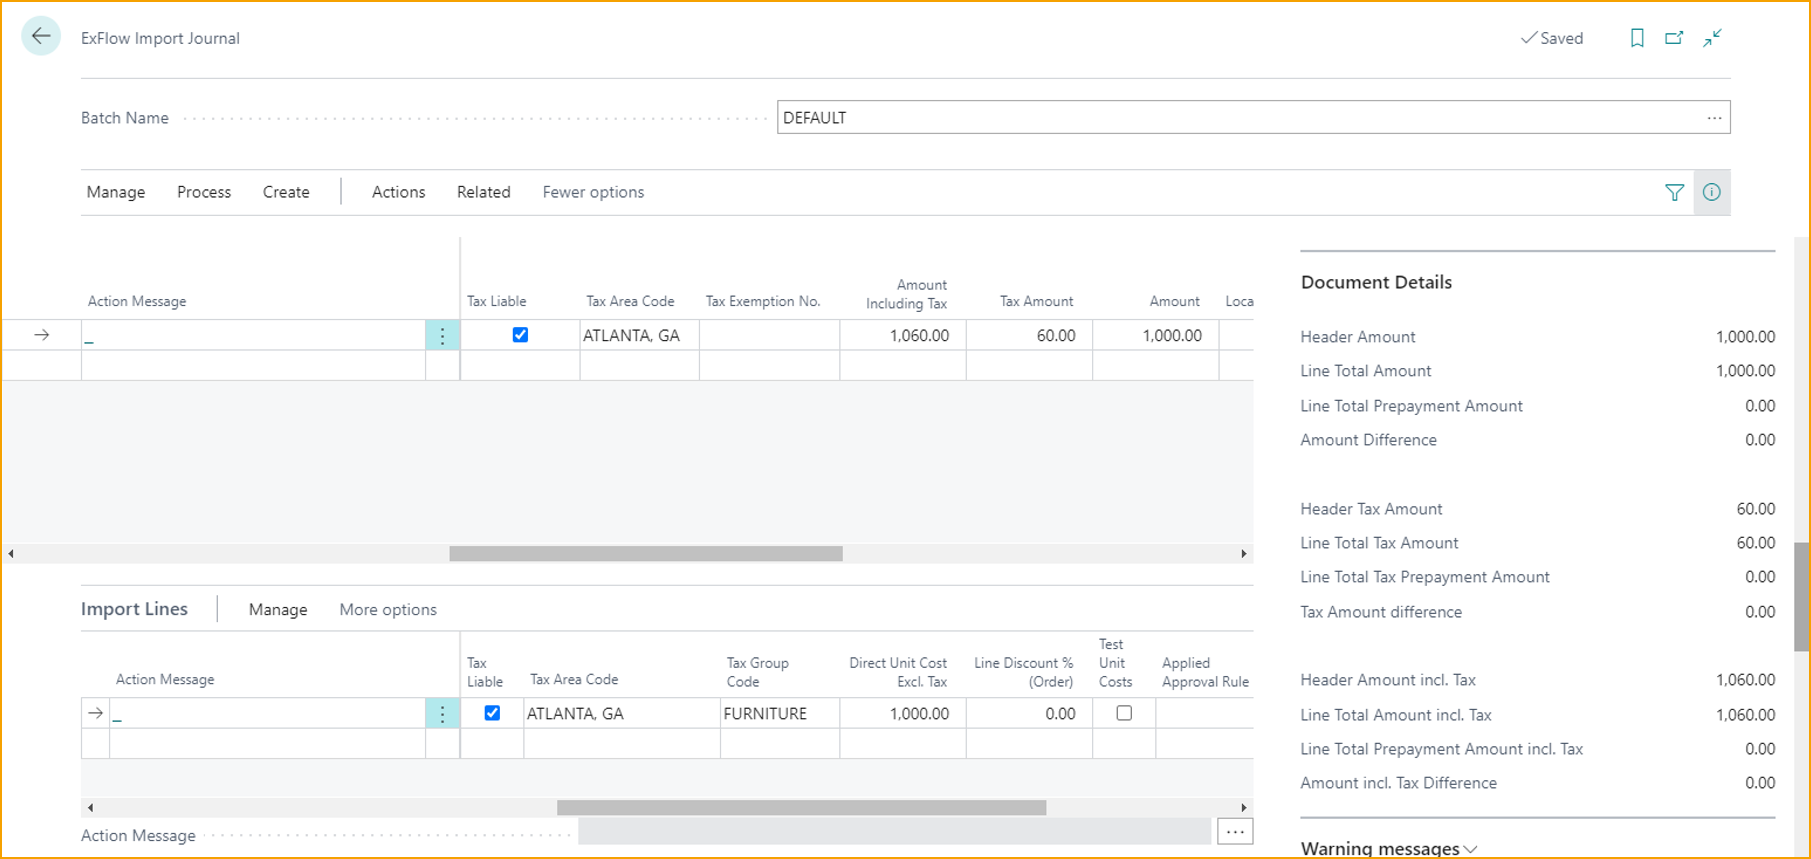
To support US Sales Tax, the Tax specific fields from Purchase Document Header and Purchase Document Lines are also implemented in ExFlow Import Journal. The functionalities for these fields are similar to how they work in the Purchase Document.
The additional fields in the document header are:
- Tax Liable
- Tax Area Code
- Tax Exemption No.
And on the document lines:
- 1099 Liable
- Tax Liable
- Tax Area Code
- Tax Group Code
With the use of US Tax Setup, the Import Journal also supports Tax calculations based on the US Tax. The functionality for retrieving Tax Area Code etc. from company information and location instead of vendor card is also reflected in the Import Journal.
Vendor 1099 Liable Transactions
Before processing 1099 liable transactions, you must setup 1099 Form Boxes and Vendors as 1099 liable in Business Central. Please refer to Microsoft documentation for 1099 setup and transaction processing instructions in Business Central.
To process a document as 1099 liable in ExFlow
- Import an invoice for a vendor that has been setup with the relevant IRS 1099 code, etc. (See Microsoft instructions for how to setup 1099 vendors.)
- Optionally, on the Import Journal header line, in the IRS 1099 Code field, override the default value with another code, or delete it to have a transaction without an IRS 1099 code.
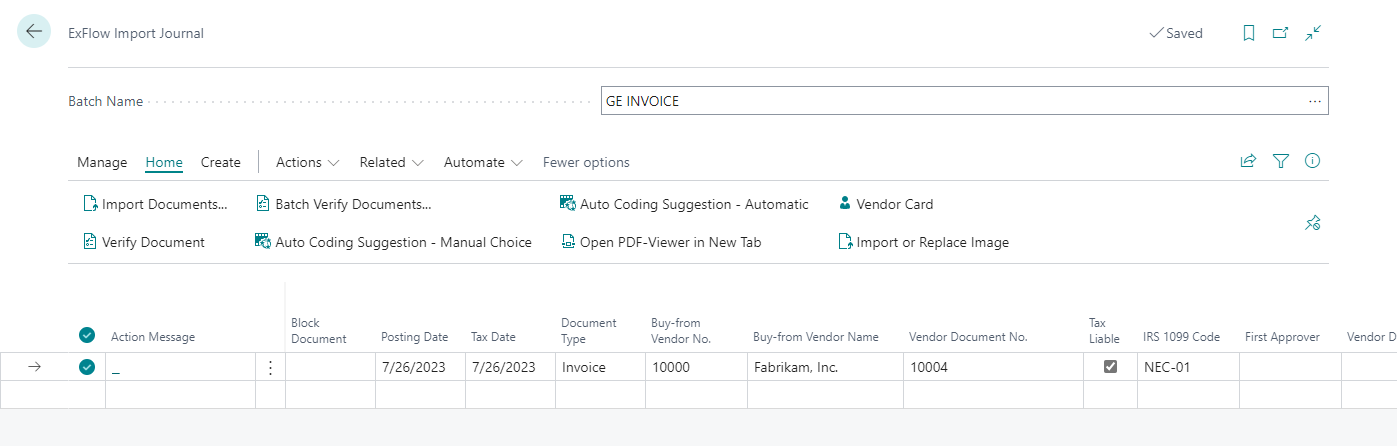
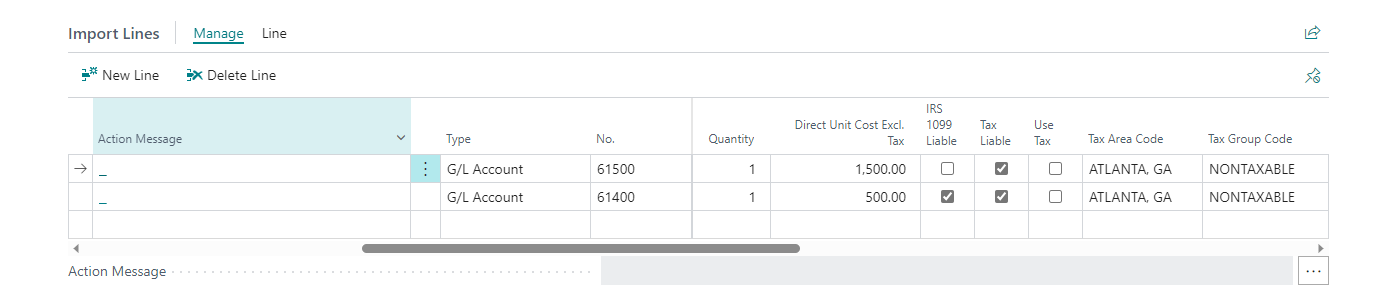
- If a portion of the invoice amount is 1099 liable and a portion is not, check/uncheck the “1099 Liable” checkbox to identify lines that are 1099 liable.
- Continue processing and post the document.
- Once the document is posted, you can go to the Vendor Ledger Entries list page and find that the IRS fields are automatically populated.
1099 Liable
Please note, Microsoft will deprecate IRS 1099 Liable feature, please find more information abut this on Microsoft website.
AP users can still use the ''IRS 1099 Liable'' field in Import Journal. However, this field will be hidden per default on Import Journal Lines. The ''1099 Liable'' field is visible instead, both on Import Lines and on the ExFlow Purchase Code Card Lines.
Handle Tax Group Code in ExFlow Purchase Code
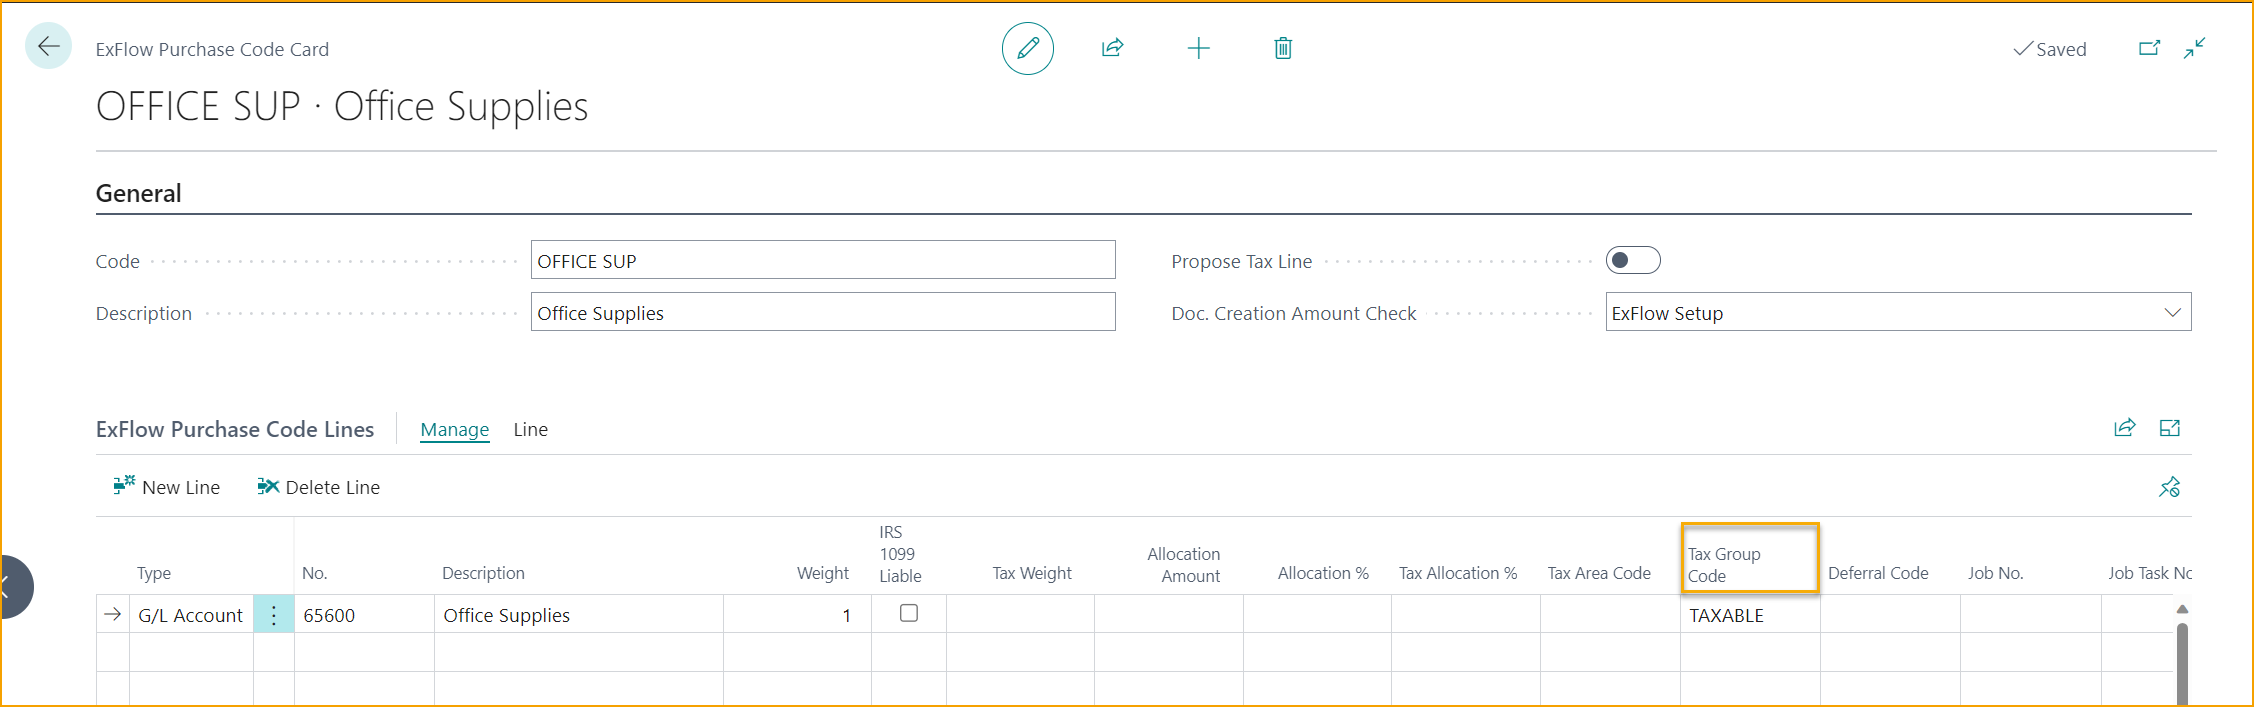
When the Tax Group Code on an invoice line needs to be different than what is defaulted on the master record selected on that invoice line, this can be handled from an ExFlow Purchase Code.
For example, if the Tax Group Code on a G/L account card for Office Supplies is defaulted to NON-TAXABLE, while a line on a Purchase Invoice with that G/L Account needs to be marked as TAXABLE, users could simply add this on the ExFlow Purchase code lines according to picture below.
This would allow users to automate invoice creation in those specific scenarios.
Tax columns on Web
It is possible to make Tax related fields visible in ExFlow Web by adding the columns in ExFlow Setup.
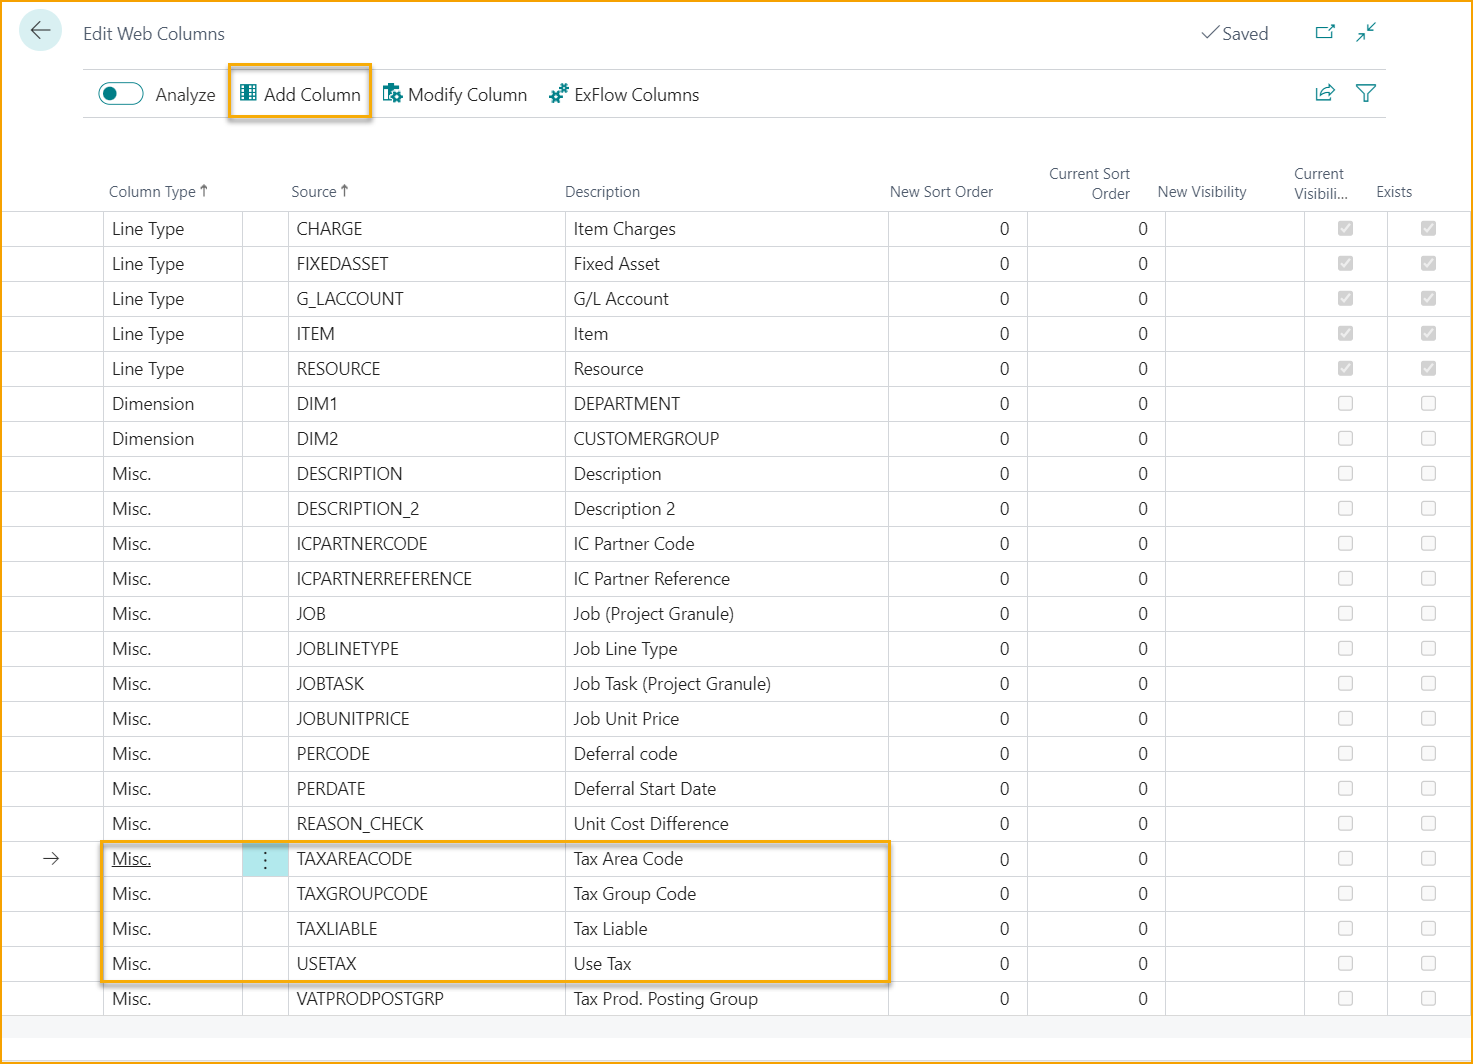
Read more about how to edit web columns under section ExFlow Web
Prepayment Handling
US environments handle prepayment invoices differently than other localizations due to how Business Central processes Sales Tax in multiple stages.
Final Invoice with Prepayment
When processing a final invoice for a purchase order that has prepayment(s), ExFlow does not use the prepayment factbox to show the reduction. Instead, ExFlow automatically creates a negative line in the Import Journal with the prepayment amount.
This approach ensures that:
- Tax amounts are correctly calculated and offset
- Business Central's multi-stage tax processing for US tax areas is properly handled
- The final invoice correctly reflects the remaining amount to be paid after prepayment deductions
Example:
- A purchase order with 100% prepayment is created with a specific Tax Area Code
- When the final invoice is imported, ExFlow adds a negative prepayment line to properly offset the prepaid amounts and taxes
This behavior is specific to US (and Canadian) environments. For all other localizations, ExFlow uses the standard factbox approach without adding a negative line.
Read more about prepayment invoices under section Prepayment Invoices