ExFlow validation exception type
The purpose of the ExFlow Validation Exception Type workflow is to set certain conditions for when an approver should not be able to approve an invoice.
The workflow is used for negative validation of values and changes in ExFlow web. E.g. stop approval for lines that have quantity differences or if a specific value are not allowed to be blank.
Setup the validation exception type workflow
-
First, we must create a new workflow. To do that, navigate to; ExFlow – Setup – Workflows- Workflows. On the action pane click “+New”.
-
Select ExFlow Validation Exception Type as a workflow type and open the newly created workflow.
-
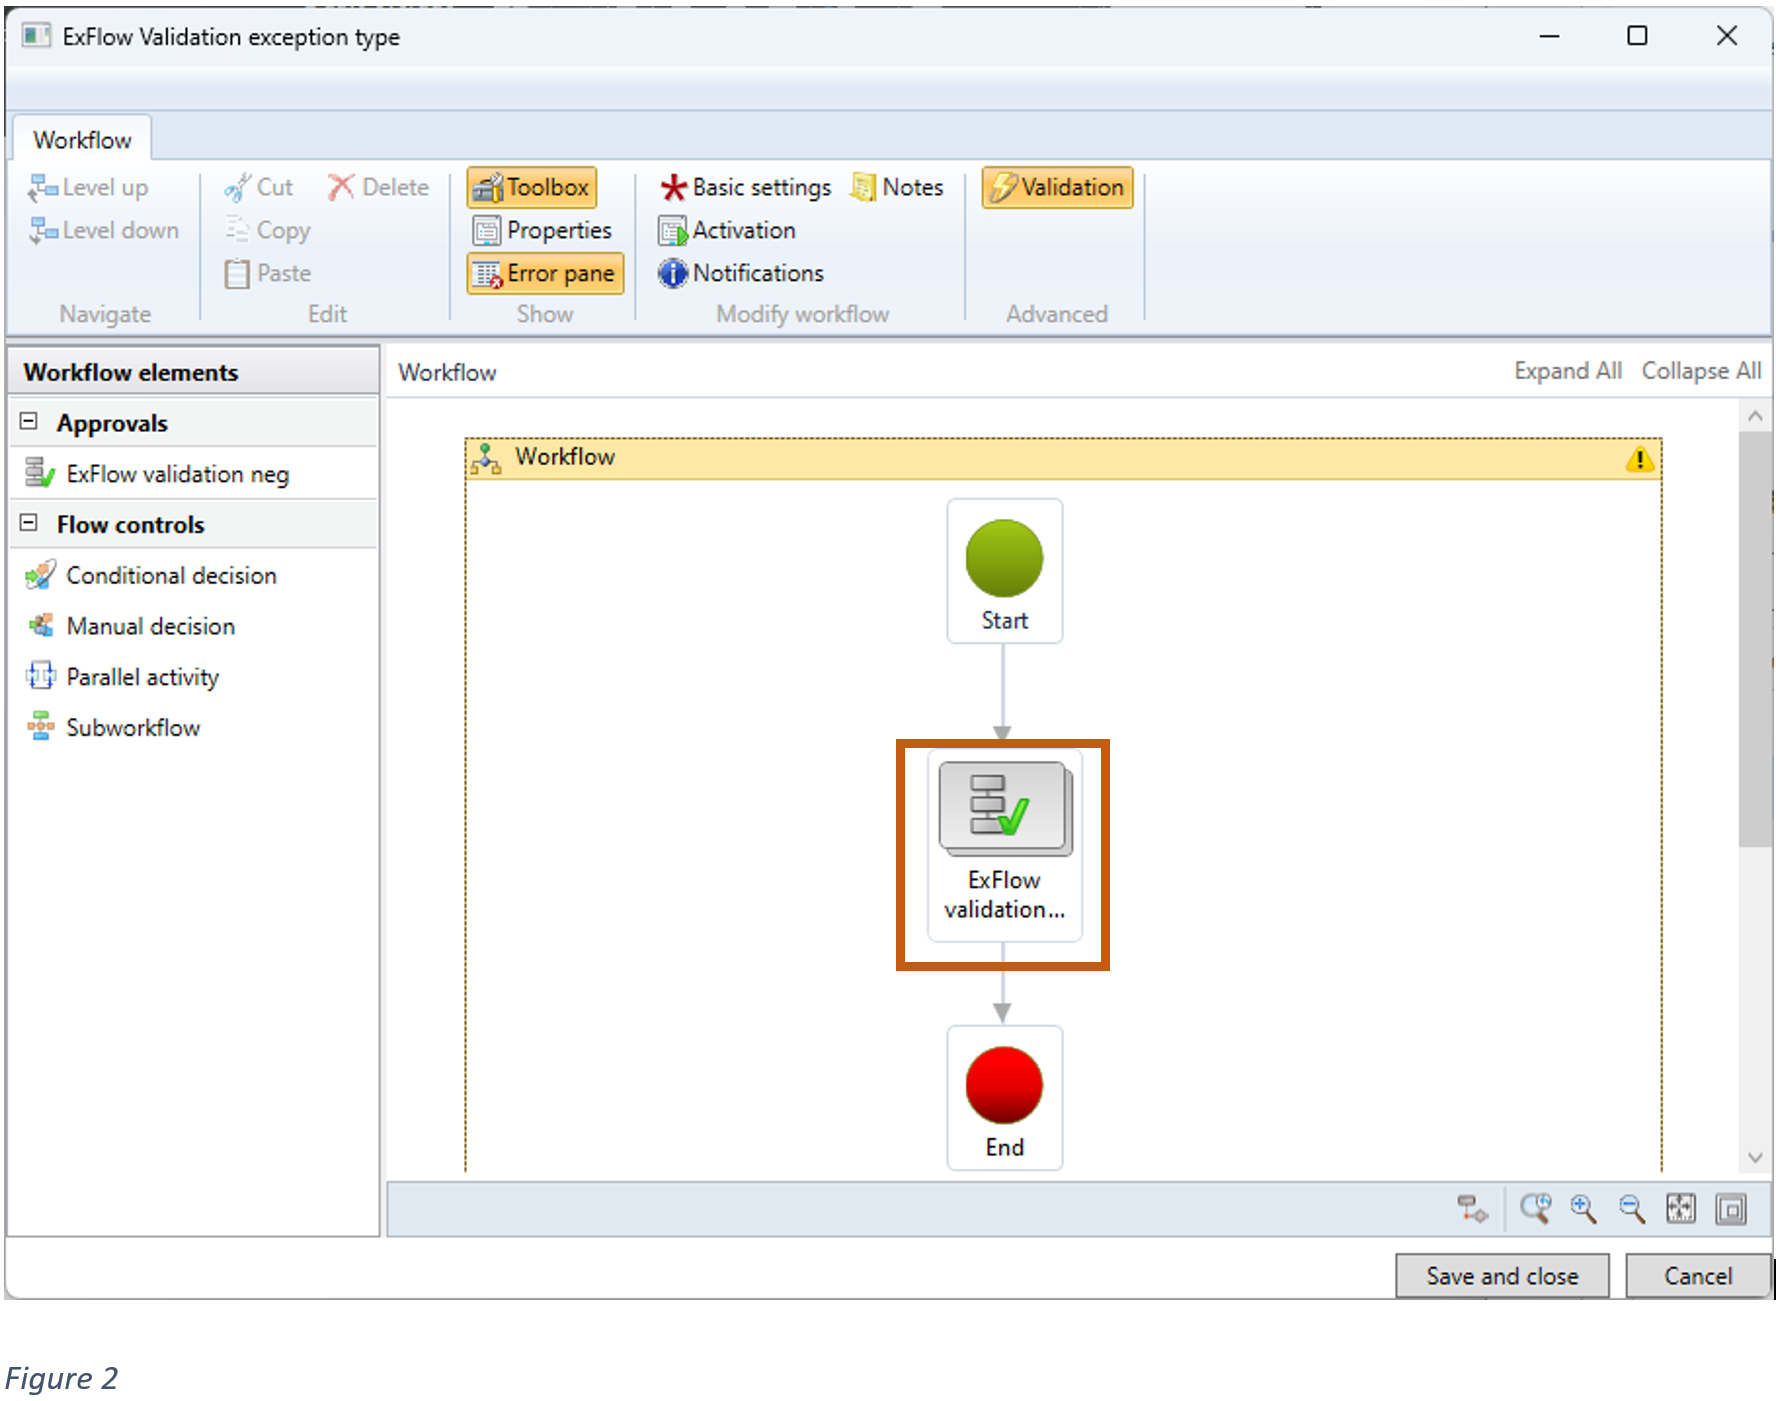
On the left side under Workflow elements find “ExFlow Validation neg” and drag it into the center between “Start” and “End” of the workflow. Drag arrows from “Start” to “ExFlow validation neg1” and to “End” (see Figure 1).

- To set a condition, double click on Exflow validation neg1 (see Figure 2). Then right click on the same box and choose “Properties”.
See examples below for more details how to set up this workflow.
Workflow examples
The conditions might be defined by business needs. For instance, purchase order invoices cannot be approved if one or more lines have a quantity variance.
Quantity variance
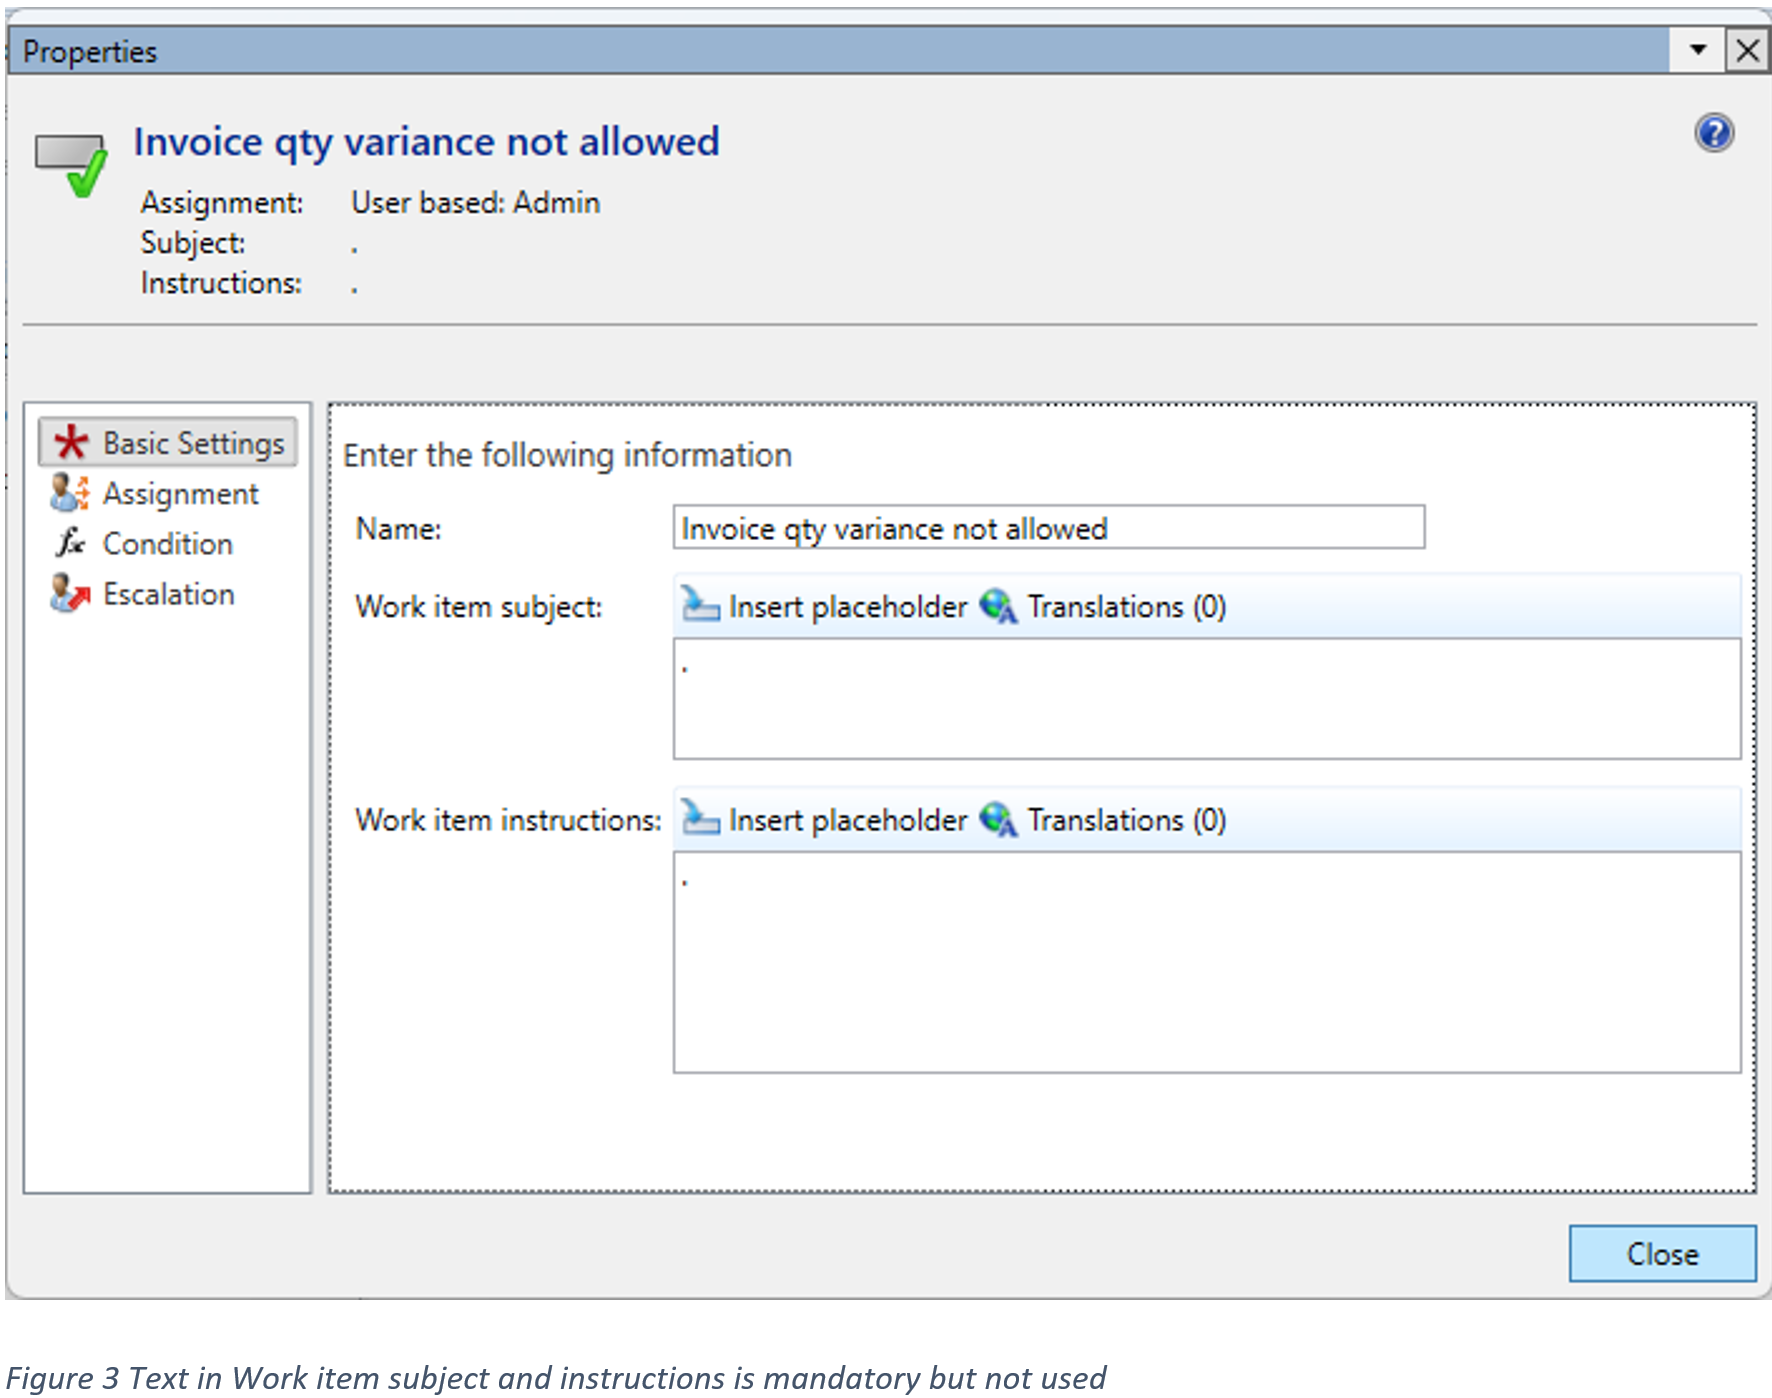
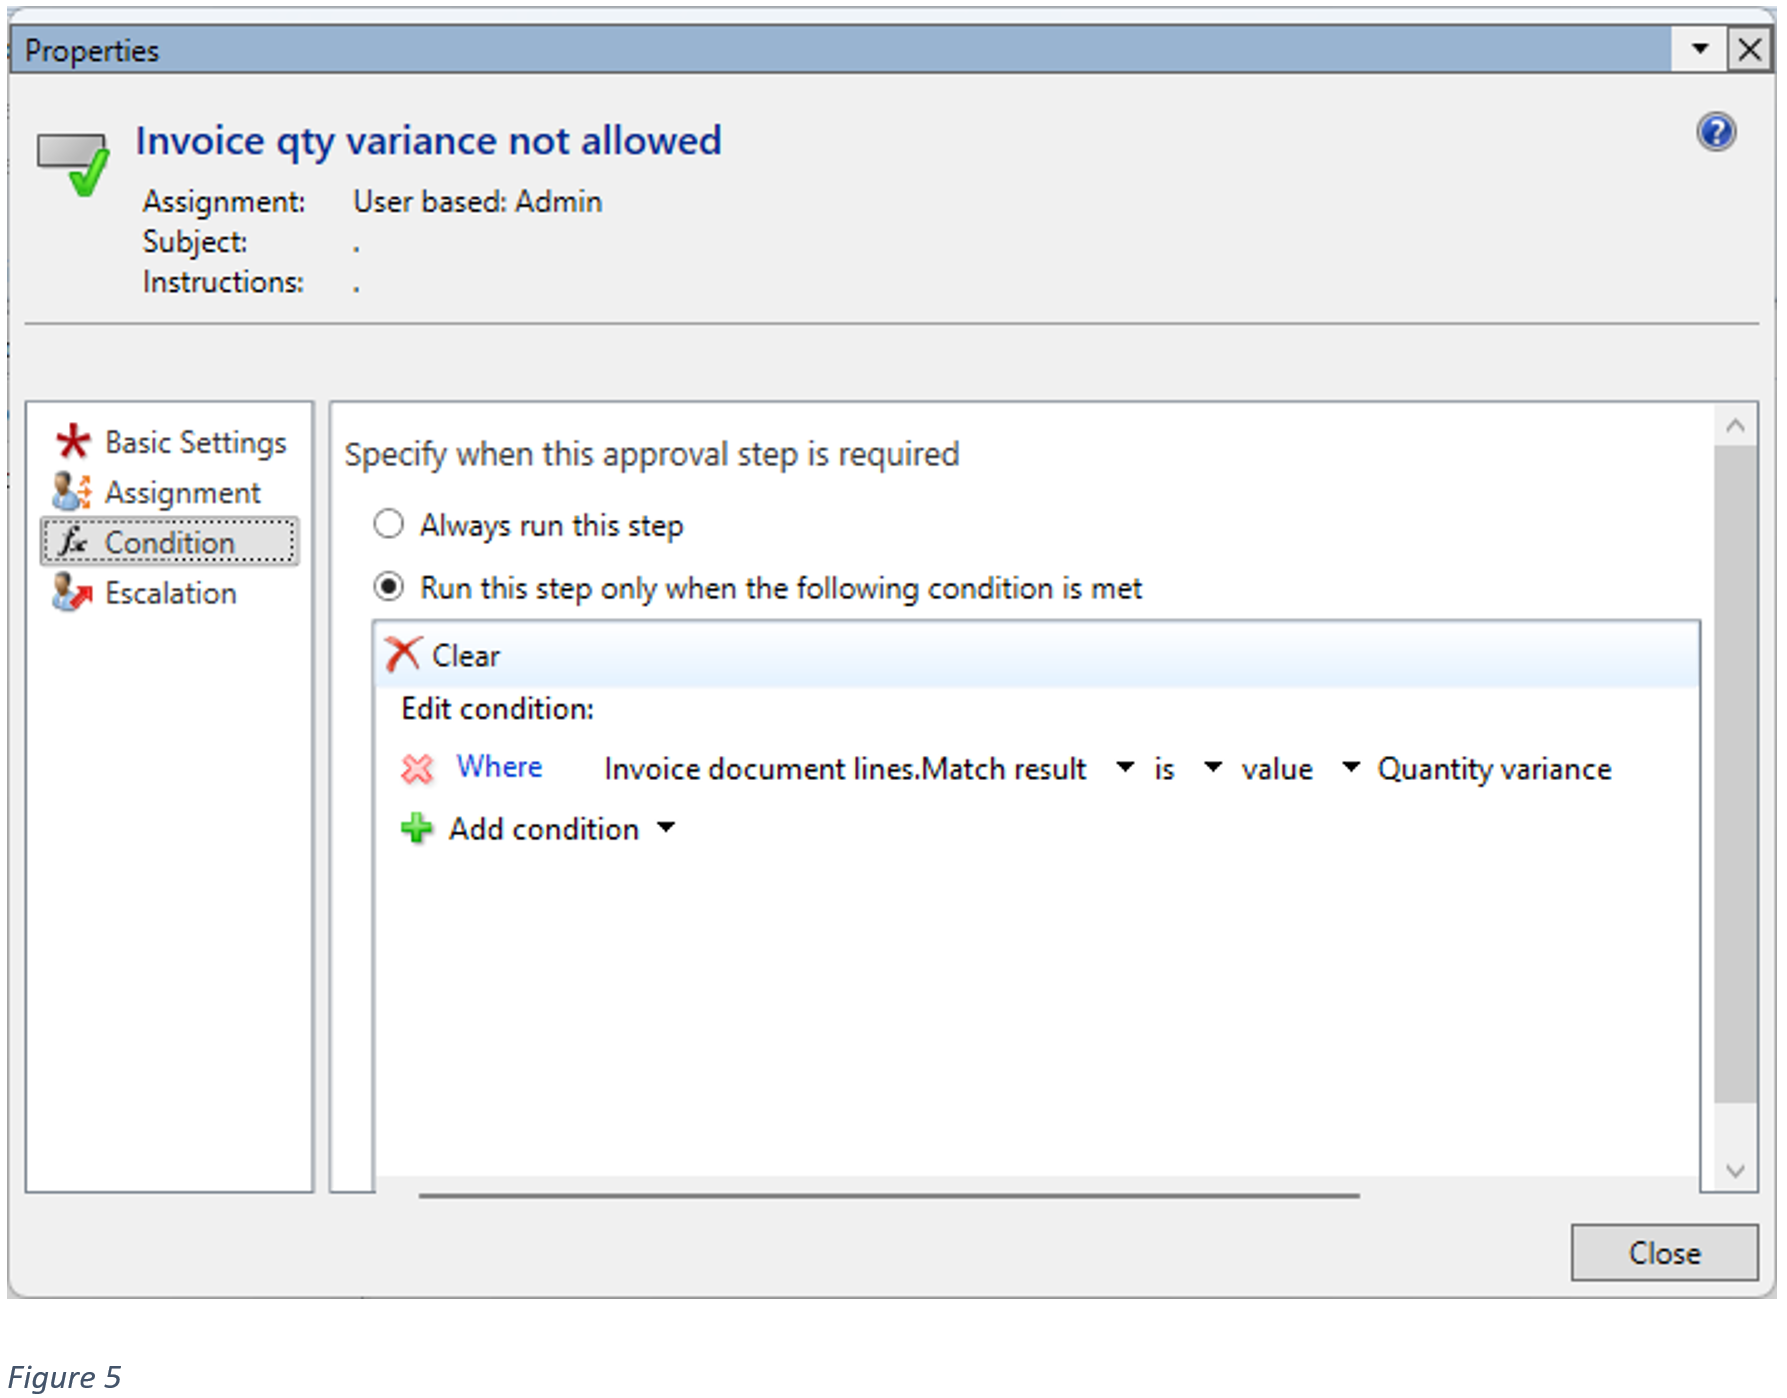
For the first example we will set a condition where an invoice line with match result Quantity variance cannot be approved. In this case we want to get an error message if an approver tries to approve an invoice with quantity variance. First, under basic setting and field Name, we will provide the message given to the approver when trying to approve an invoice where the condition is met (line with quantity variance).
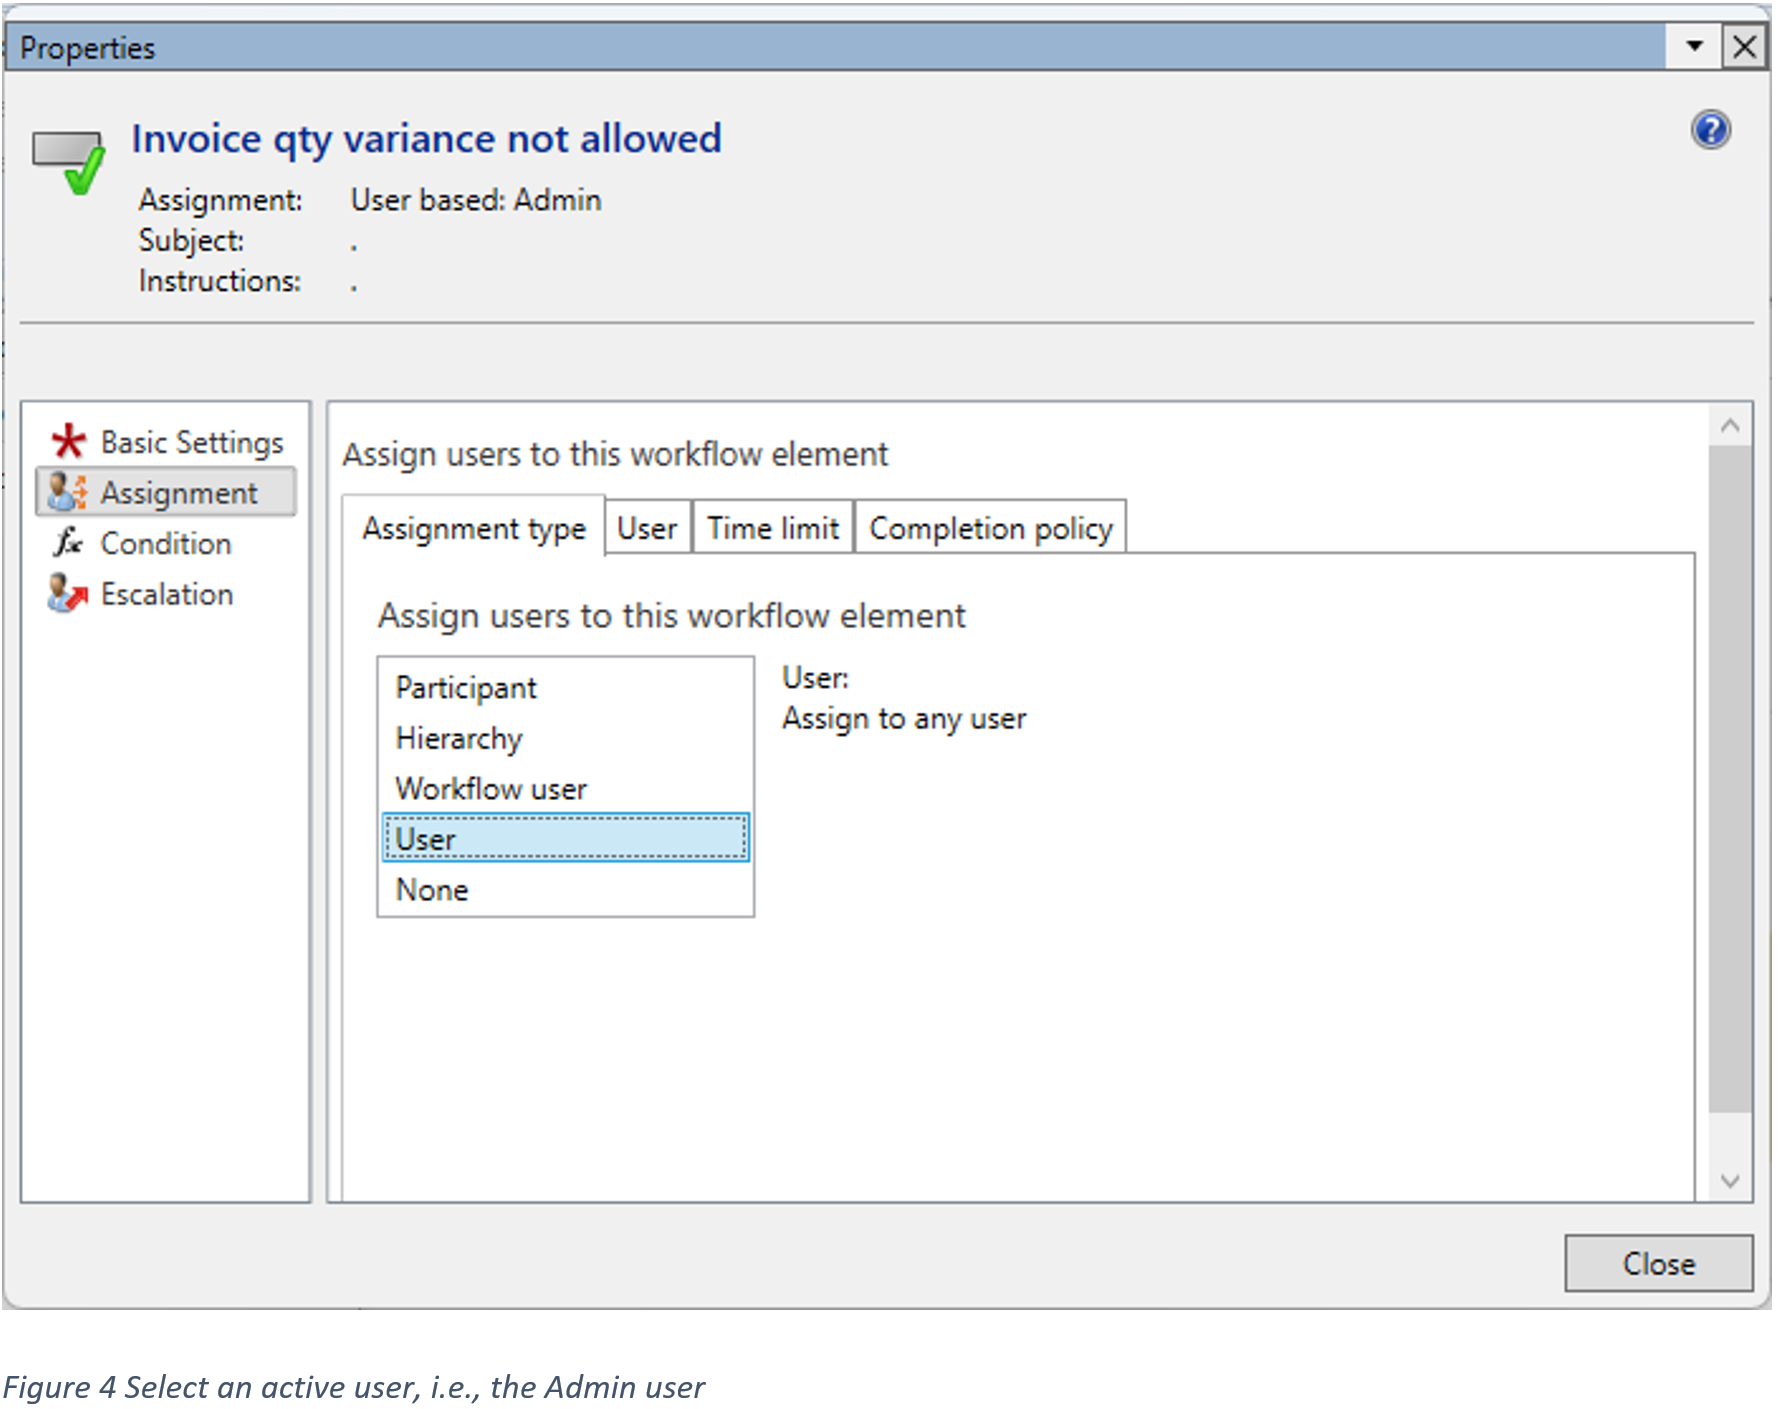
Next, under Assignment, select User and then select a user name (under the User tab) that is most likely not to be deactivated in the system. This information will not be used but for the workflow to be valid an active user must be provided in the setup.
Under Condition, we set the condition(s) for when we don’t allow for invoice approval and return the error message from Basic setting. See the Condition for Quantity variance in Figure 5.
- Close and save the Workflow configurator.
- As a next step for setup, go back to the list of the Workflows and set the ExFlow Validation exception type workflow as a Default. Make sure that the latest version is active.
- With the aim of switching between versions, select the workflow in the list, then navigate to the active menu and click on Workflows, then choose “Versions”.
- A list of versions will pop up on the right side of the screen. Select the latest version of the workflow and click the button “make active”. See Figure 5.
Now we will trigger the created workflow and see how it works:
- Create a Purchase order invoice where one or more lines have match result “Quantity variance”.
- Find and open the invoice in ExFlow web or My vendor invoices.
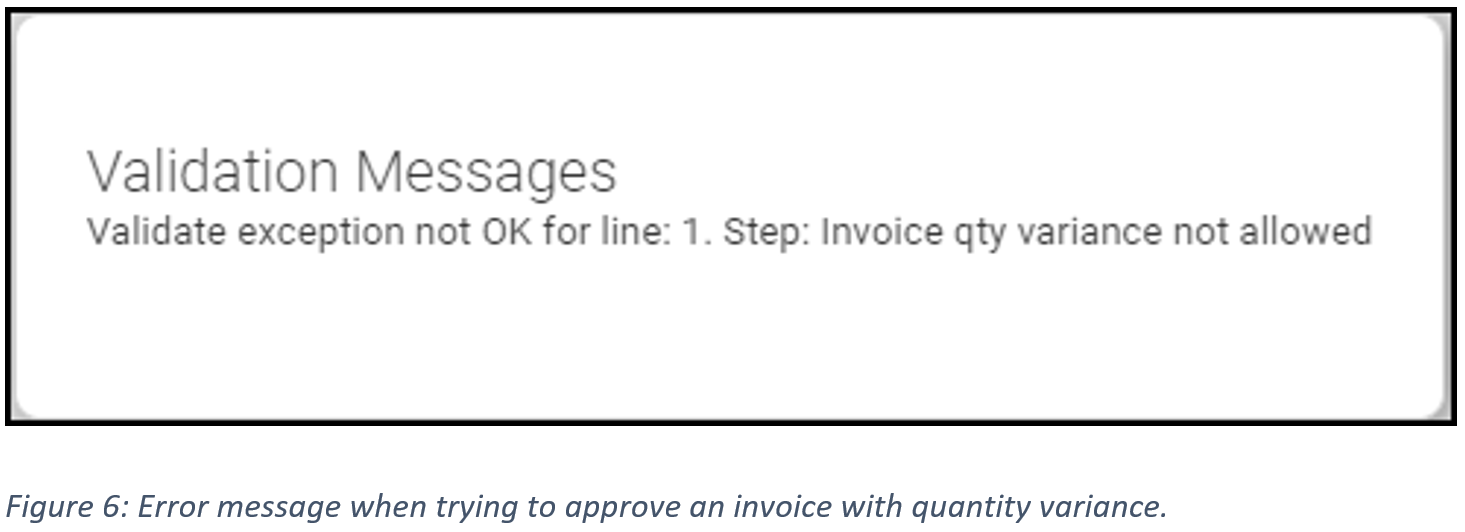
- Try to approve the invoice. ExFlow Web/My vendor invoices will return the message from the workflow and the invoice cannot be approved until the quantity variance is corrected. See figure 6.
Dimension
For the next example, we will create a condition that makes sure a certain dimension value is added to the coding. This can be useful if you don’t want to have that dimension as mandatory in the account structure, but for vendor invoices only.
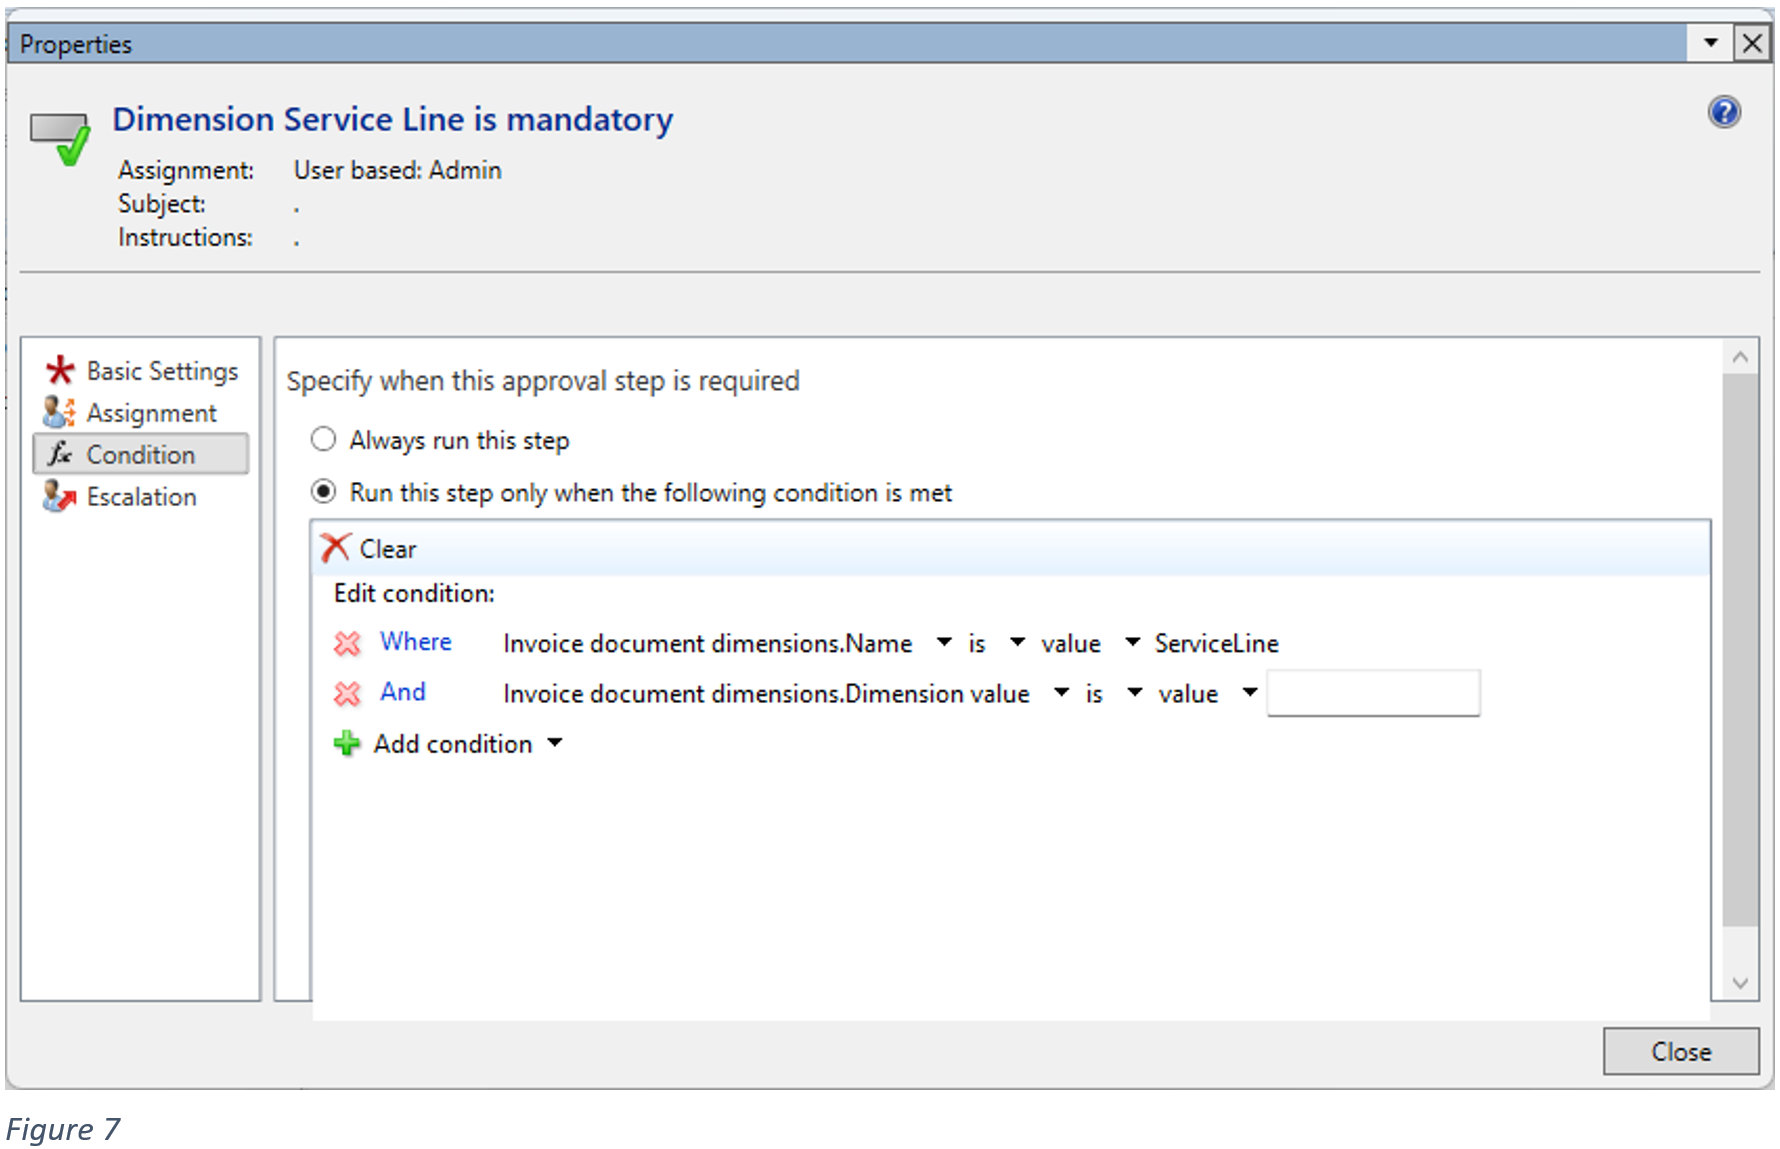
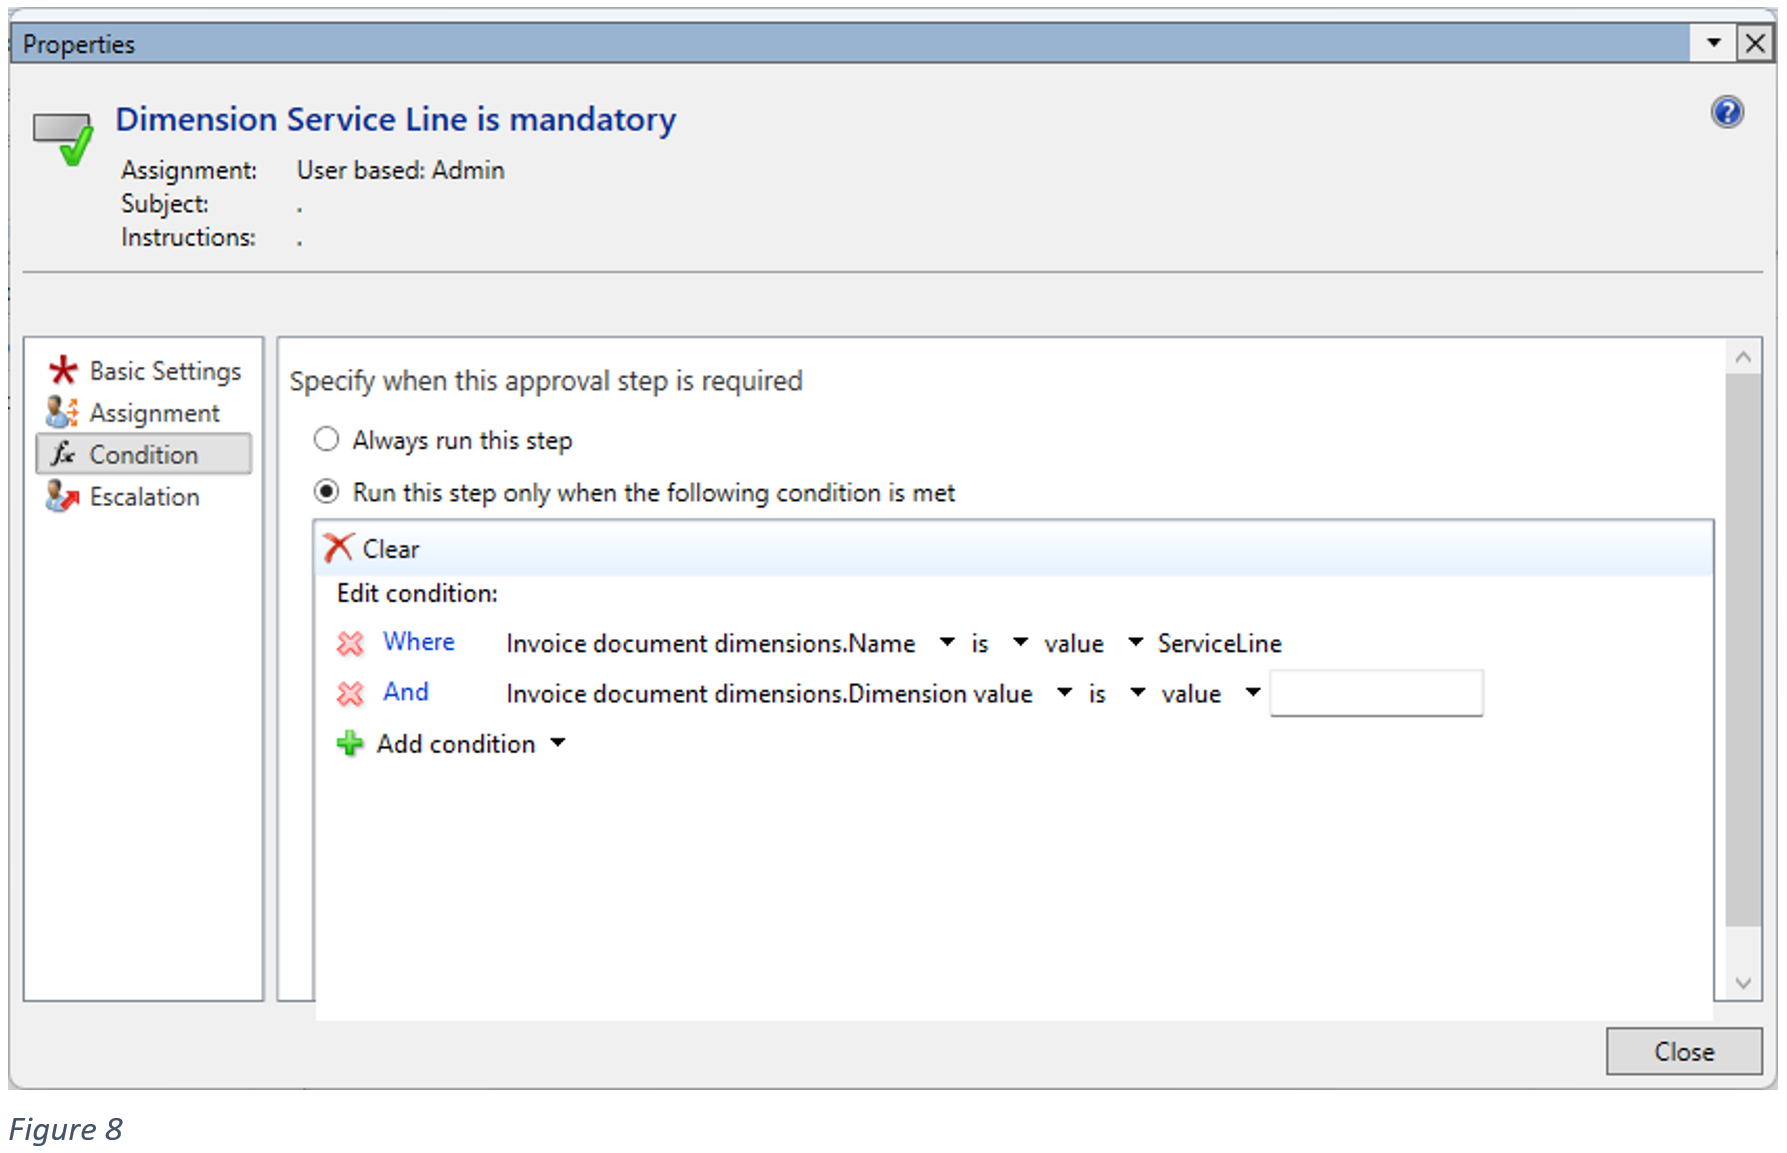
- Setup the rules as describe in the first example, but change the Name (message returned to the approver) under Basic settings and the set the Condition similar as show in Figure 8.
- Save and close the window. Activate the new version of this workflow as described in the previous example.
- Create and import an invoice with a line type Ledger and send out for approval.
- Code the invoice and fill in the financial dimensions but leave the dimension used in the workflow blank.
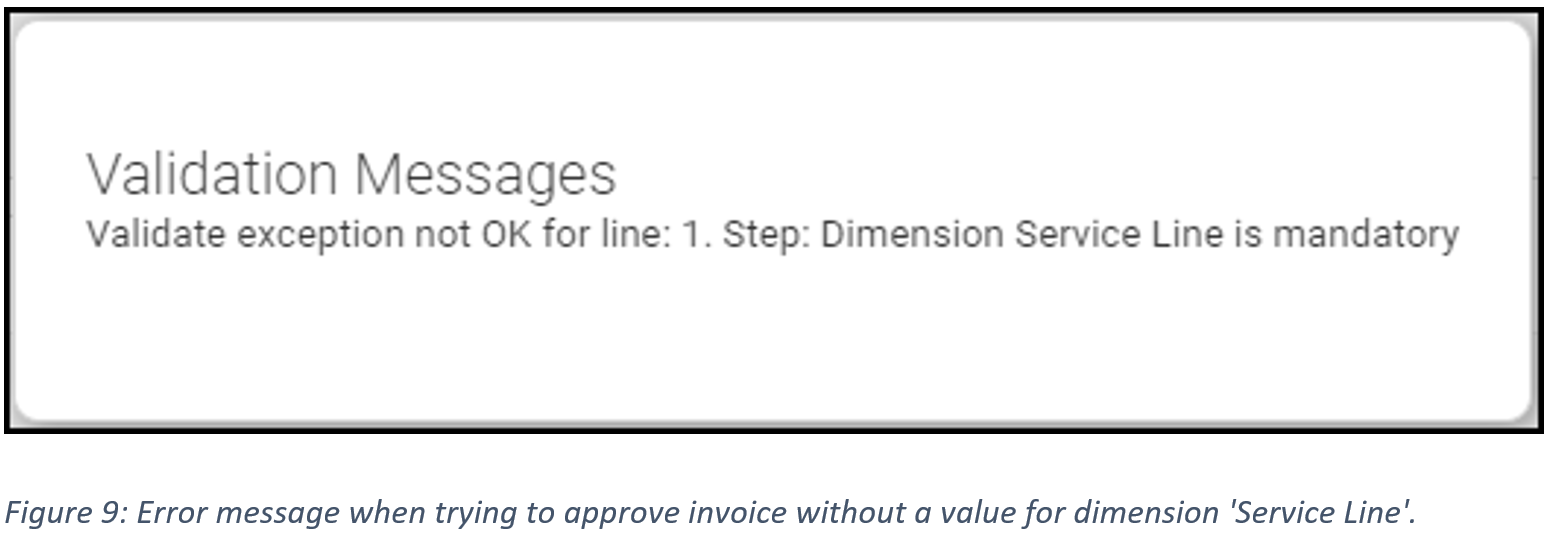
- When you try to validate or approve the invoice, the Validation Exception workflow will be triggered, and you will get an error message as shown in Figure 9.