Invoice timeline
It is now possible to see the timeline for an invoice, the timeline is presented by using the invoice timeline button in import form and document form.
The log is created and presented as timeline during certain events like when importing invoice, post invoice to document form, final posting, cancel invoice, copy to import from cancel and status updates of invoices in document form.
Setup
No setup is needed for basic timeline logging.
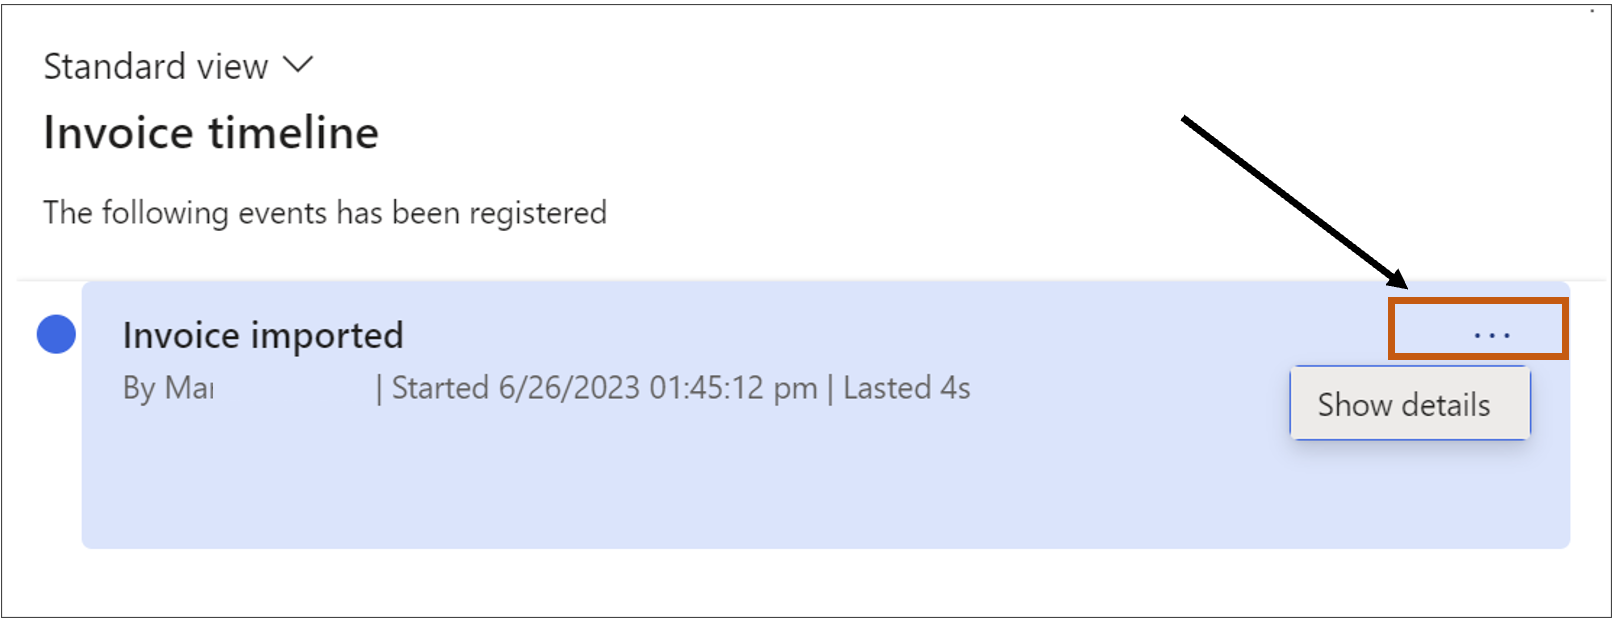
For an invoice the following events is displayed as a timeline event;
- Creating the invoice (import ocr, from invoice cancellation).
- Will show an 'Invoice imported' log with a function button showing more details.
- Posting the invoice from import
- Will show an 'Invoice posted to document form' log.
- Final Posted
- Will show an 'Invoice posted' log.
- Canceled
- Will show an 'Invoice cancelled' log.
- If the invoice was copied to import this will be shown in the body of the timeline entry.
- Status Update
- Will show a 'Document status updated' log every time the status is updated.
- The details will show from and to status. Process time is not shown for this timeline event.
Setup Groups for log details
It is possible to log details on the events by setting up group and select the details from a list of actions you want to log from import history and invoice journal.
Note! That Log of field data occurs on the event when it is executed meaning it is not possible to modify field assignments and expect the data to change.
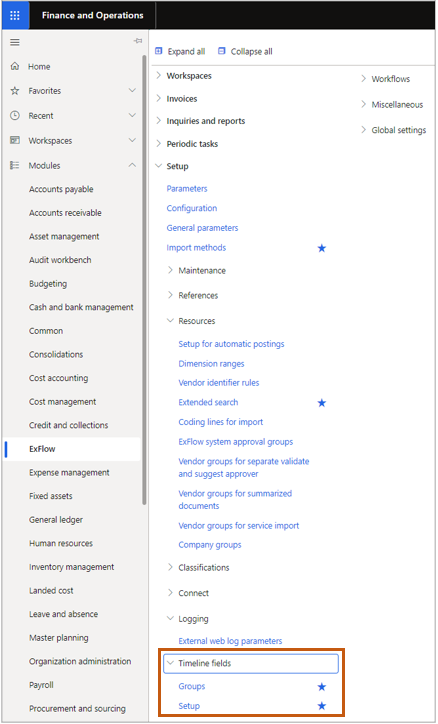
- Go to ExFlow | Setup | Resources | Logging | Timeline fields | Groups
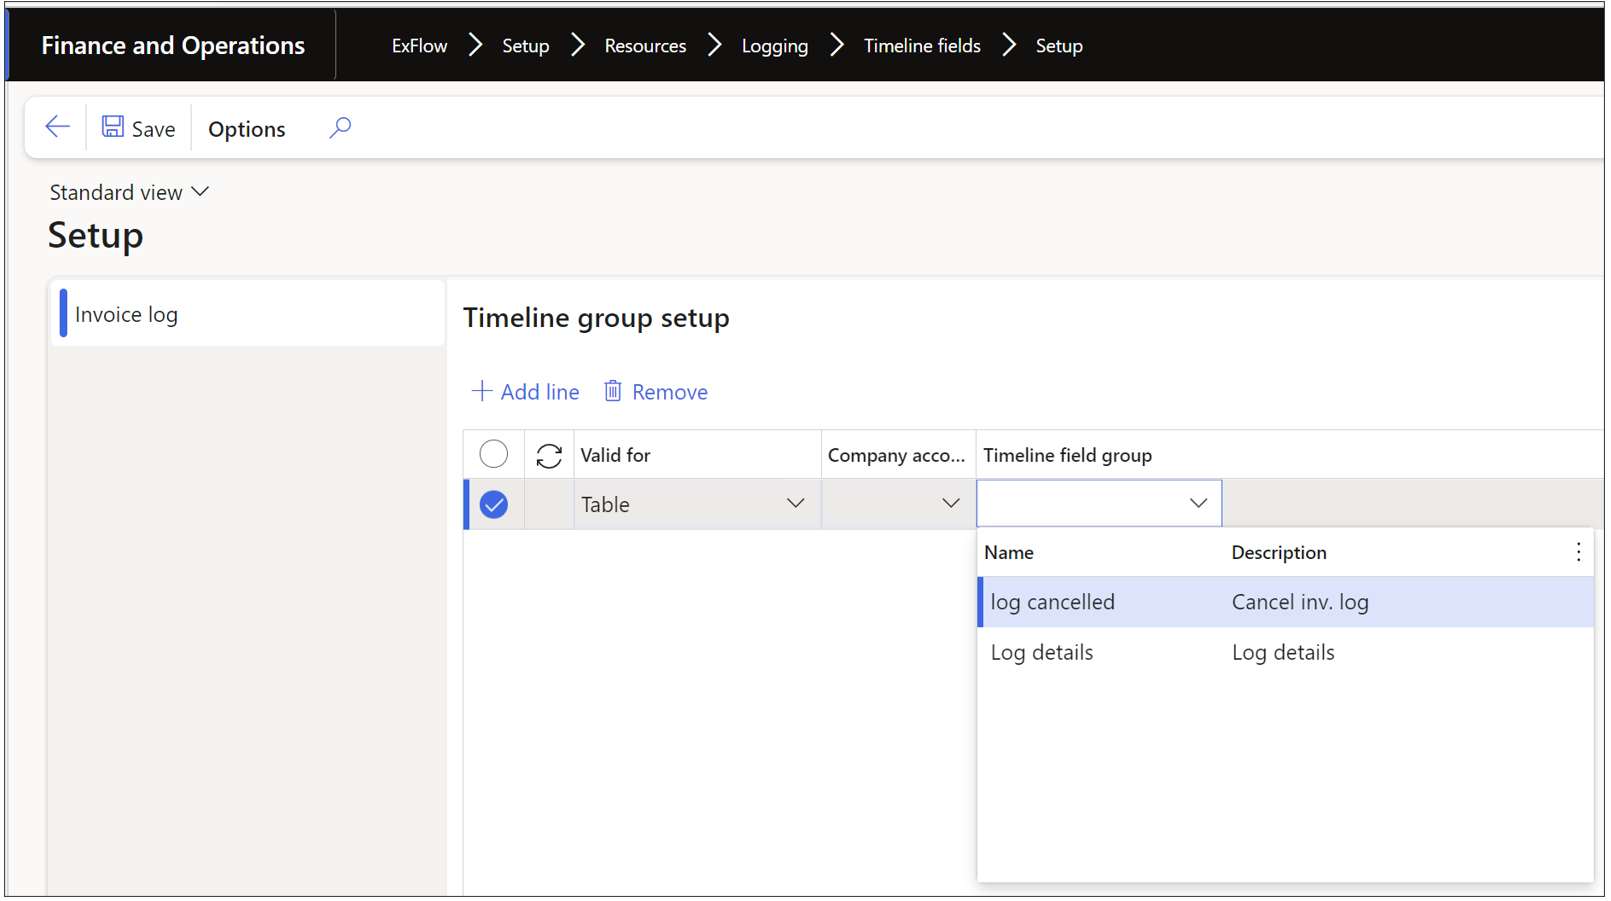
a) Create a group, name it and set an event (currently invoice imported and invoice cancelled is supported).
b) Assign the table that is to be logged.
- Select “Add” and choose the table to use.
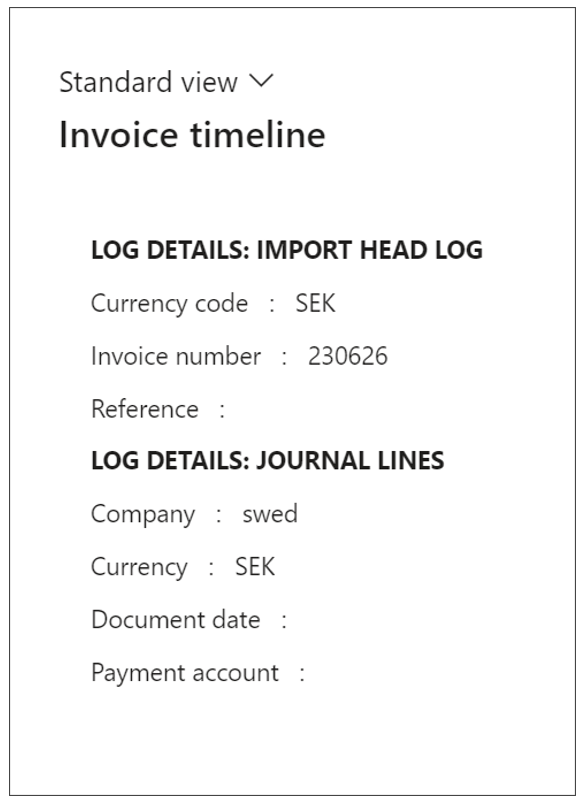
Import head log – Fields from Import history.
Journal lines – Fields from invoice register journal.
c) Then assign field(s) from that table under fields.
- Select “Add” and choose the fields to log.

- Go to ExFlow | Setup | Resources | Logging | Timeline fields | Setup
a) Assign the group to a single company or all companies (Table or All).
b) Select the earlier created Timeline field group.
- On the time line event there will be a button “Show details” that will present the field data collected.
Process/Functionality
The log is created from import of the invoice and displayed as a timeline event for following;
Creating the invoice (import ocr, from invoice cancel), posting the invoice from import, final posted, canceled and status updates.
The buttons “Timeline” and “Invoice Timeline” exists;
• in the import list page, under General tab > History > Invoice timeline.
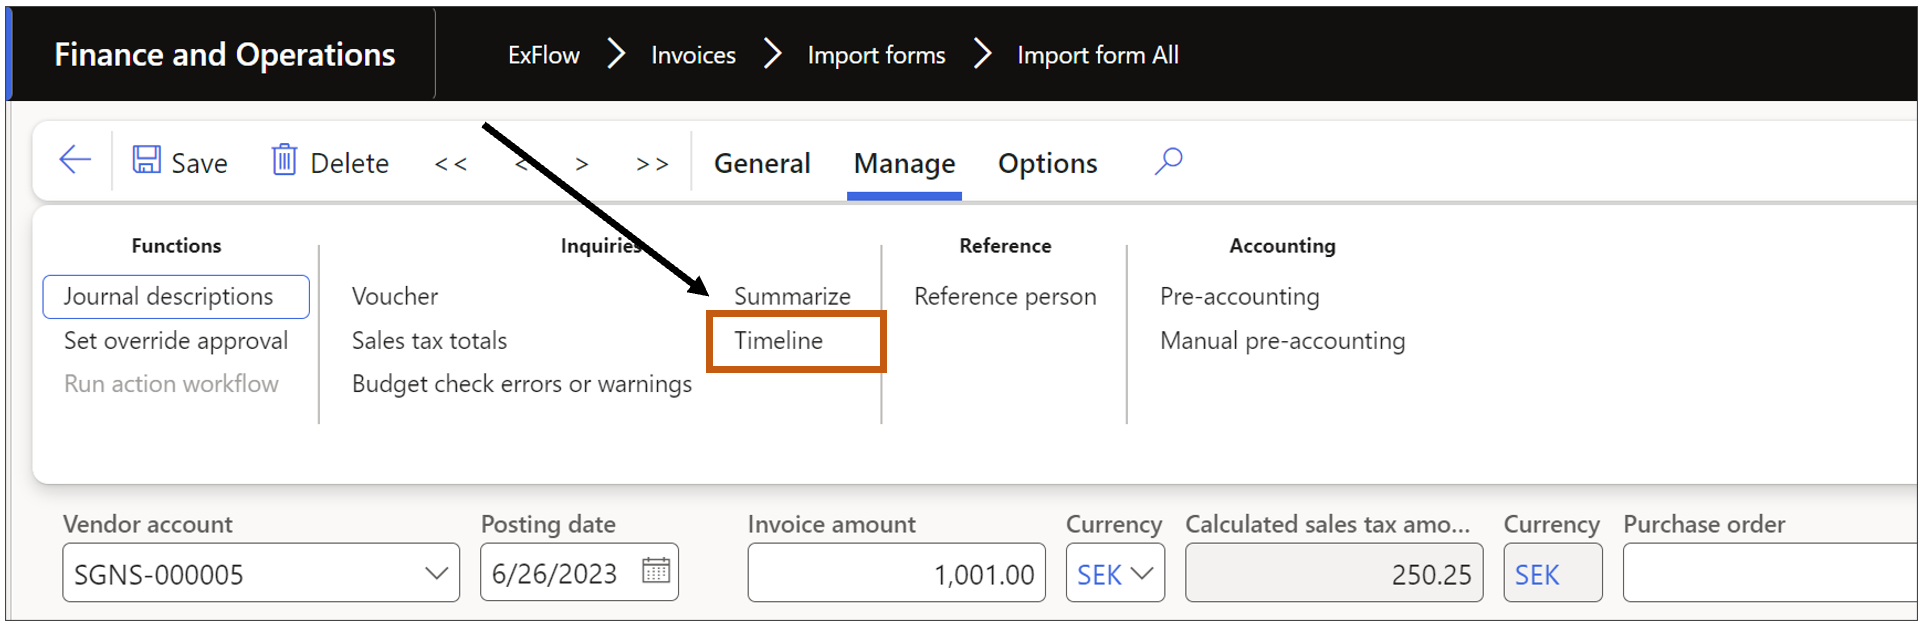
• on the invoice in import, under Manage > Inquiries > Timeline.
• in the document list page, under General tab > History > Invoice timeline.
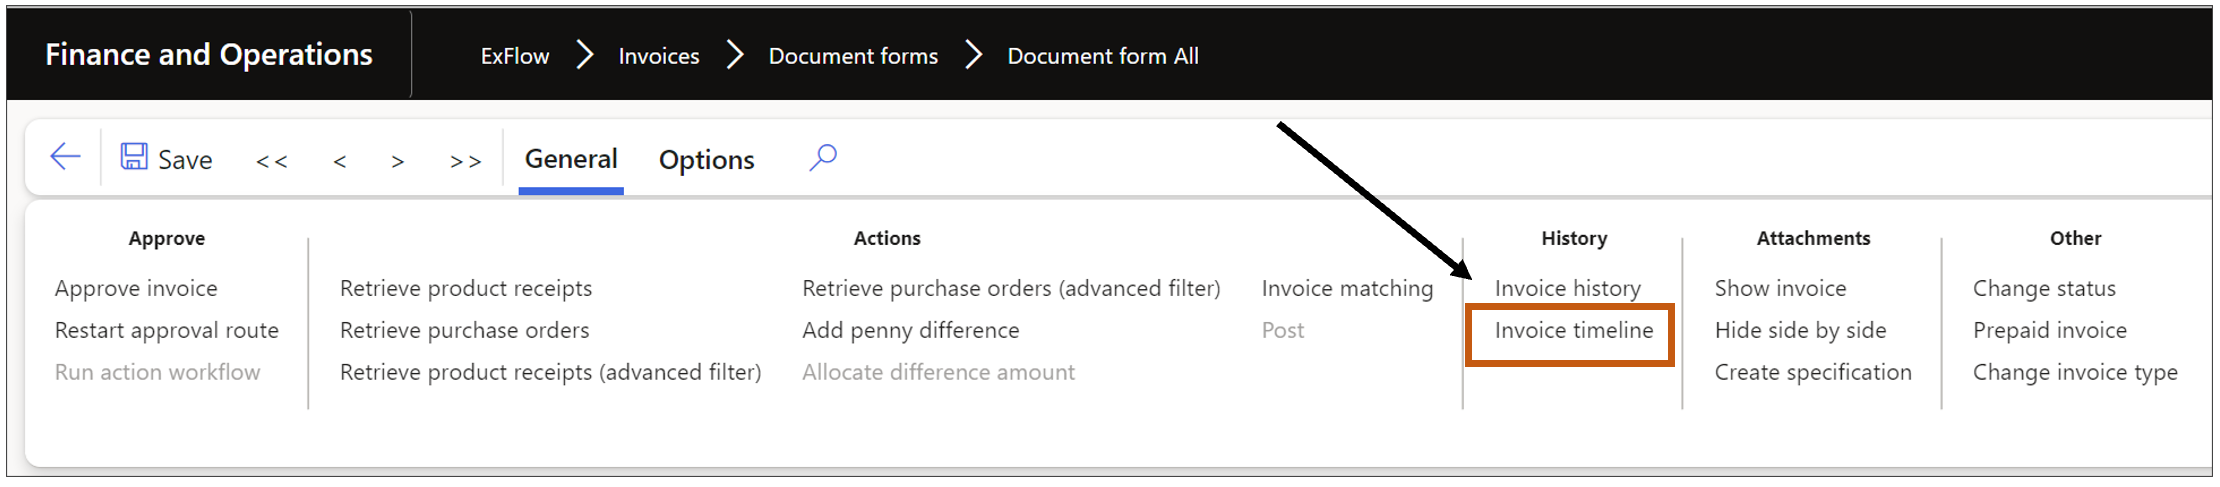
• on the invoice in document, under General tab > History > Invoice timeline.
Note! The timeline is the same regardless of where you click on the timeline.