Process for Vendor collaboration portal use
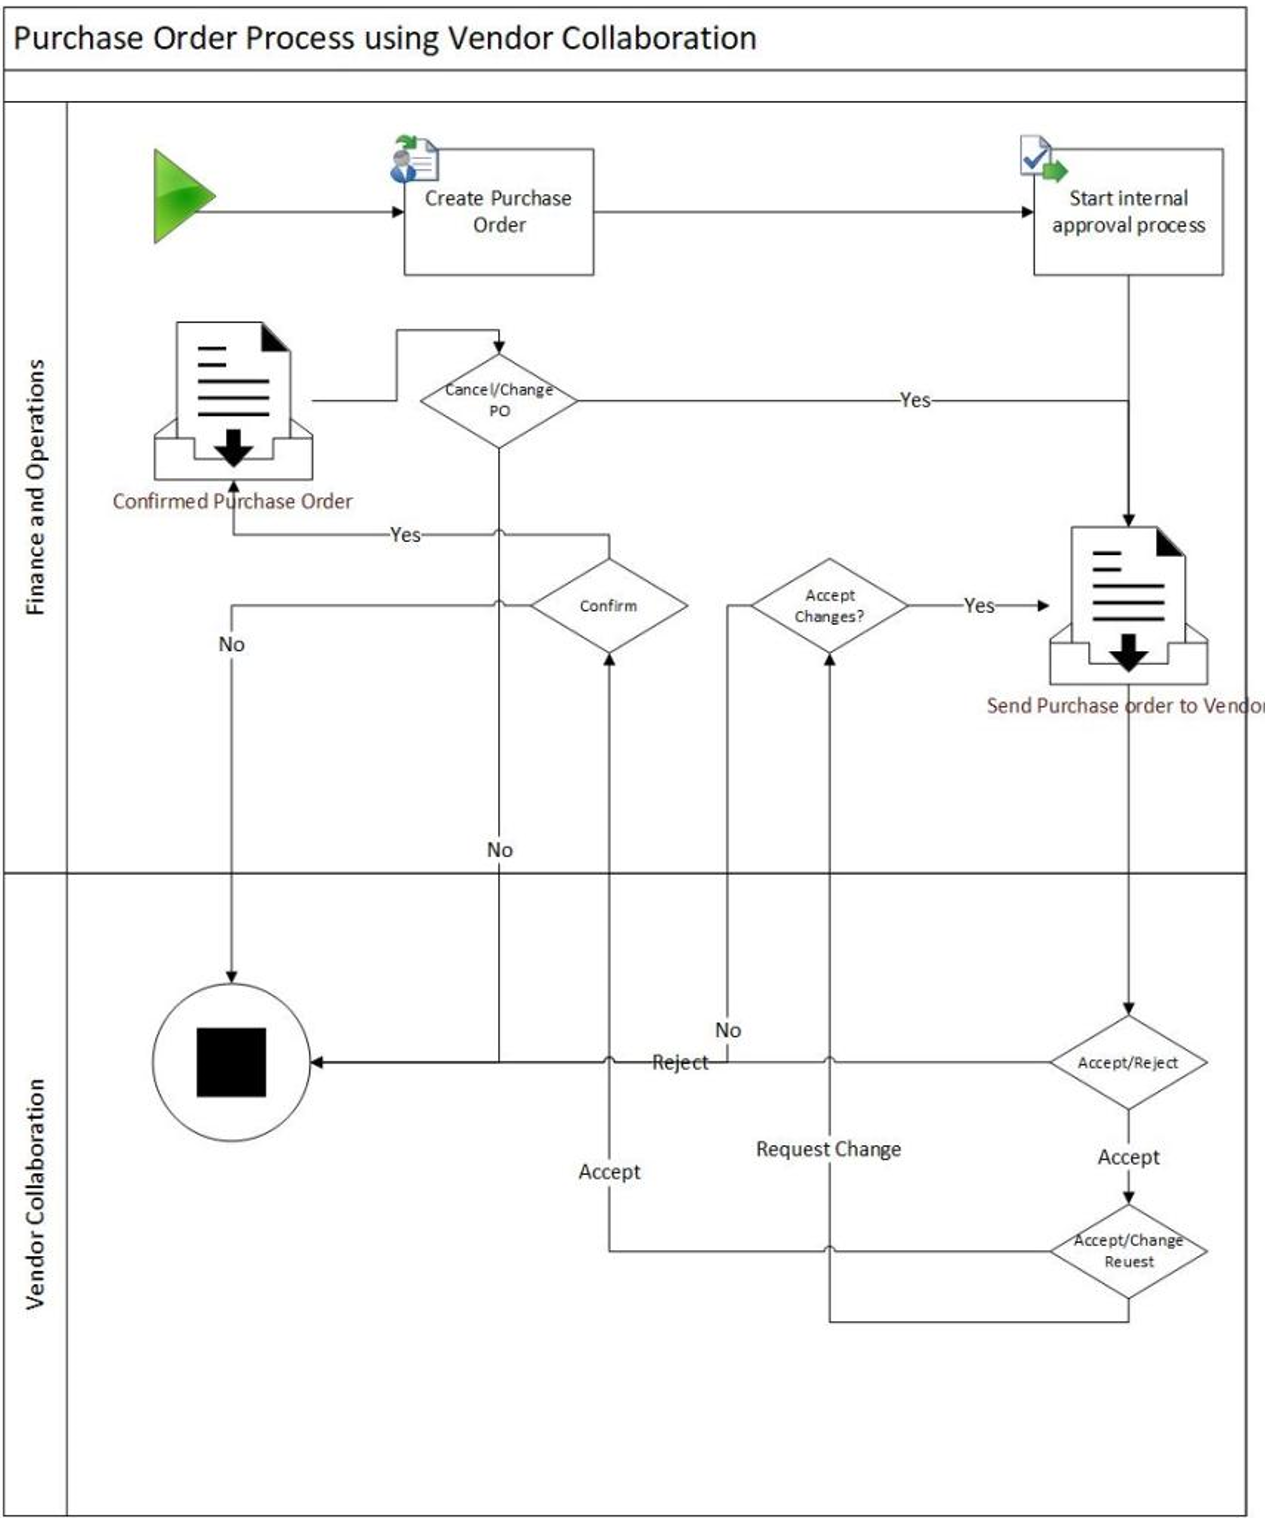
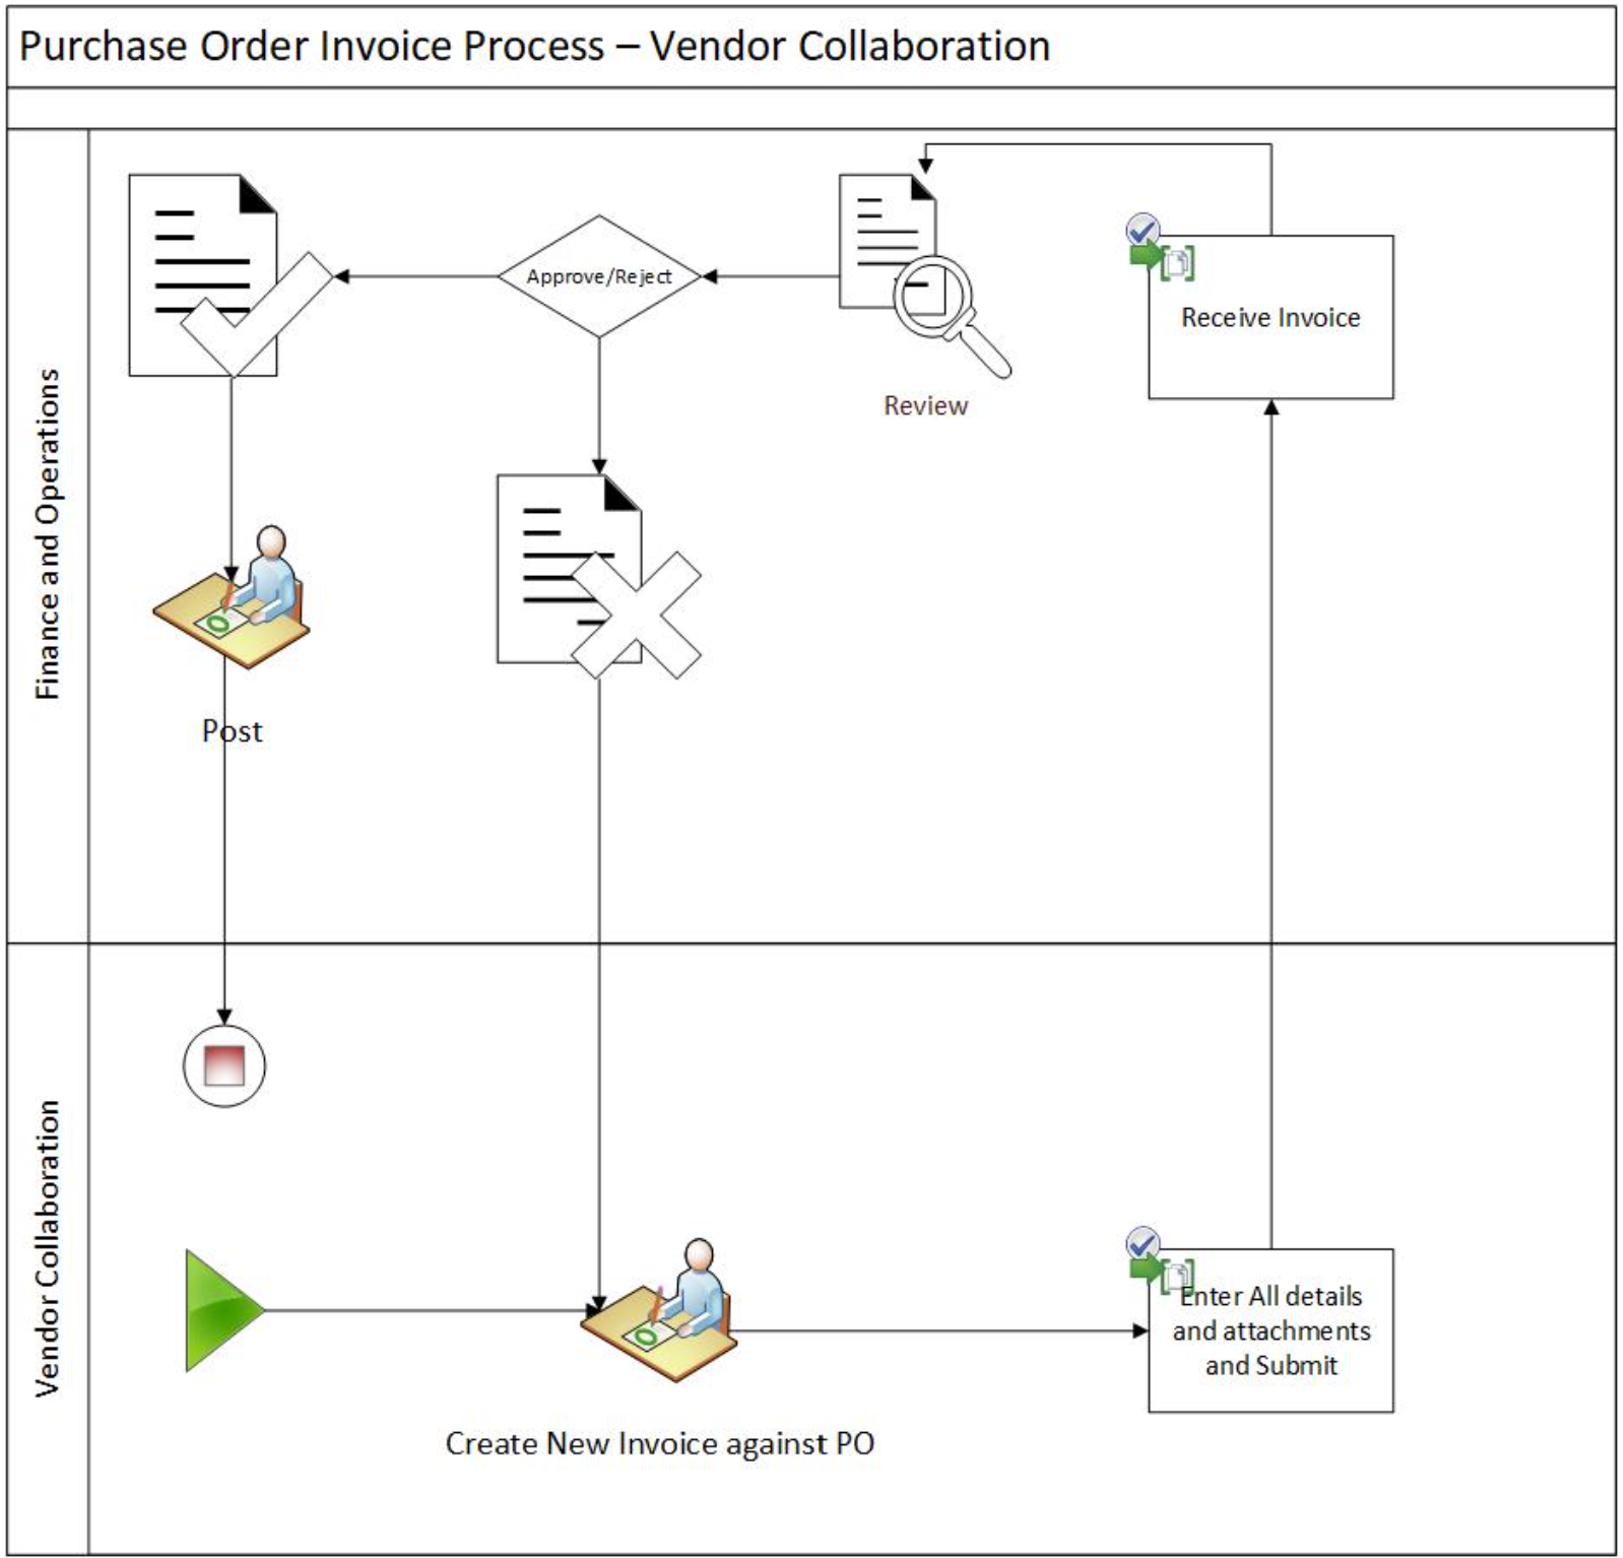
Purchase order process
Create purchase order
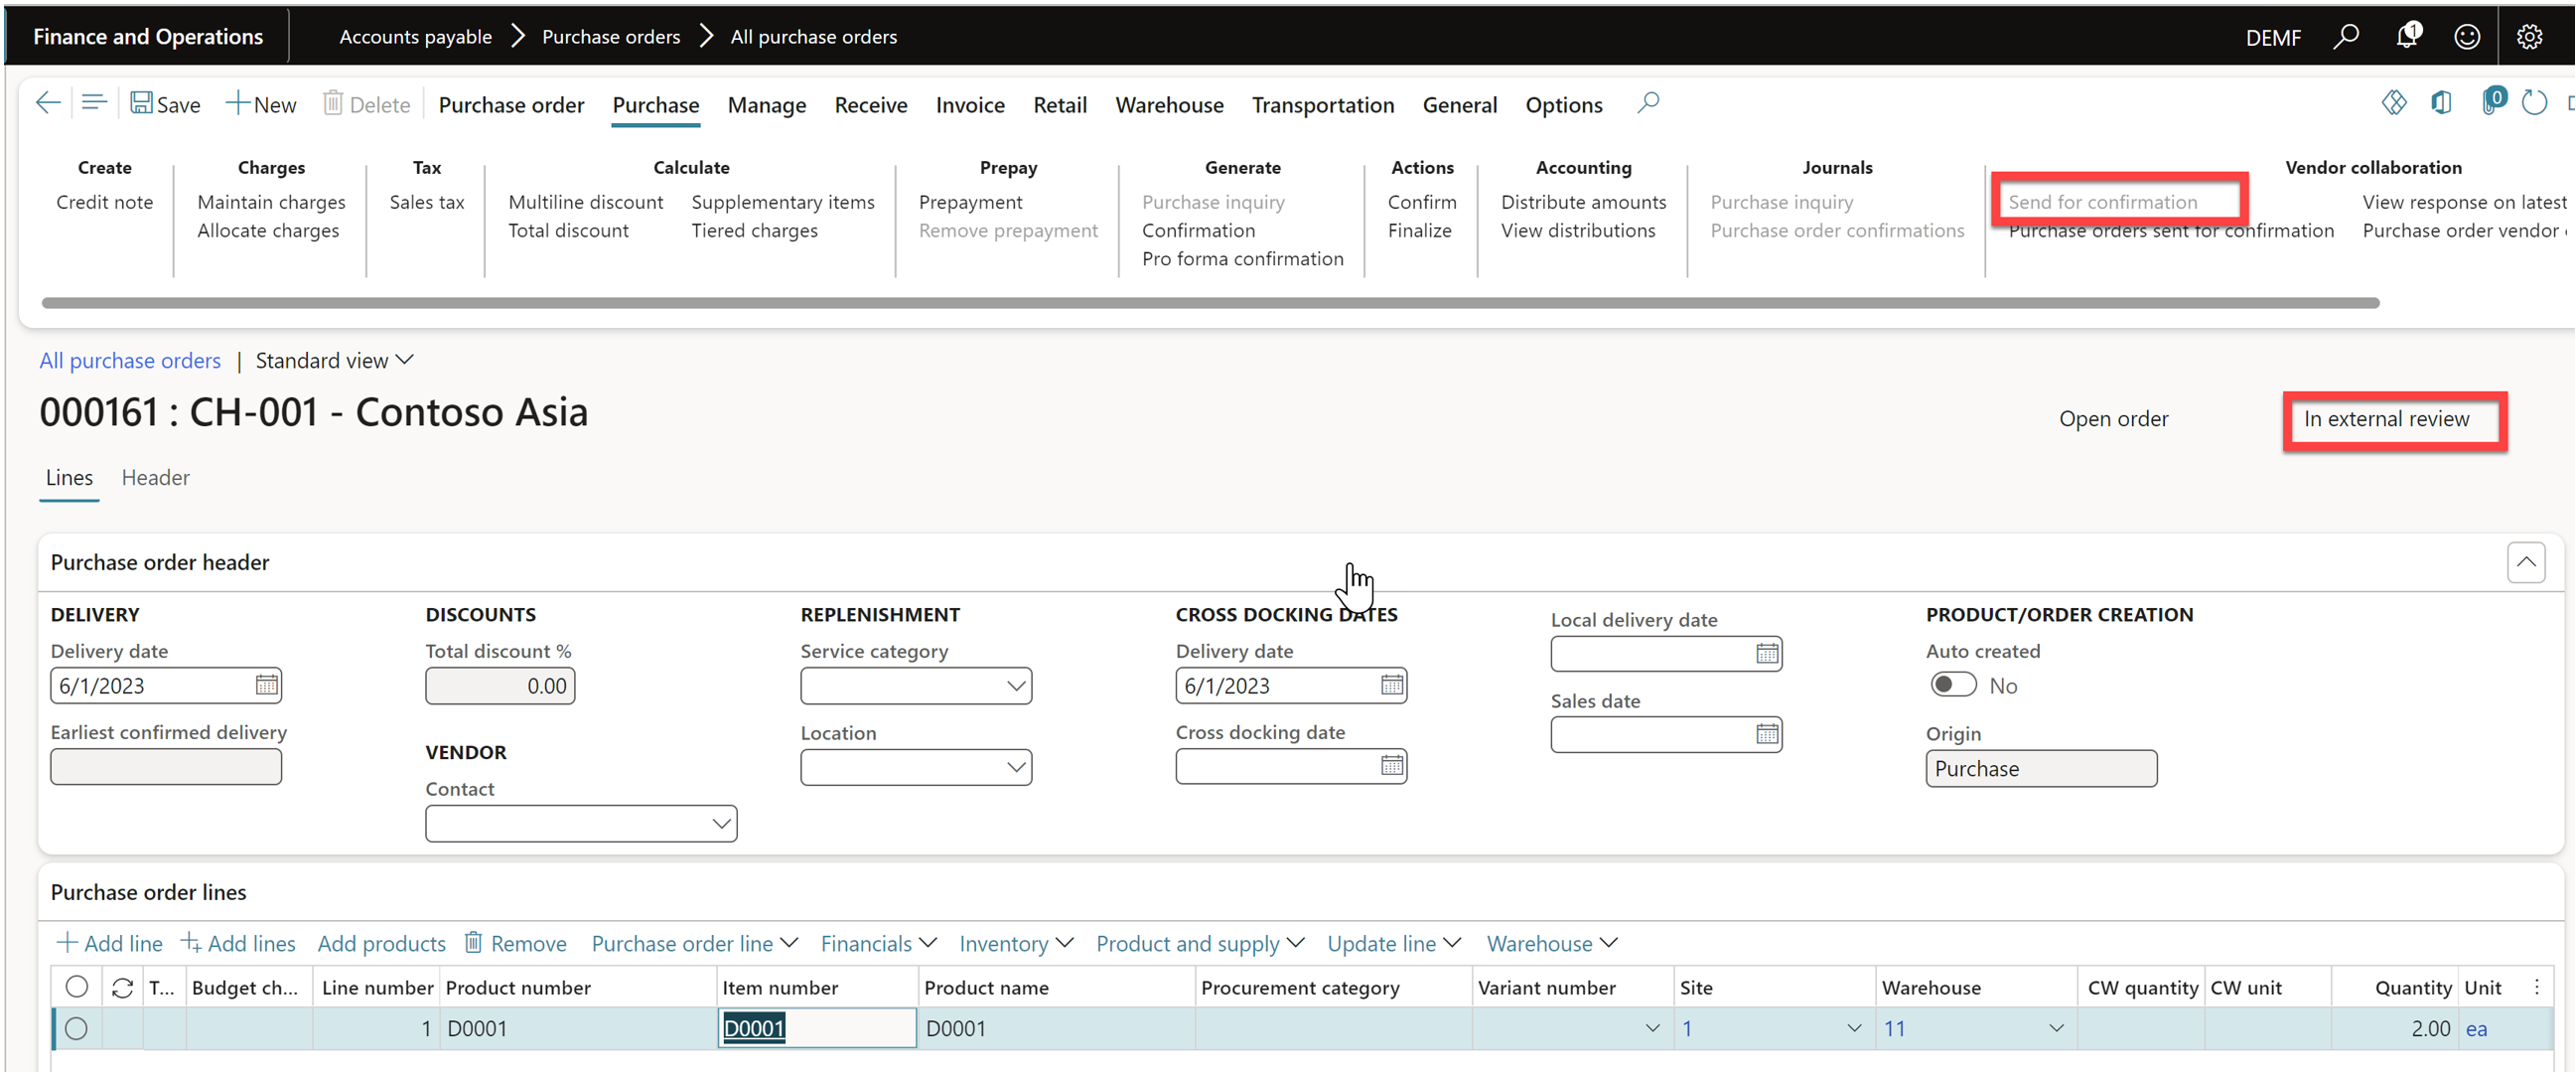
Accounts payable | Purchase orders | All purchase orders
Create your purchase order and when you are done select Send for confirmation on the Purchase tab. You will now see that the status will change to "In external review".
Review and accept purchase order
The Vendor login to Vendor Collaboration portal and the Purchase order confirmation workspace.

- Selects "Purchase orders for review" and mark the purchase order to handle.
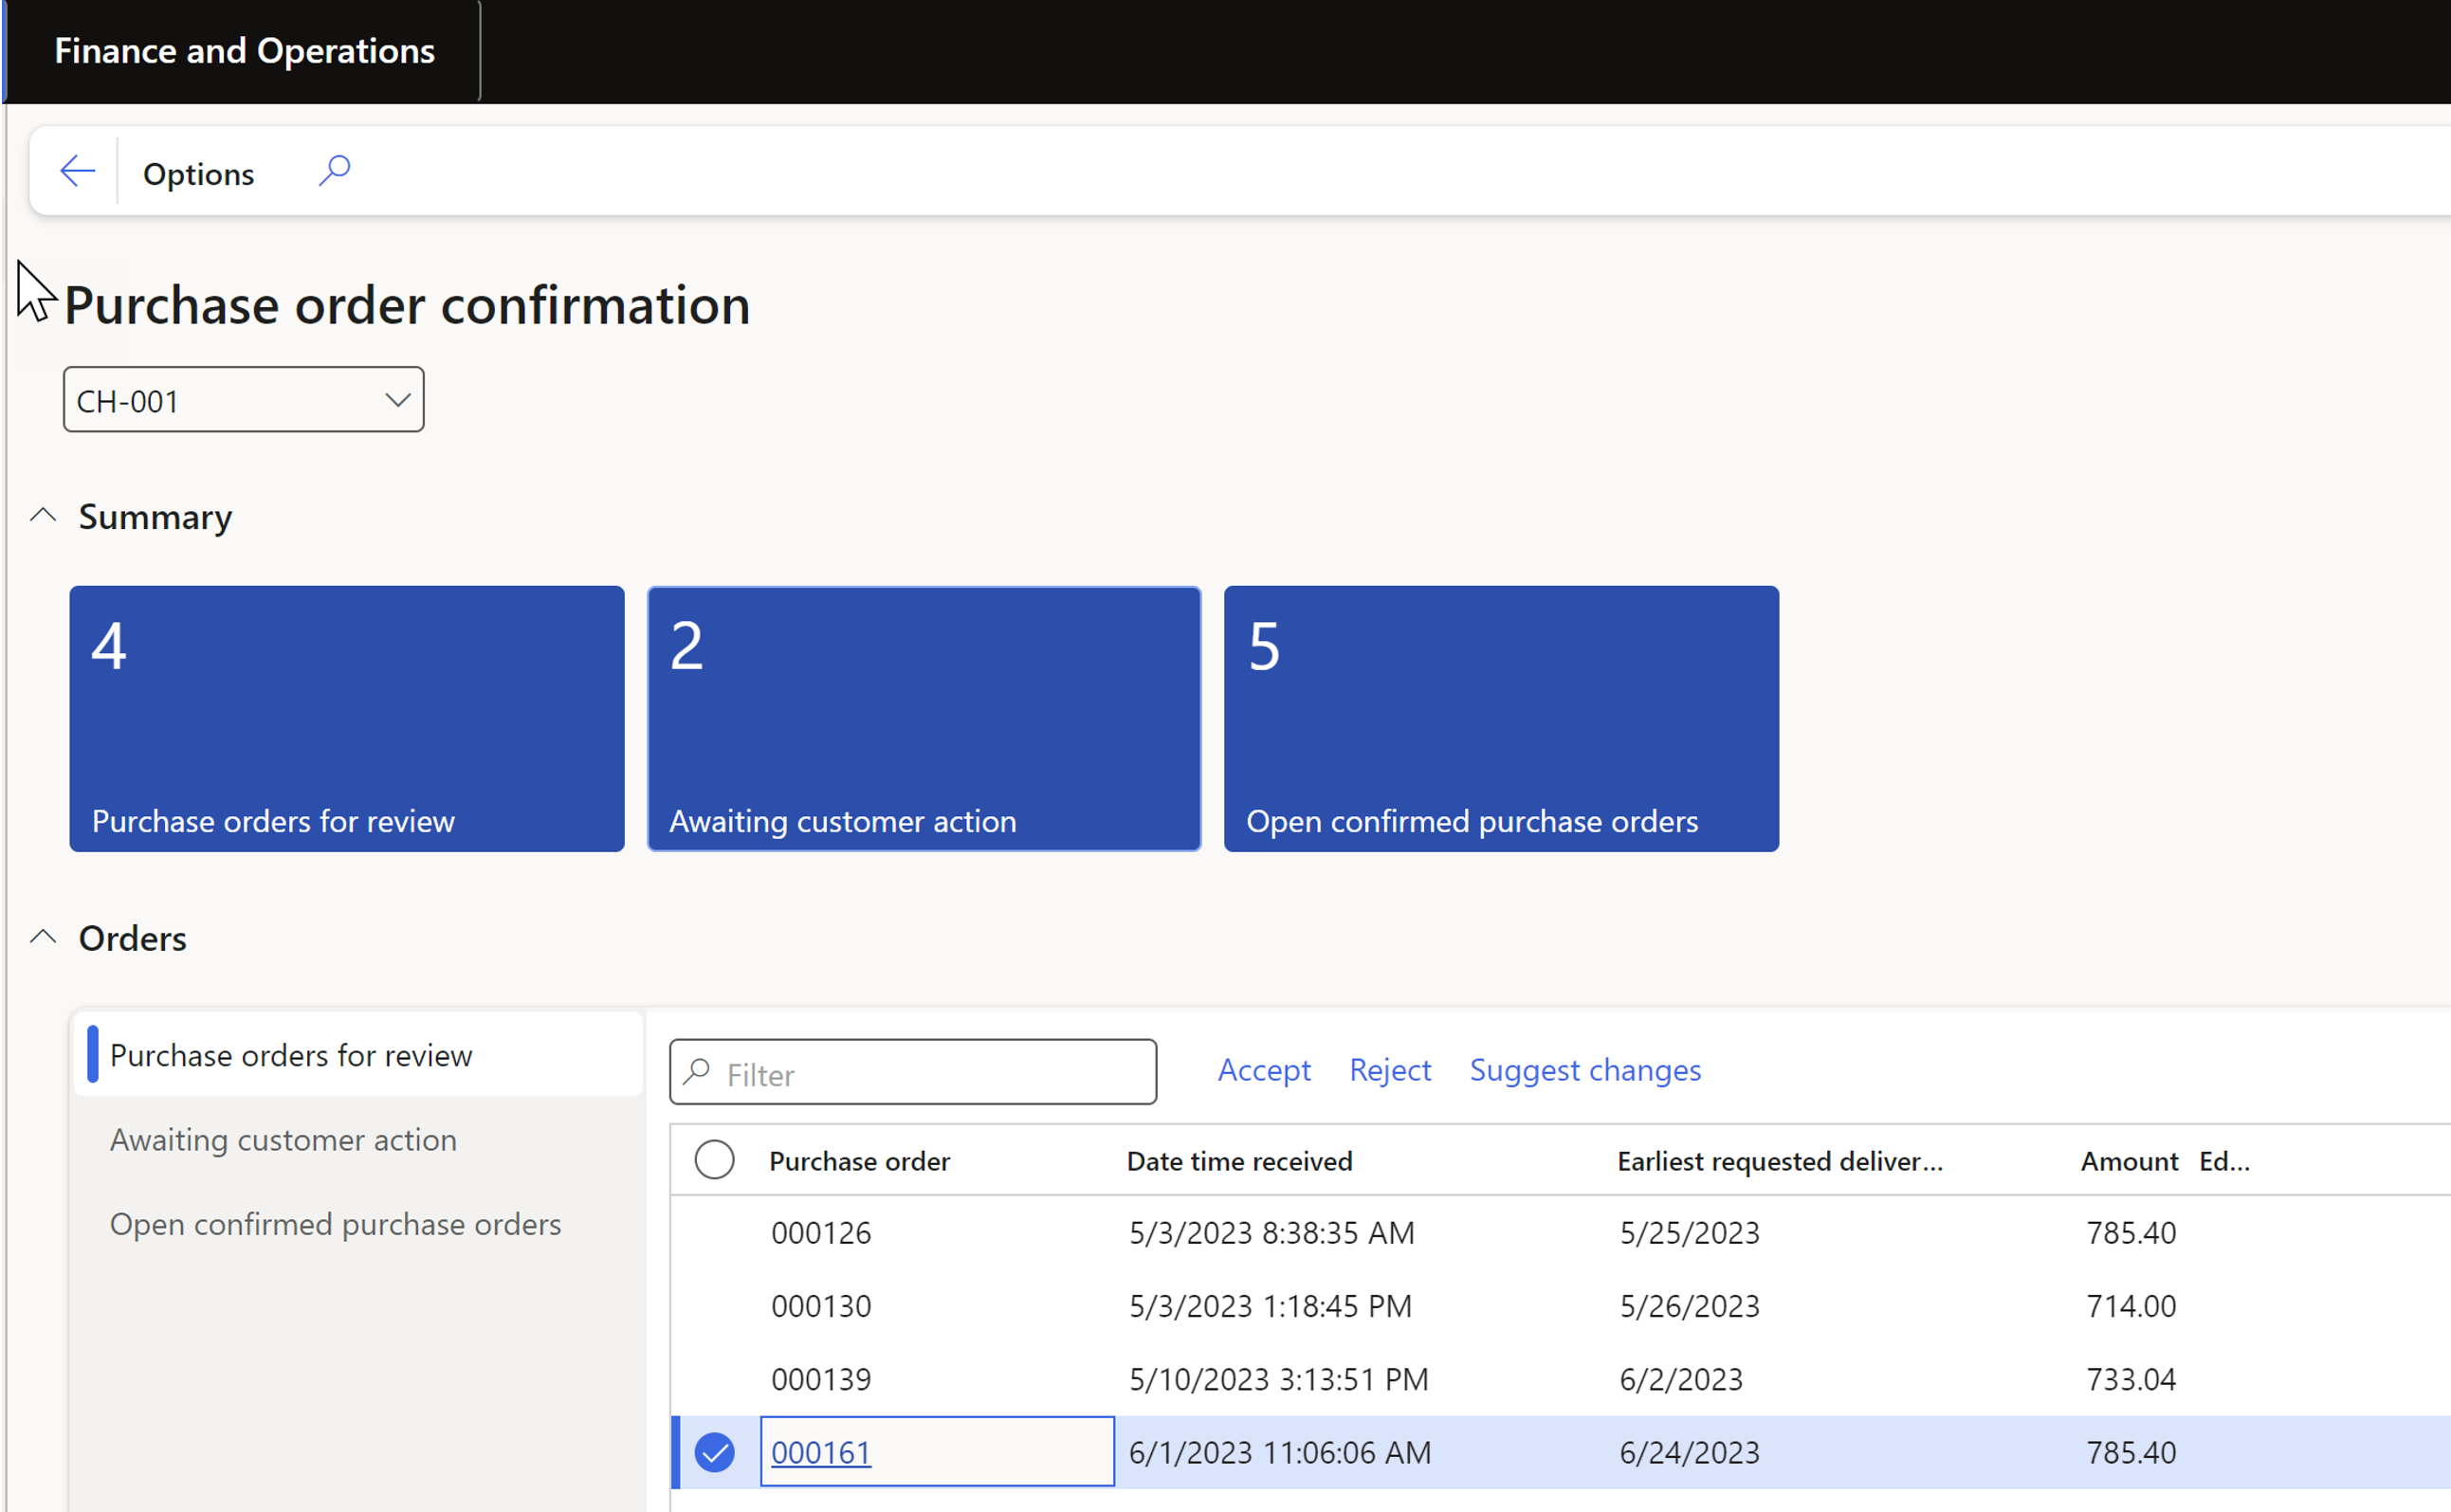
- Detailed information for the purchase order is shown and the vendor can either Accept, Reject or Request changes.

- When the vendor has accepted the purchase order you can confirm and receive the order.
For more detailed description of PO process see Microsoft documentation or we can recommend this blog:
Invoice creation
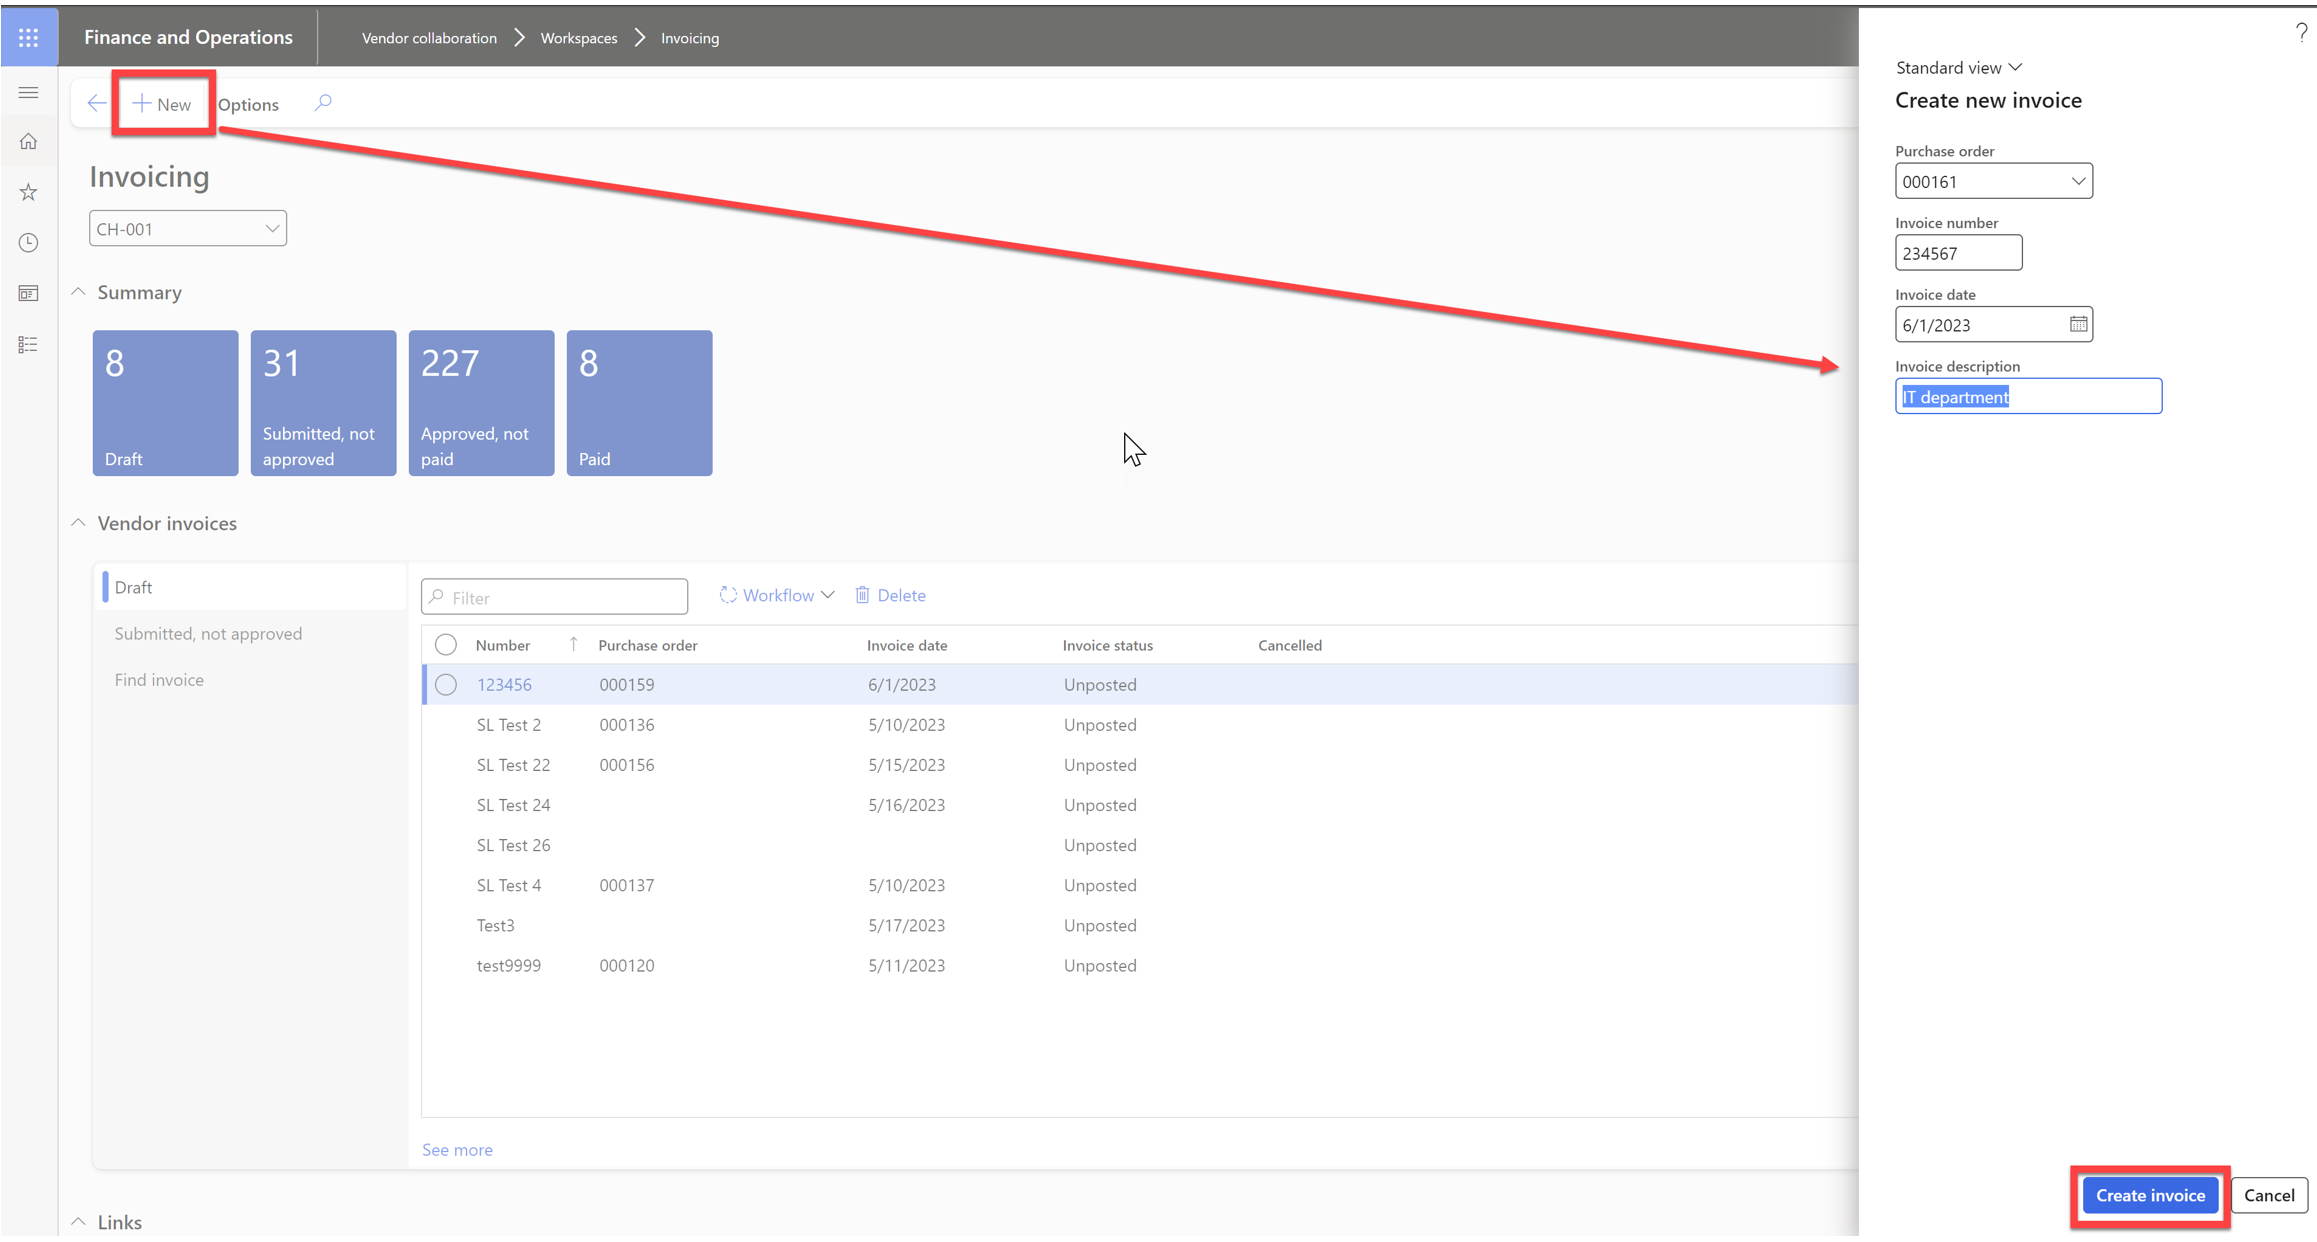
Create new invoice from vendor collaboration portal
The vendor can now create the invoice in the portal and send it to the customer.
- Go to Vendor collaboration portal > Invoicing workspace.

- Select
New - Mark the purchase order, add invoice number, date and description
- Select
Create invoice
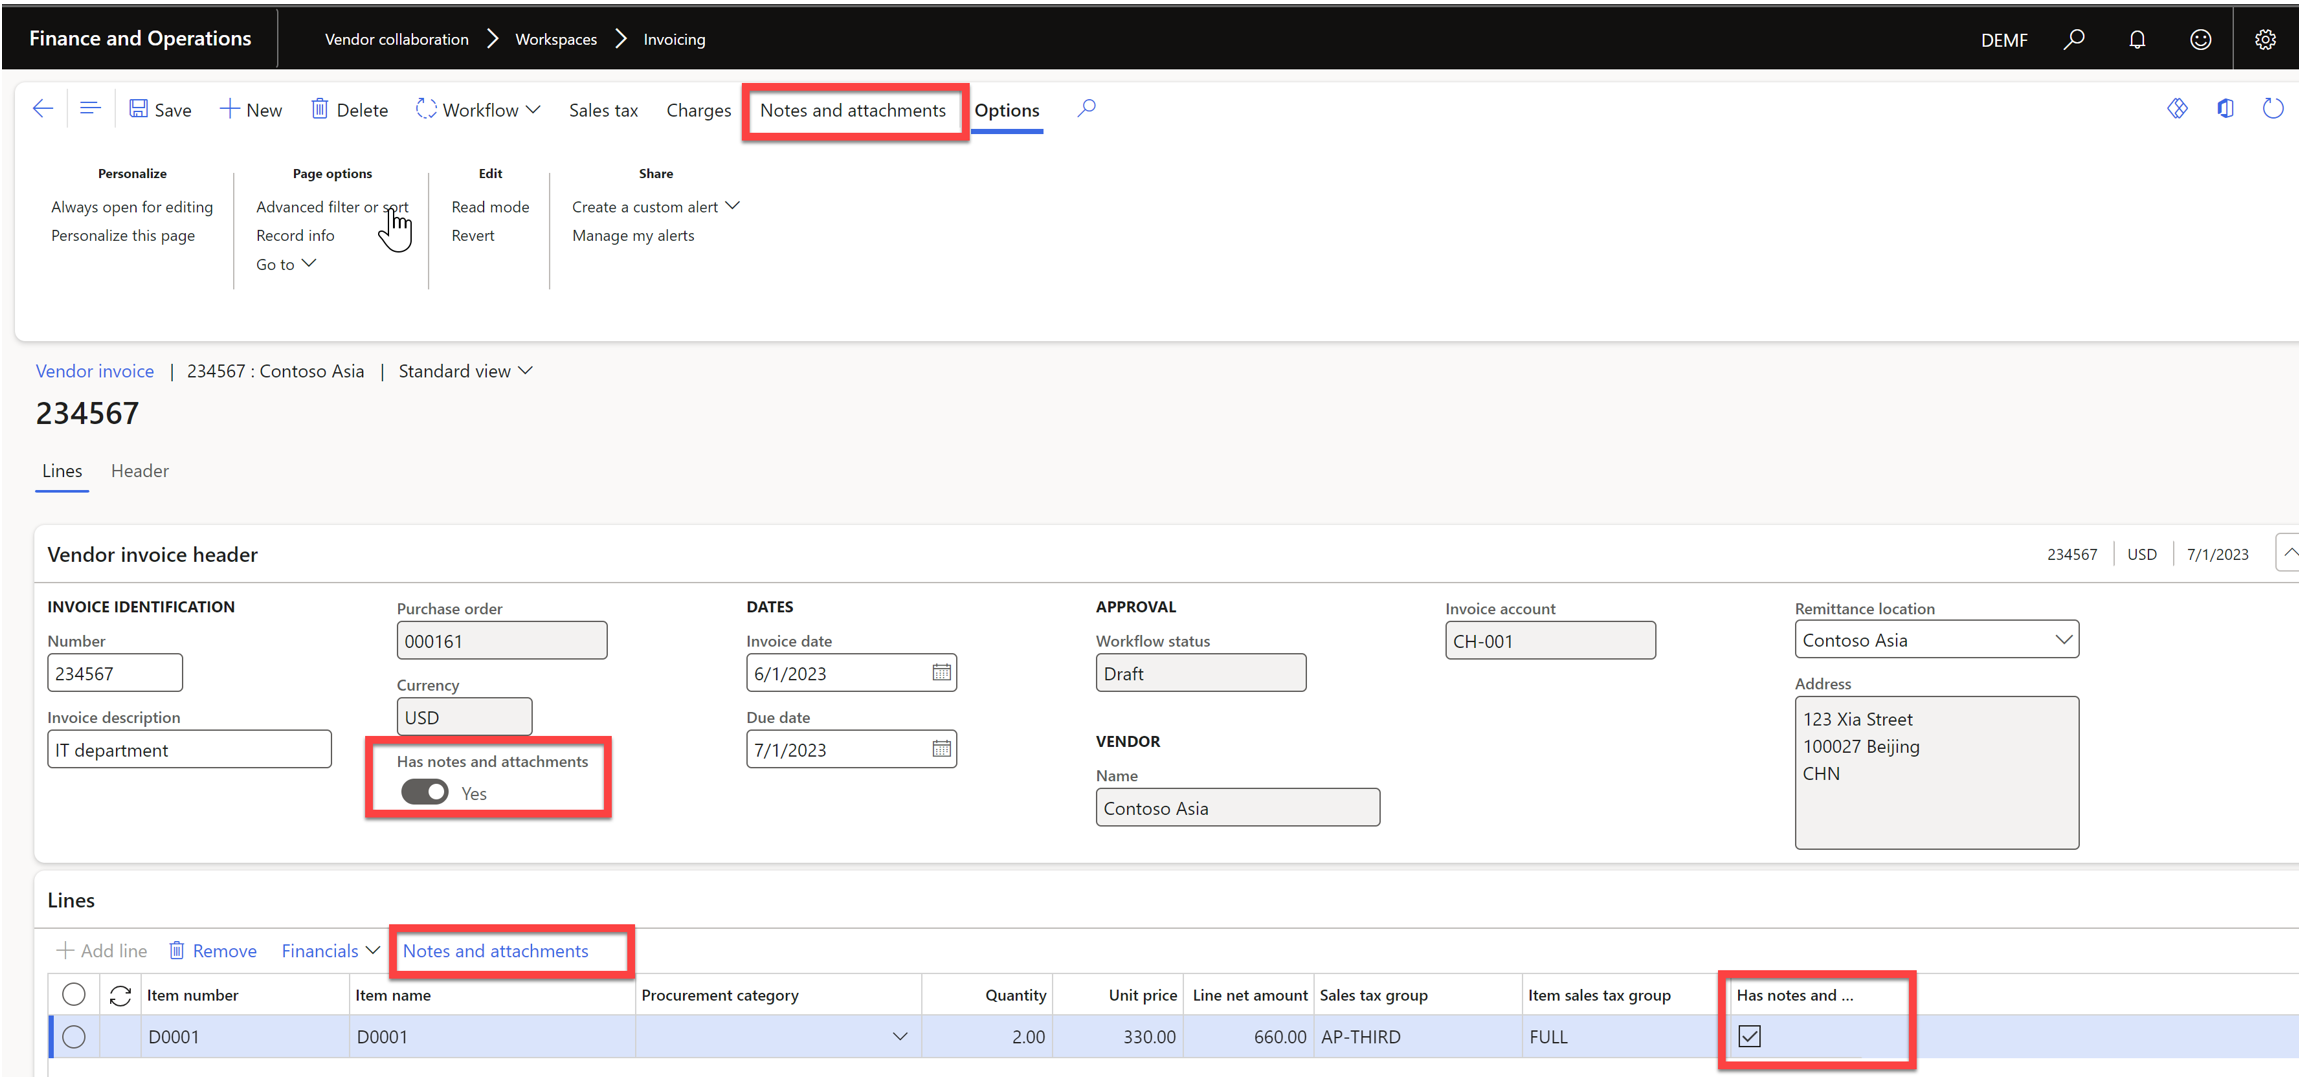
Attachments and notes
The vendor can attach notes or attachments on header and line level. It can be an invoice copy or any other document. This also is marked with a flag for “Has notes and attachments”.
Note: ExFlow can support one PDF attachment on the header level and will take the first one and treat that as an invoice copy.
Submit invoice to D365FO and ExFlow
When the invoice is created and validated it needs to be submitted.
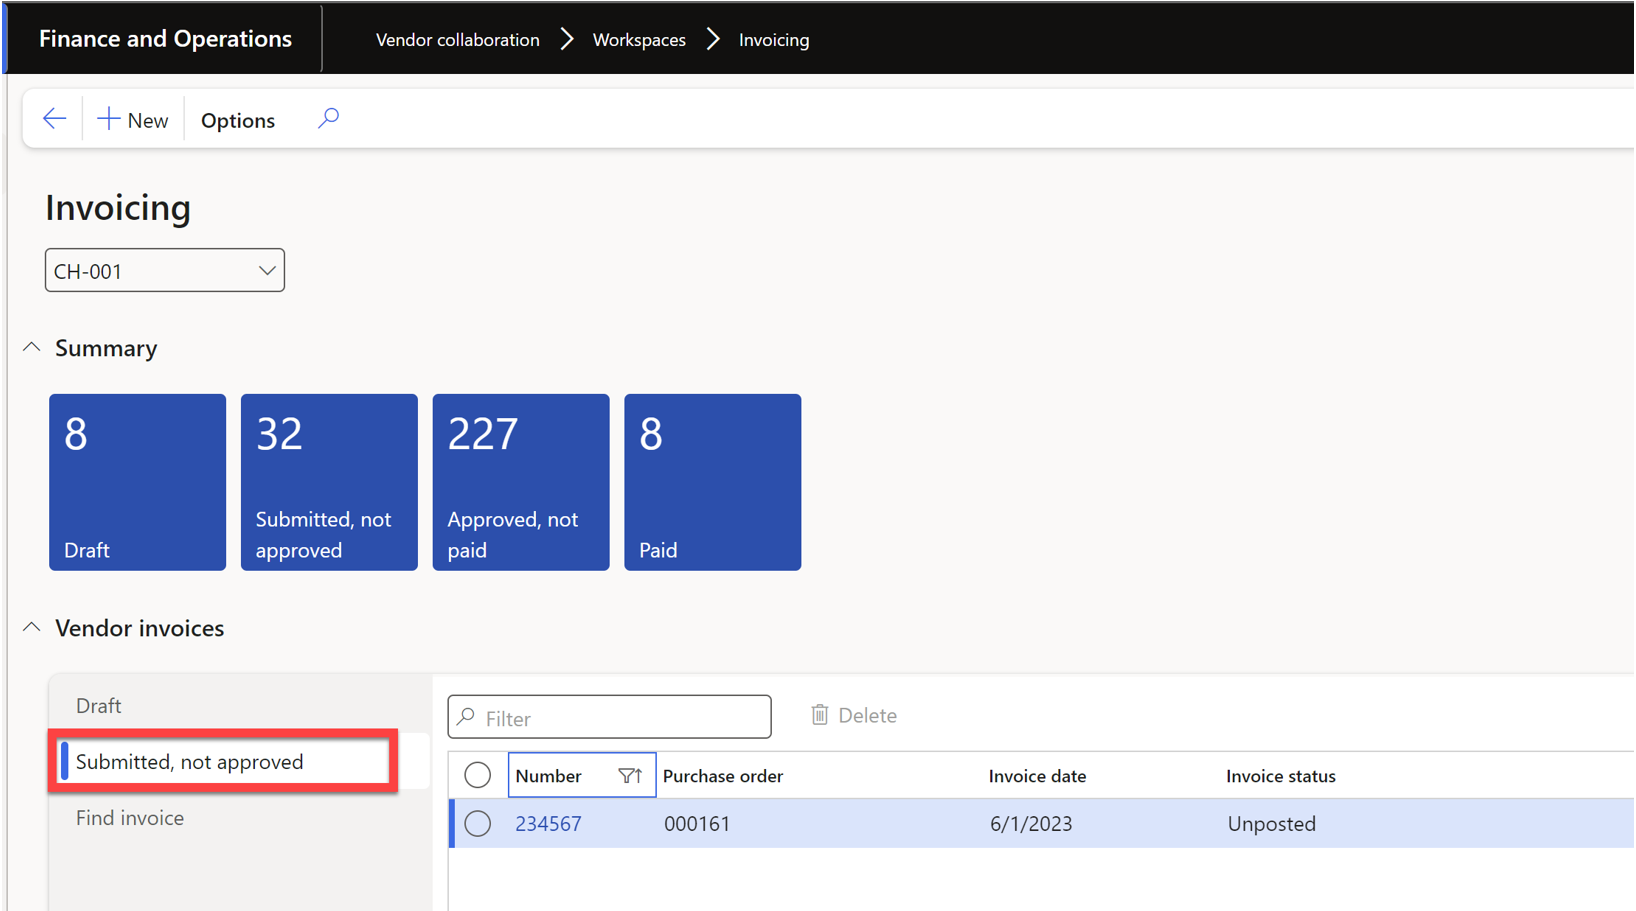
- Go to the Vendor Collaboration portal and Invoicing workspace.
- Select the invoice under the tab "Draft" and select "Workflow" and "Submit".
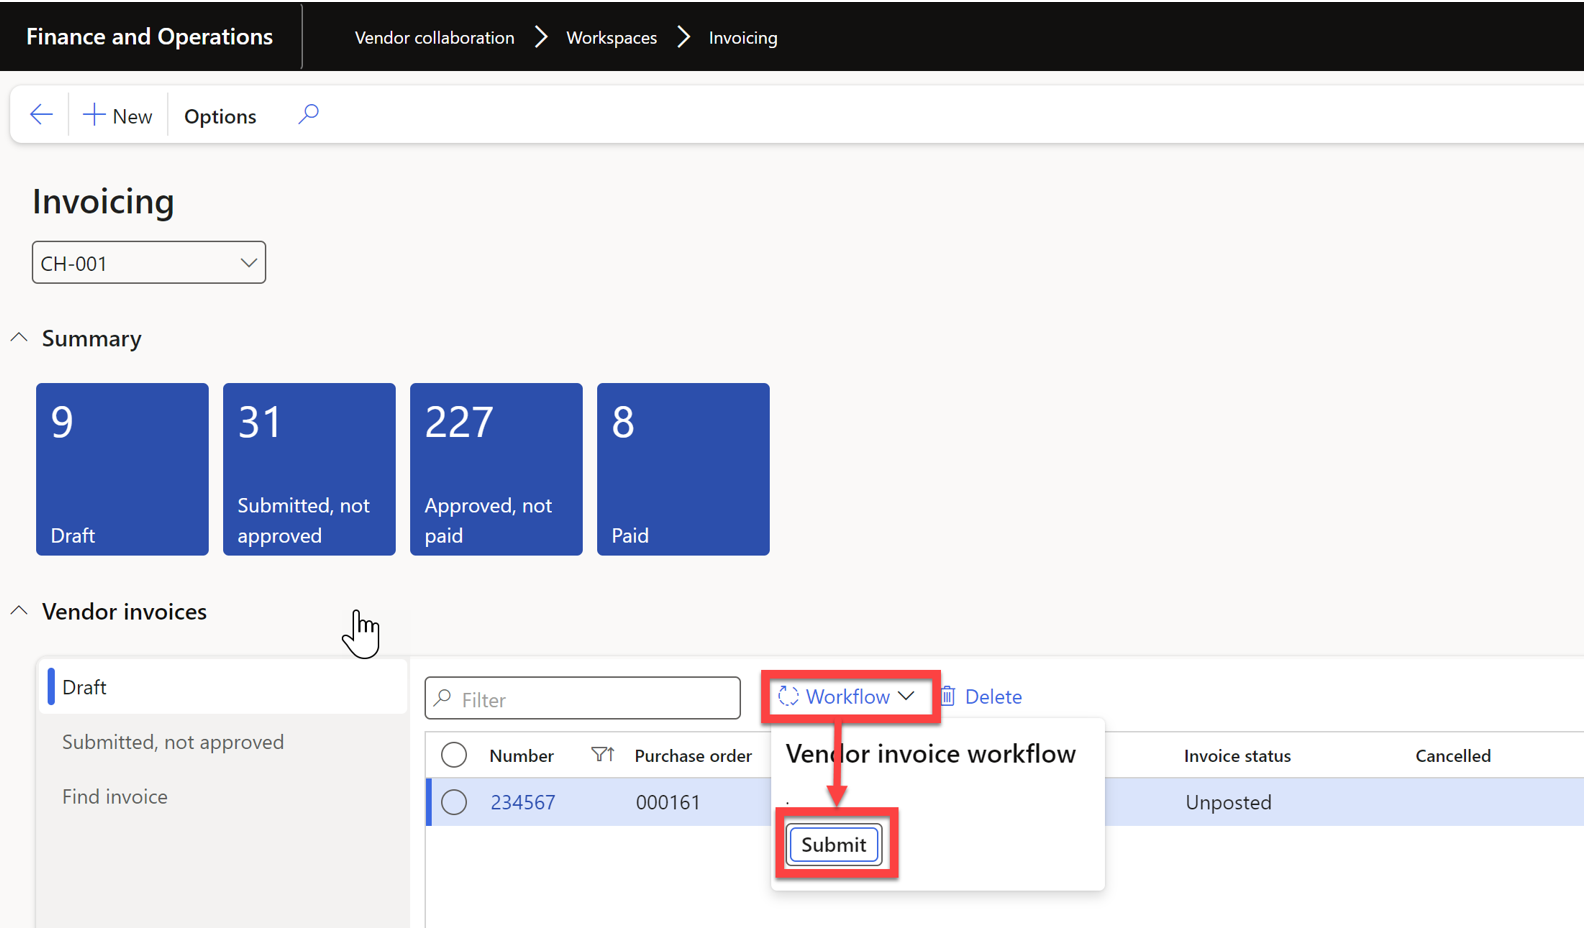
- When the invoice is submitted it can be shown under Submitted, not approved.
Invoice process in ExFlow
When using ExFlow and running Vendor portal the invoice should be imported as any other vendor invoice. The “Vendor portal” invoice will be sent to import history instead of being processed in pending invoices.
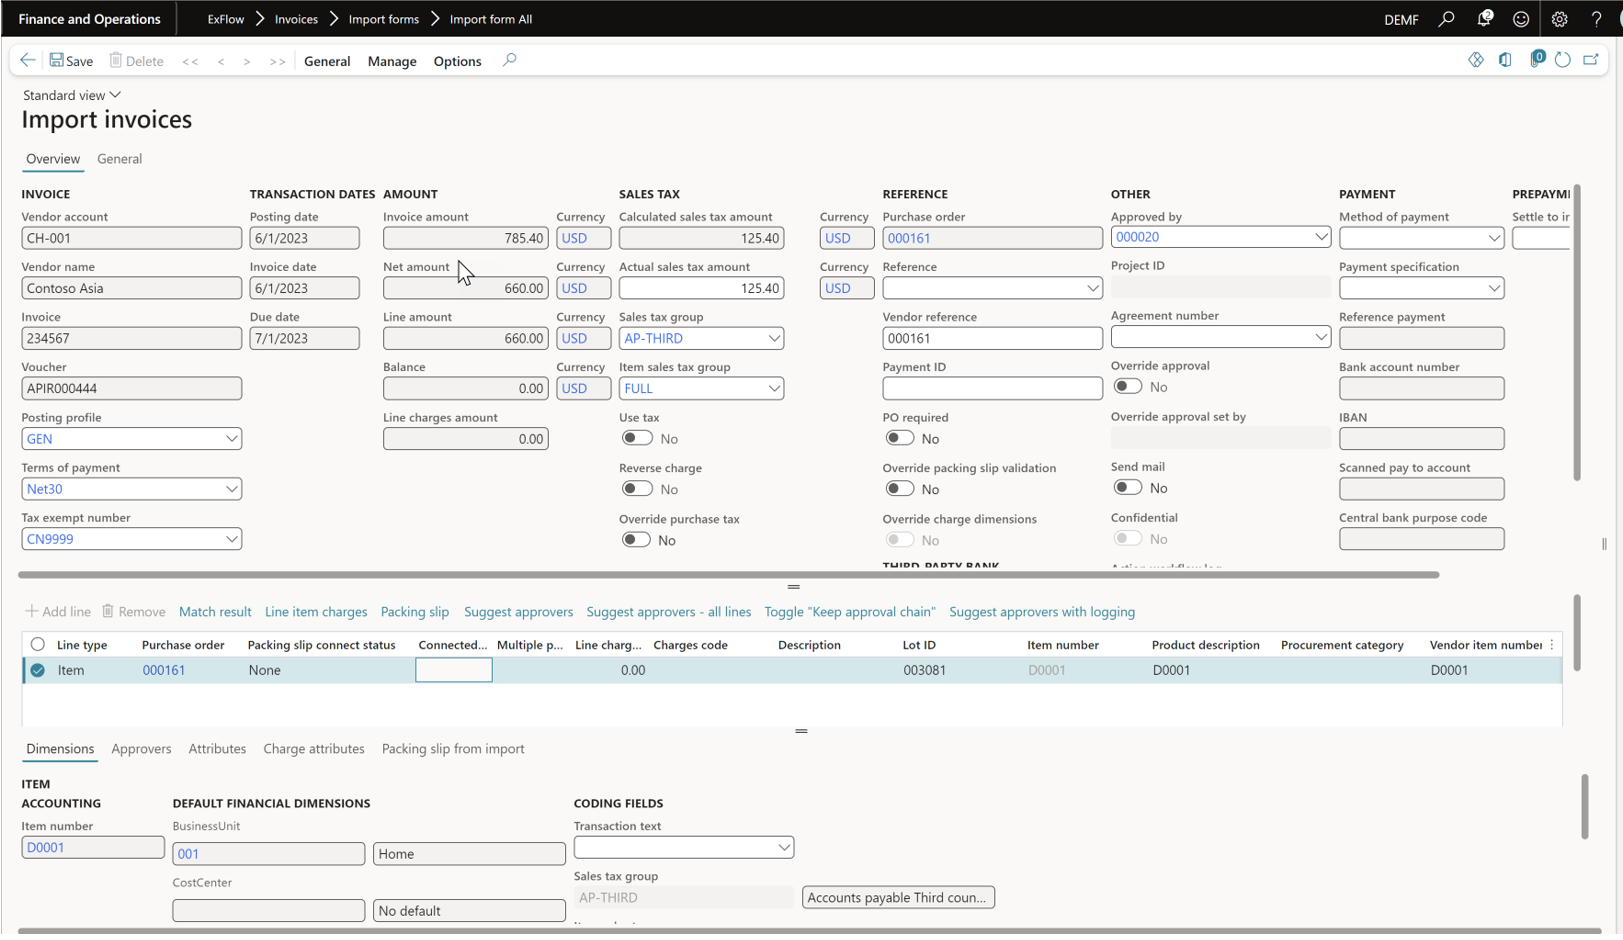
Import invoice to ExFlow
- Go to ExFlow > Invoices > Import forms > Import form All.
- Select "Import" and "Scanned Invoices".

- When the invoice is imported to ExFlow Import form, some of the information is locked for editing.
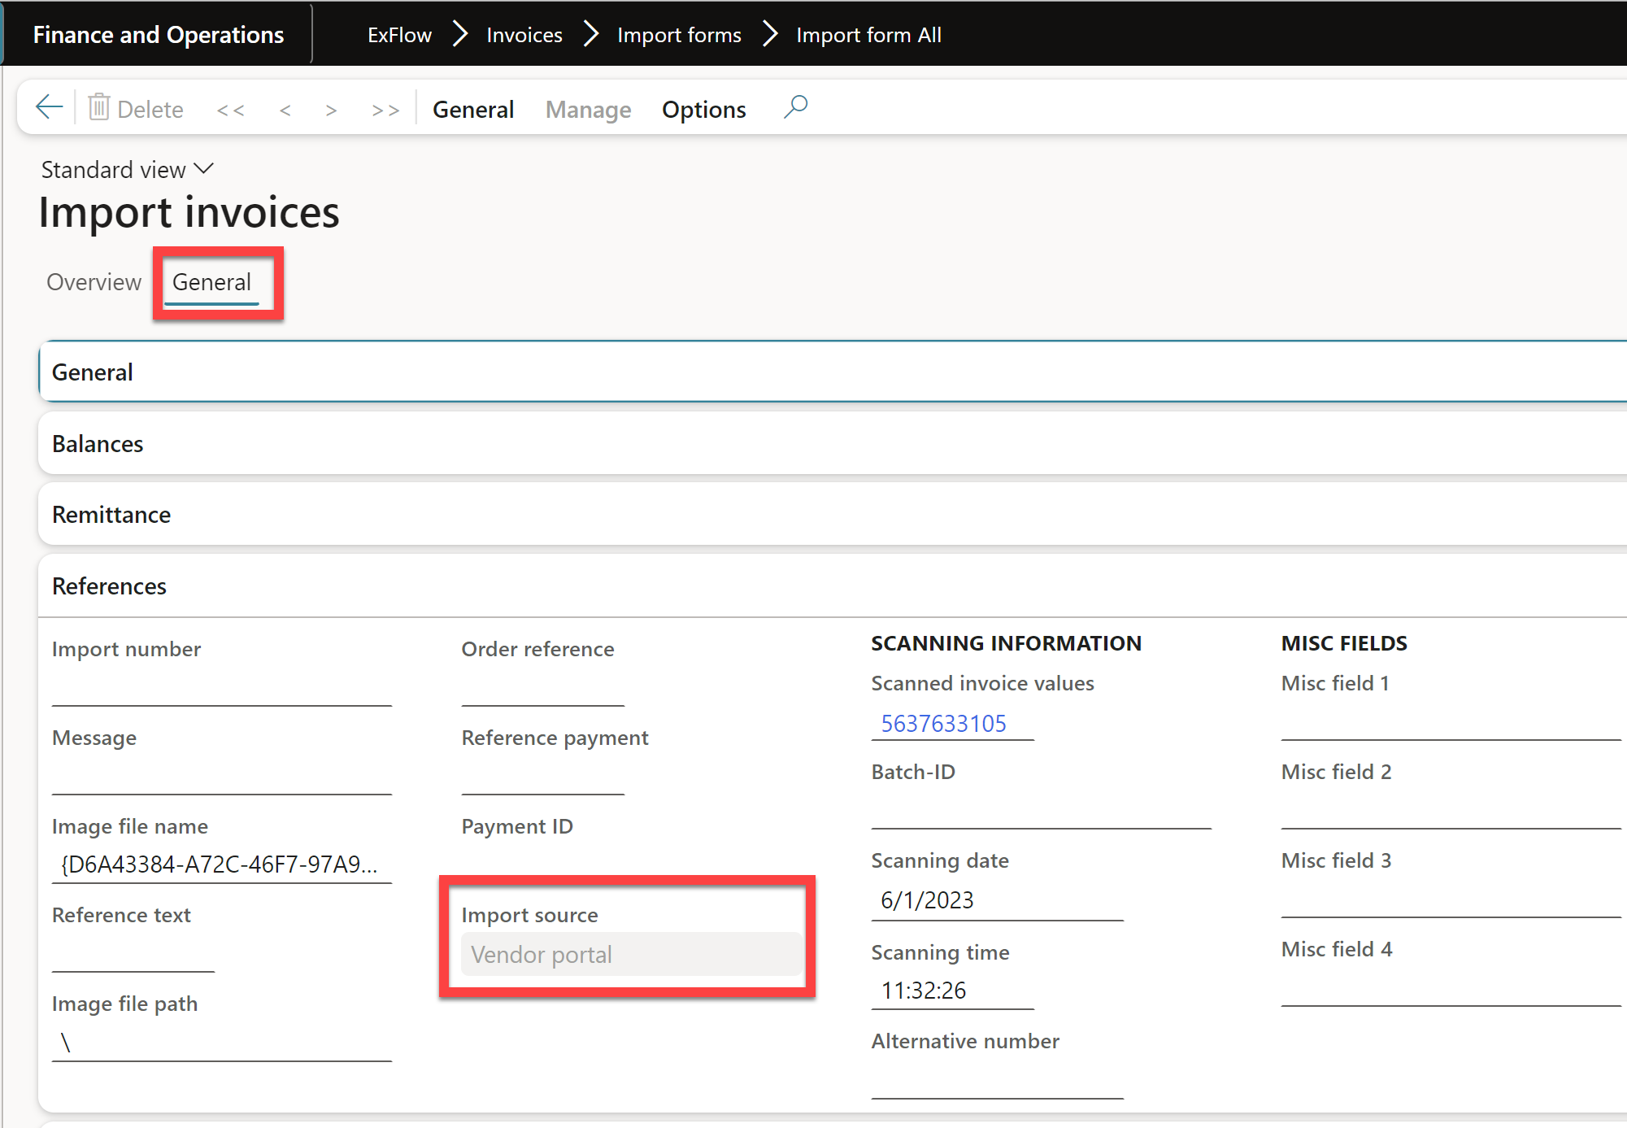
- Under General tab and References, you can see the Import source = Vendor portal.
Approval of the Invoices
ExFlow web
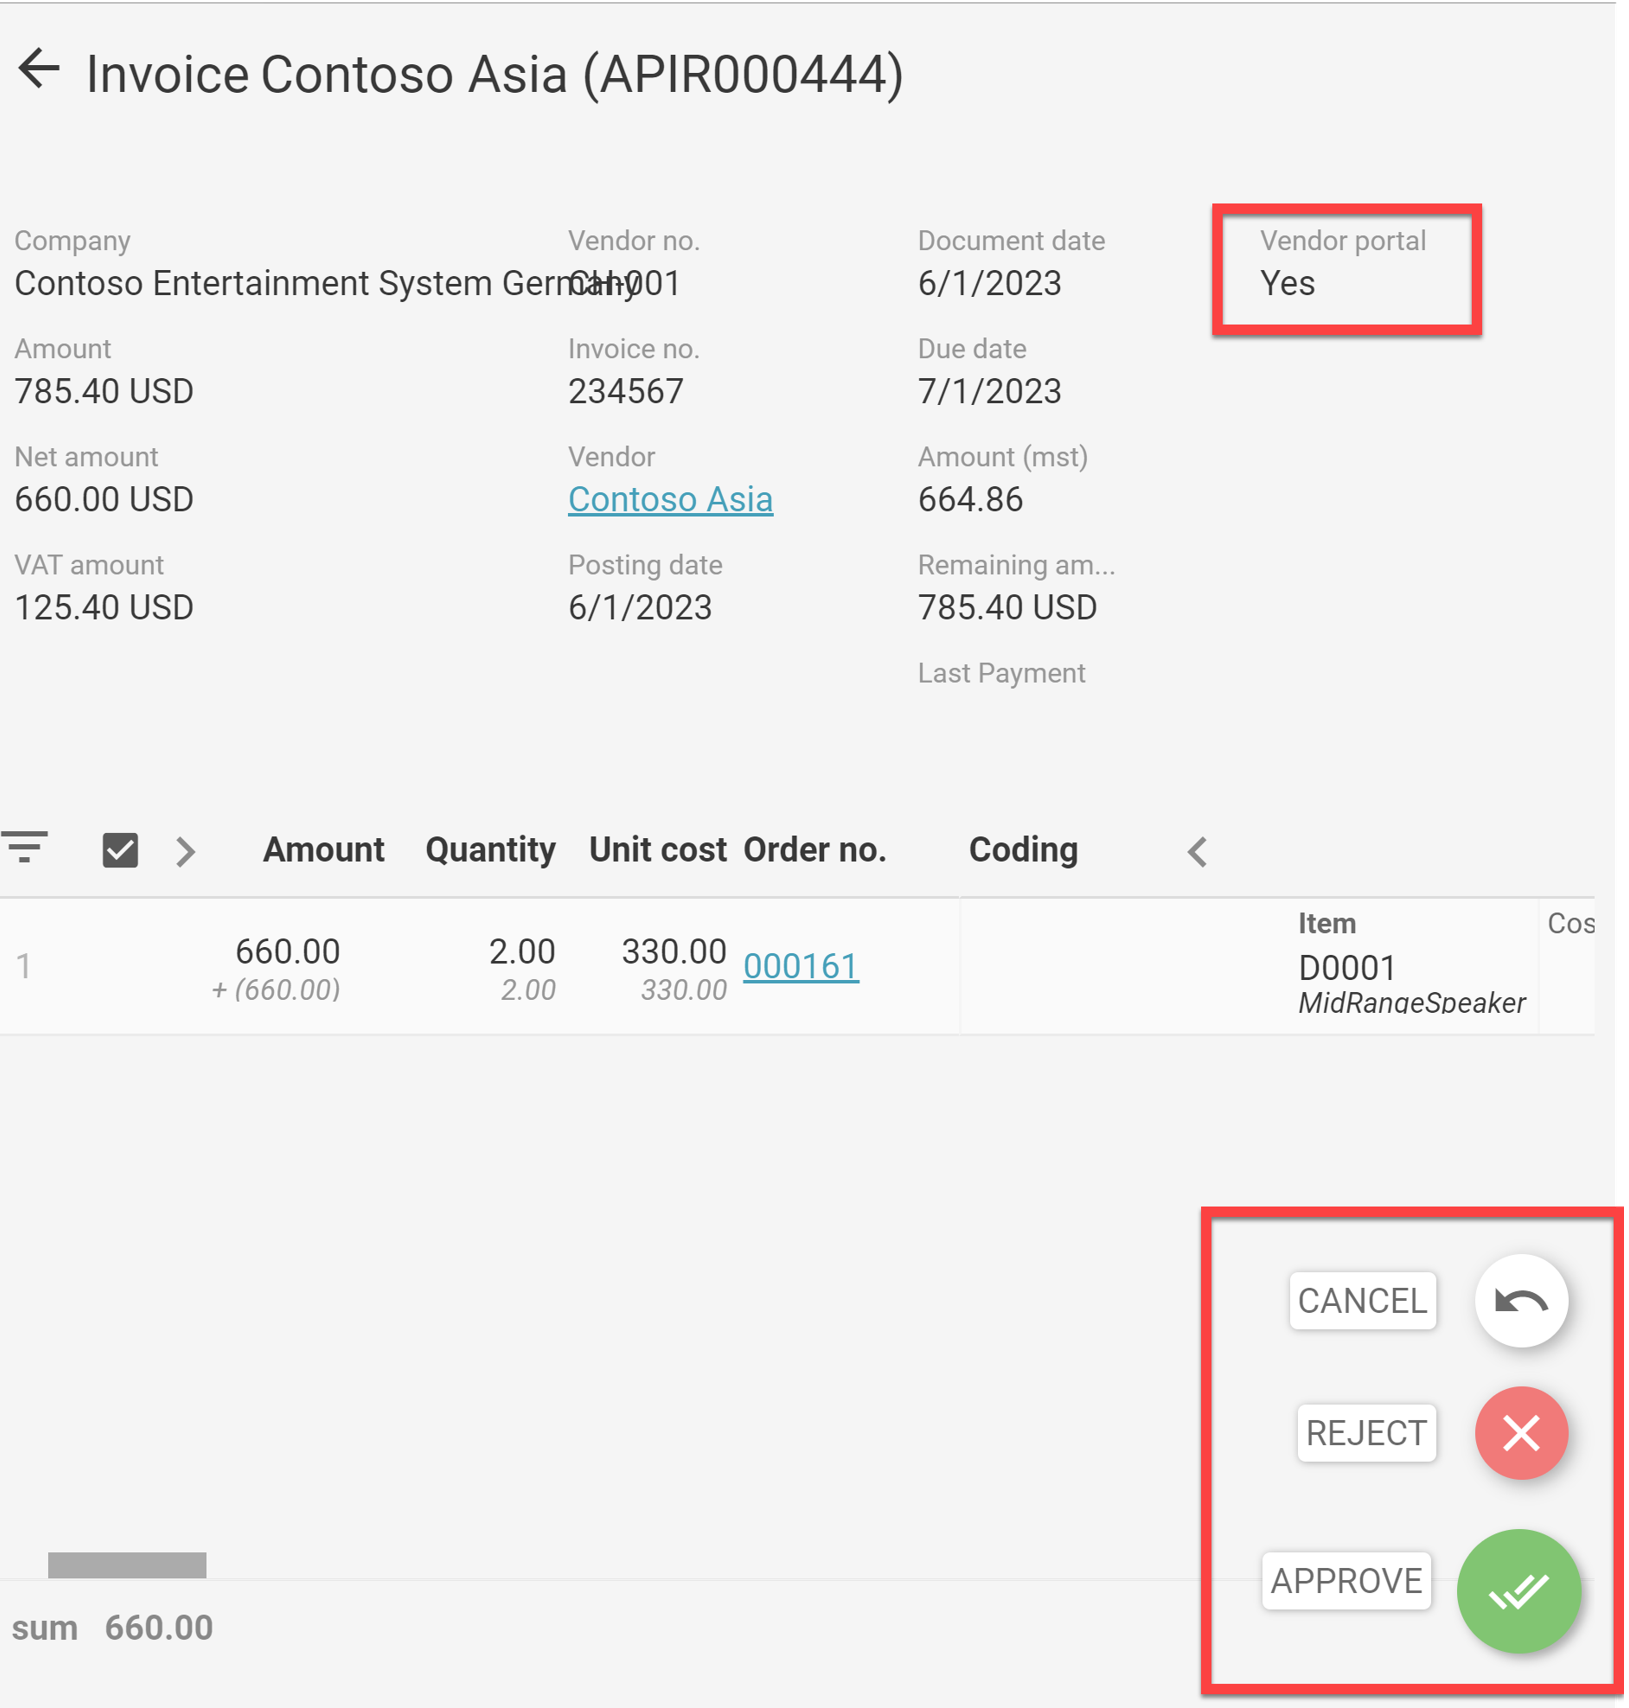
To make it visible for the approvers that this invoice comes from the portal and therefore has limited options. The invoice will be marked with Vendor portal = Yes in ExFlow web.
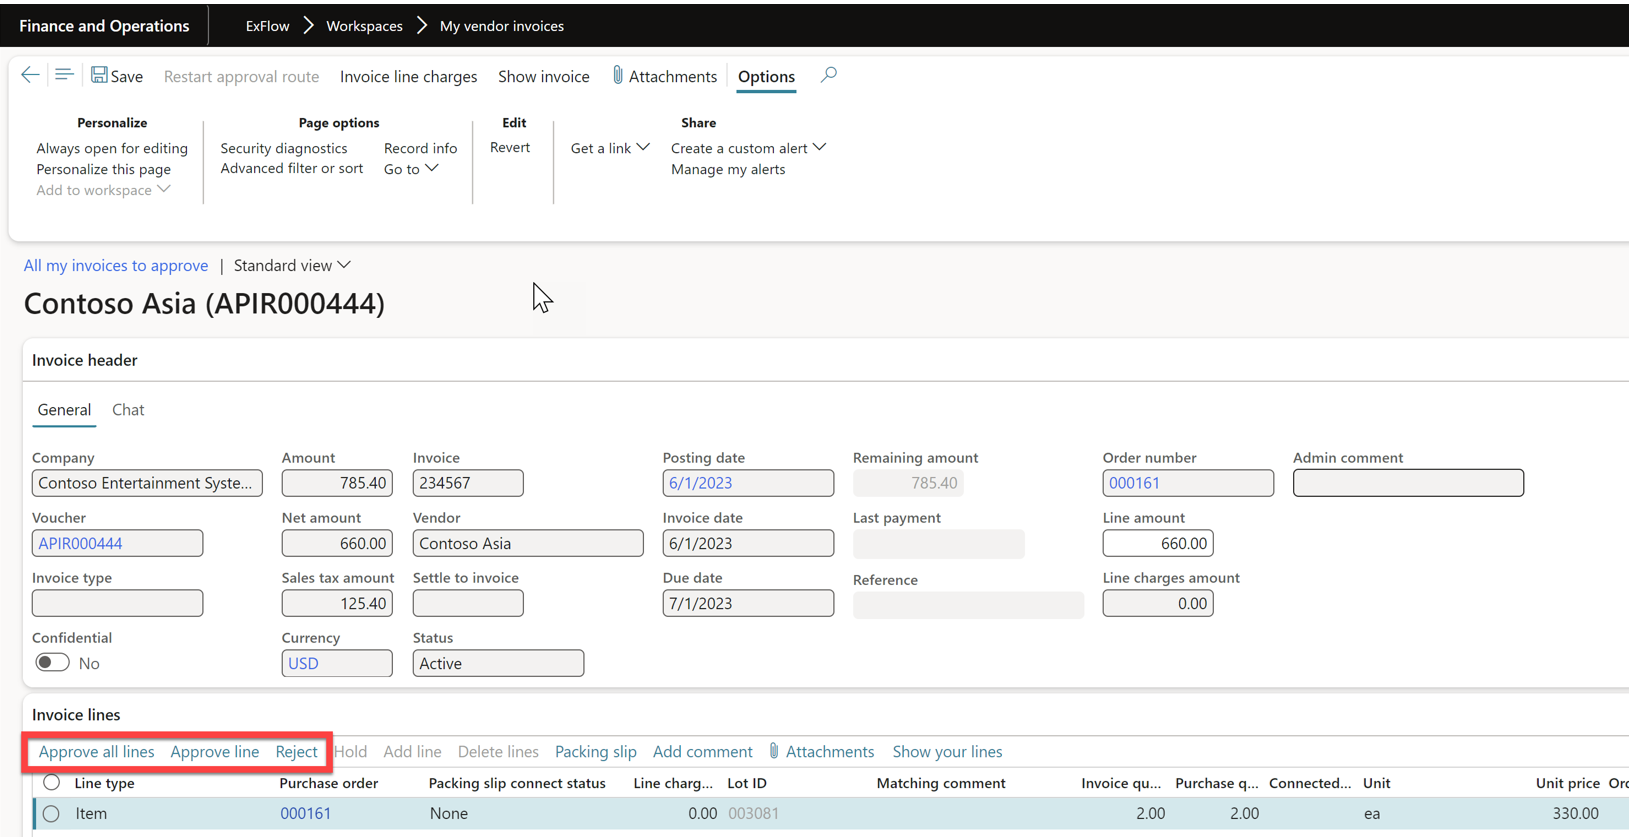
- The approvers can only Approve or Reject the invoices.
My vendor invoices
If the approver is using "My vendor invoices" instead of ExFlow web to approve the invoice, the same options will apply.
View invoices in Vendor portal
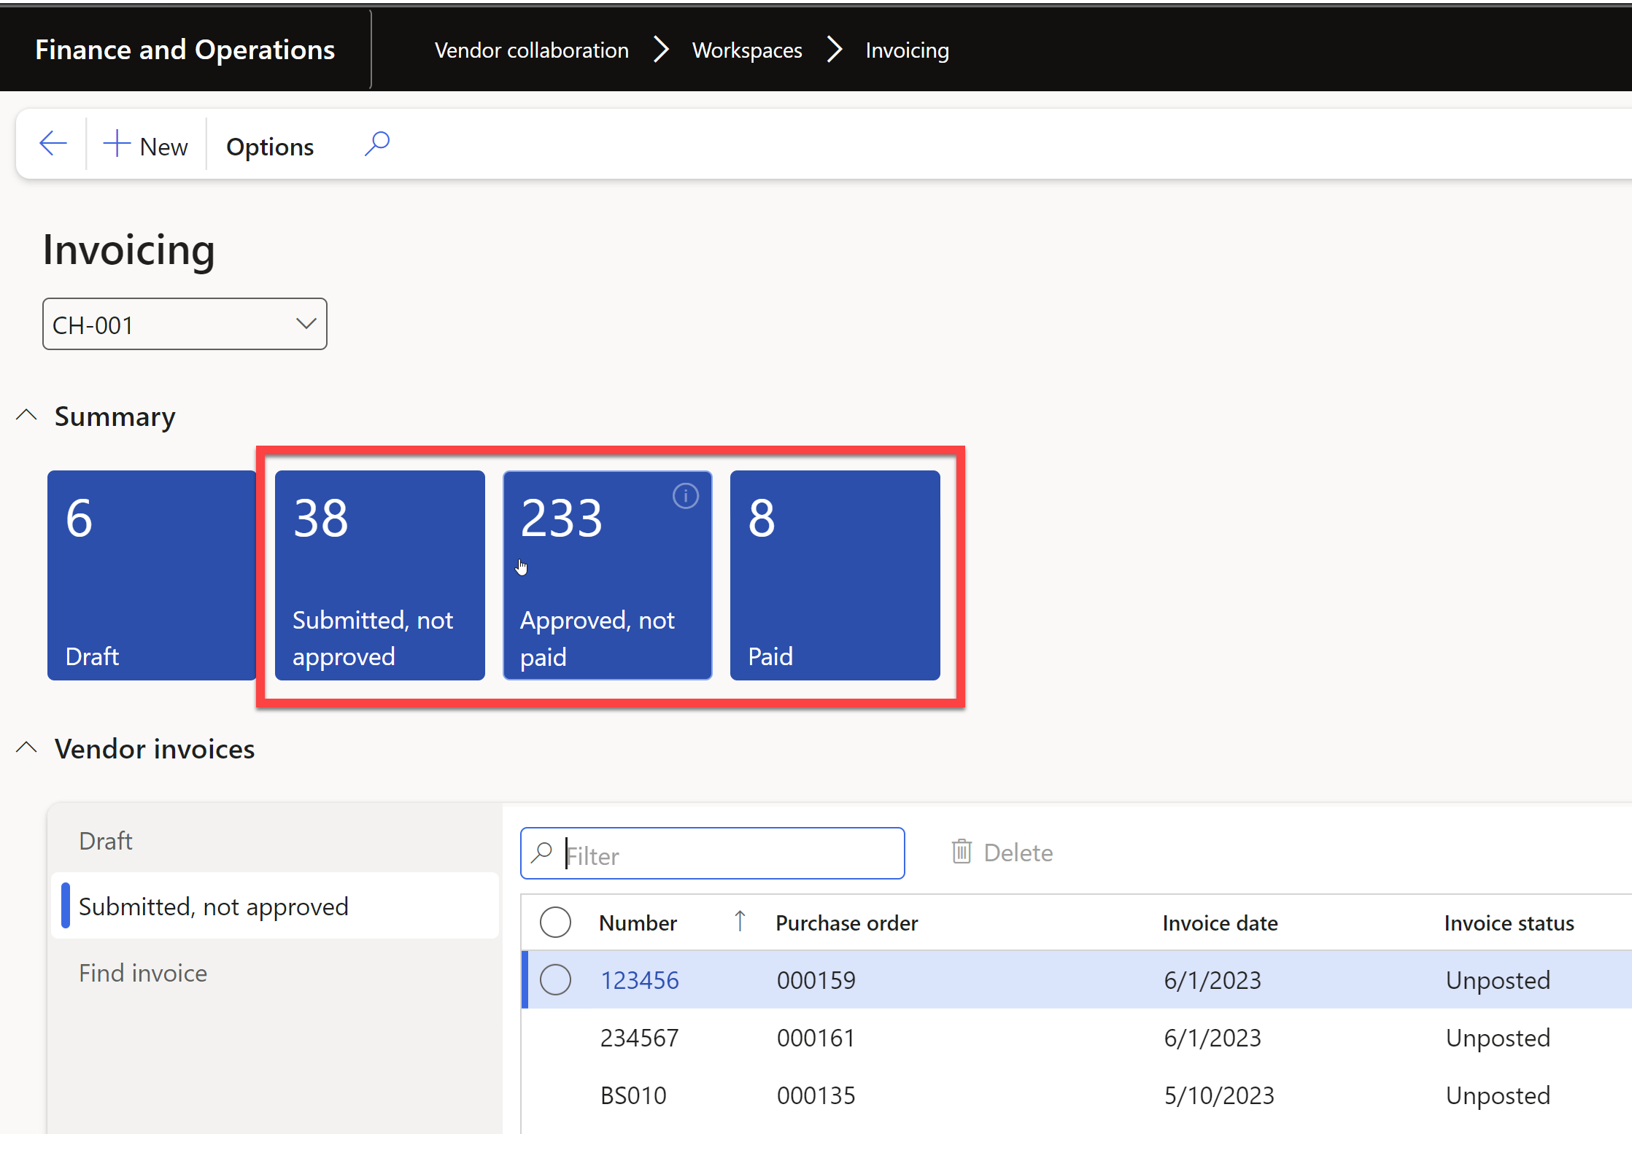
The vendor can follow the status of the invoice under the Invoicing workspace.
Submitted, not approved –> Invoice is submitted in the portal.
Approved, not paid –> Invoice is approved and posted.
Paid –> Payment is posted.
Note! Once an invoice is approved you can no longer open it to see the details.
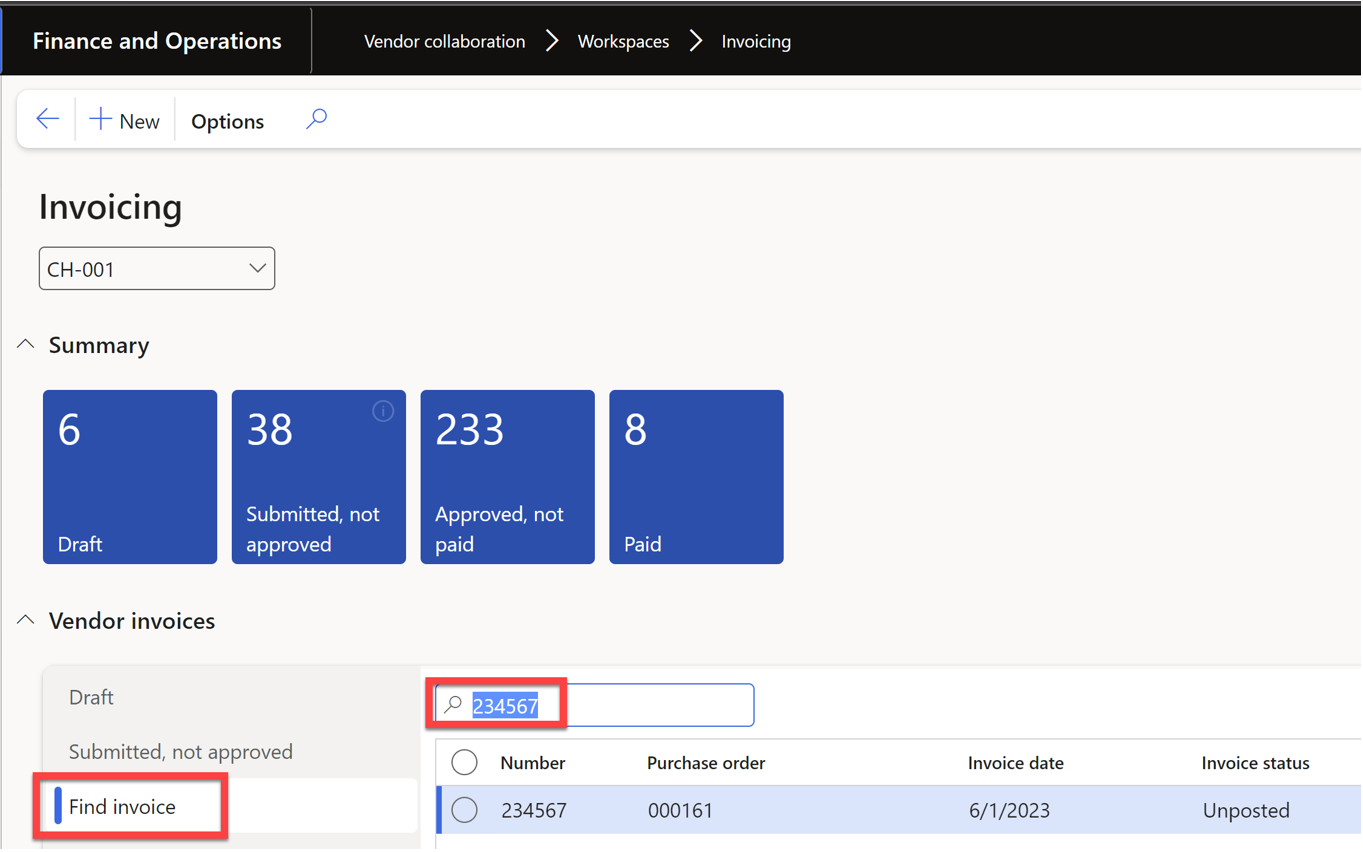
Find the invoice
There is also an option to search for invoices under #Find invoice# by using the search bar.
