Auto create debit and credit from posted invoices
Purpose
The Solution is to allow the customers to generate debit and credit invoices from a posted invoice, to correct incorrect coding from an invoice in the AP sub-ledger instead of correction through a GL journal.
If using the button Create correction invoices the 2 new invoices should be automatically created in import form and settled against each other if using “Exflow automatic credit handling”. Using the button Credit invoicing only one invoice will be created in import form.
Setup and prerequisites
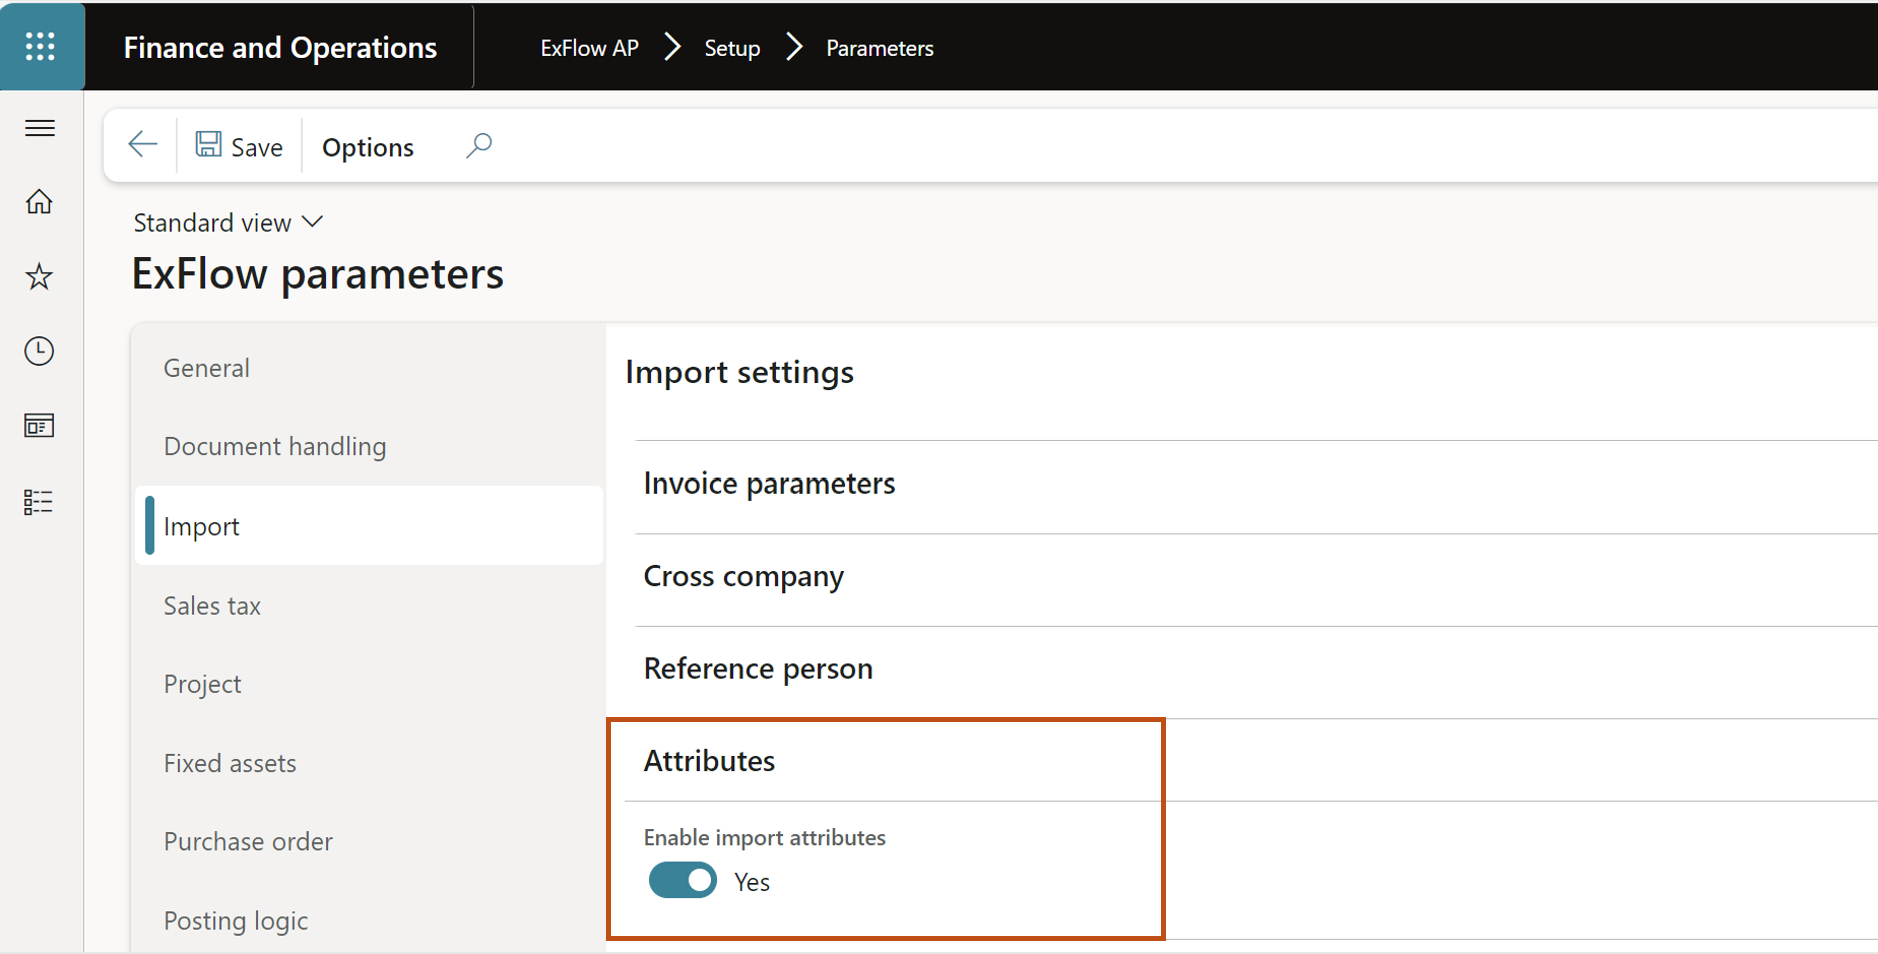
Enable Attributes
ExFlow | Setup | Parameters | Import
One of the requirements to create new invoices to import form is to activate the attributes functionality.
- Navigate to ExFlow AP | Setup | Parameters
- Select
Yes
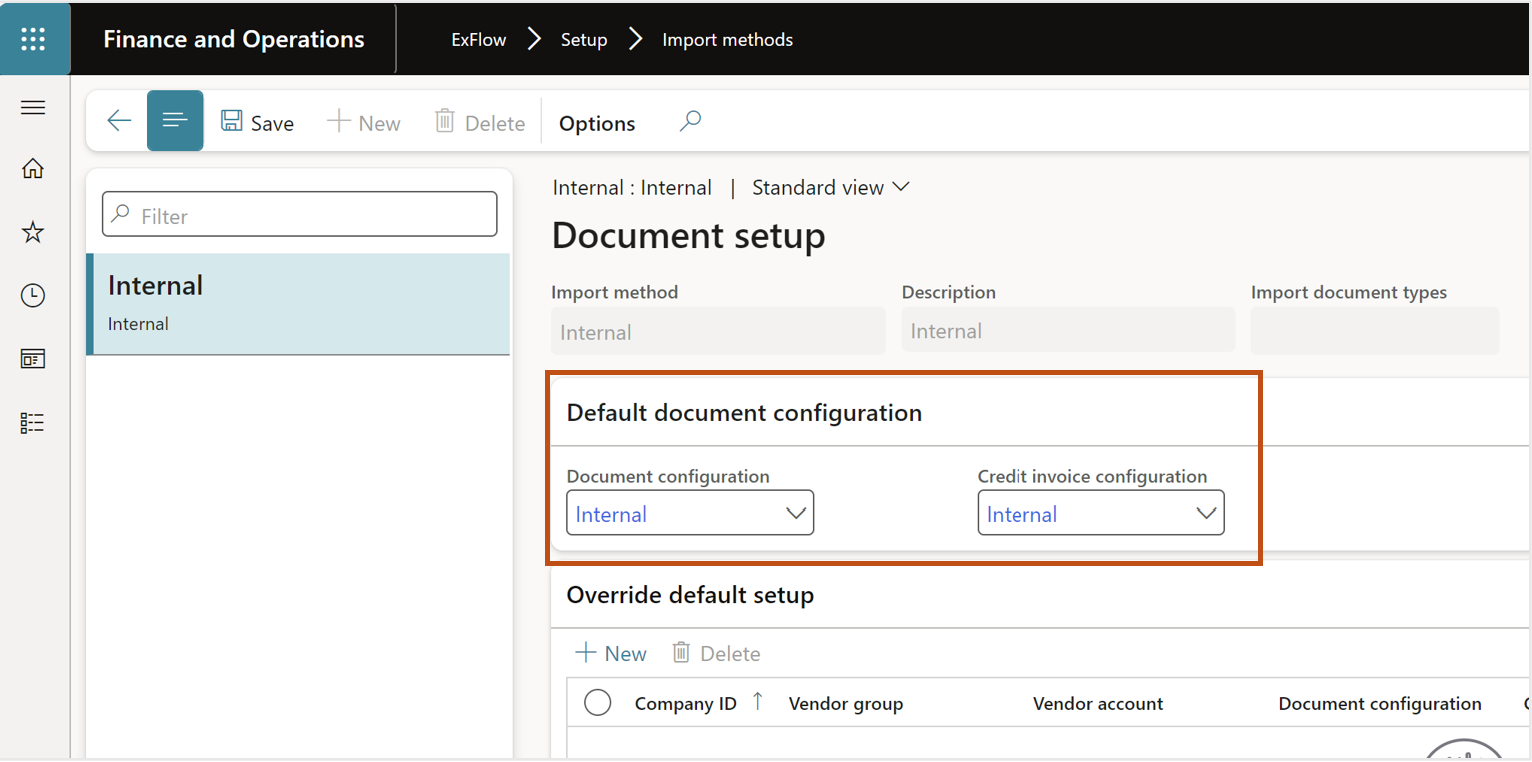
Enable Credit/debit handling
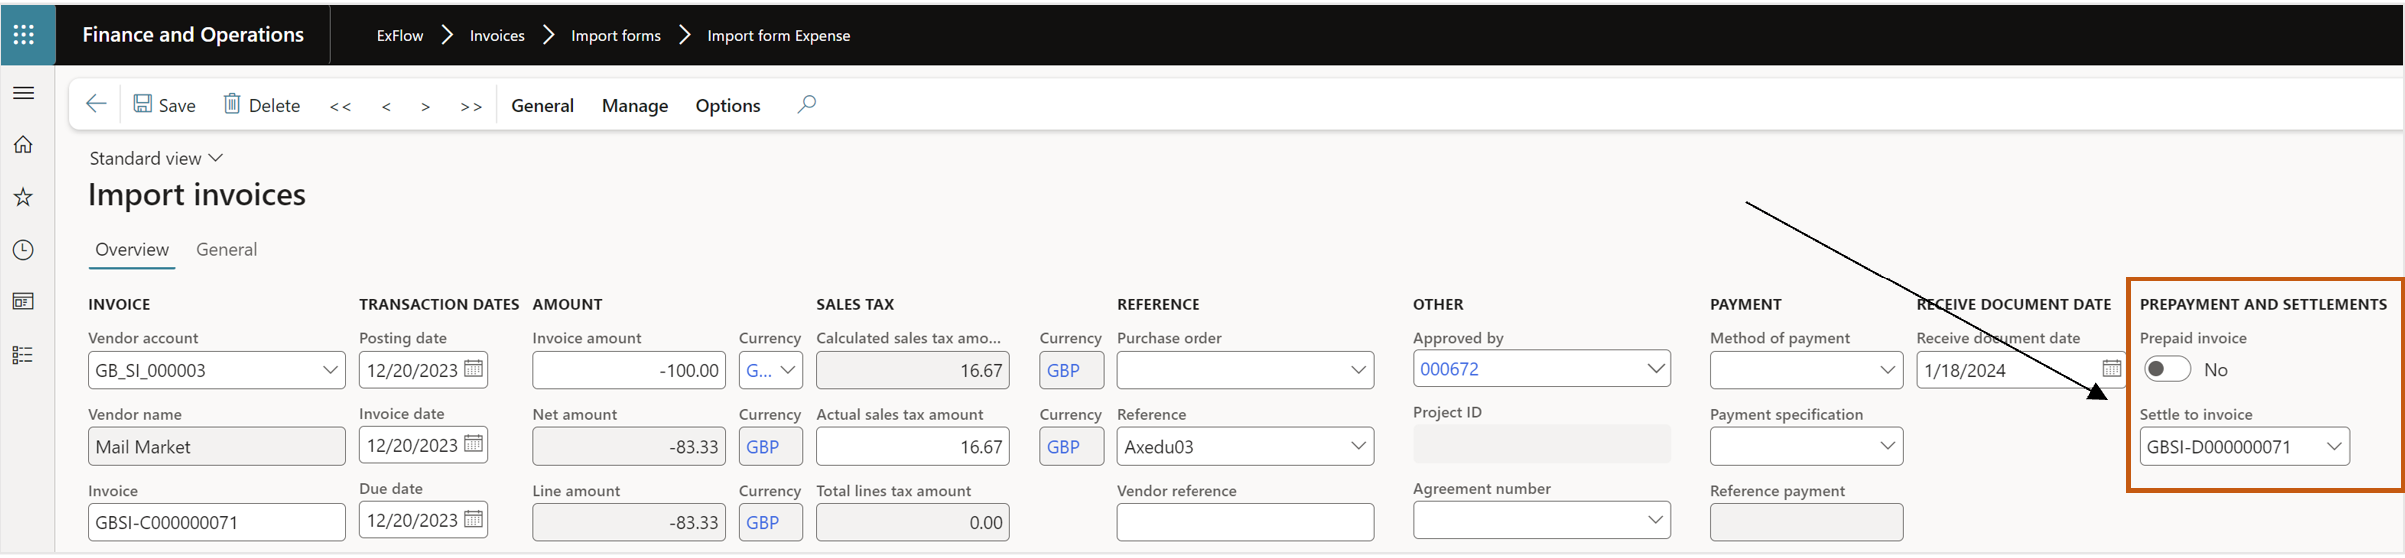
ExFlow | Setup | Parameters | Prepayment and settlements
In the parameter form under the prepayments and settlement tab, find section called “Credit/debit handling”.

| Fields | |
|---|---|
| Debit invoice retain coding | If the parameter “Debit invoice retain coding” is set true (Yes) the lines will retain the coding making the invoice an exact copy. If it is set to false (No), the invoice should be created with the same lines as the original invoice but without coding. |
| Display reason comment | The reason comment should be added and displayed in the admin comment field. |
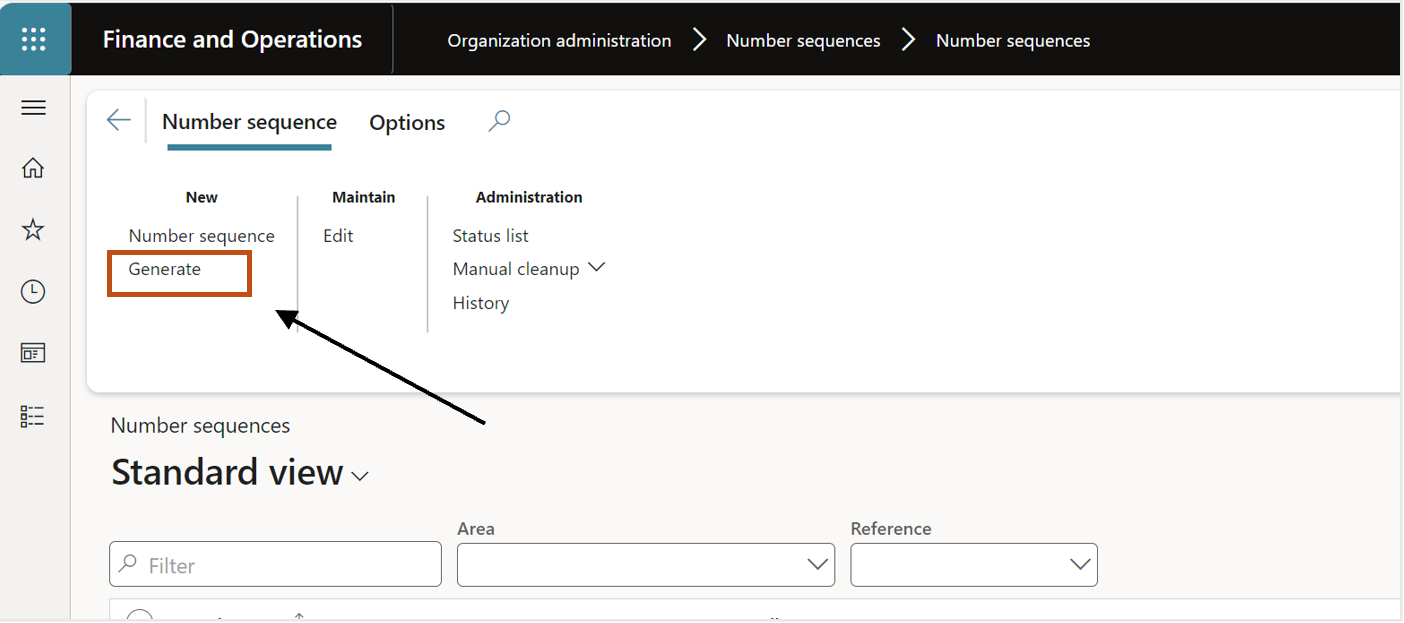
Generate number sequence
Create the number sequence for Debit and Credit invoice number by using the number sequence wizard.
- Organization administration – Number sequences – Number sequences.
- Select Generate.
- Select next.
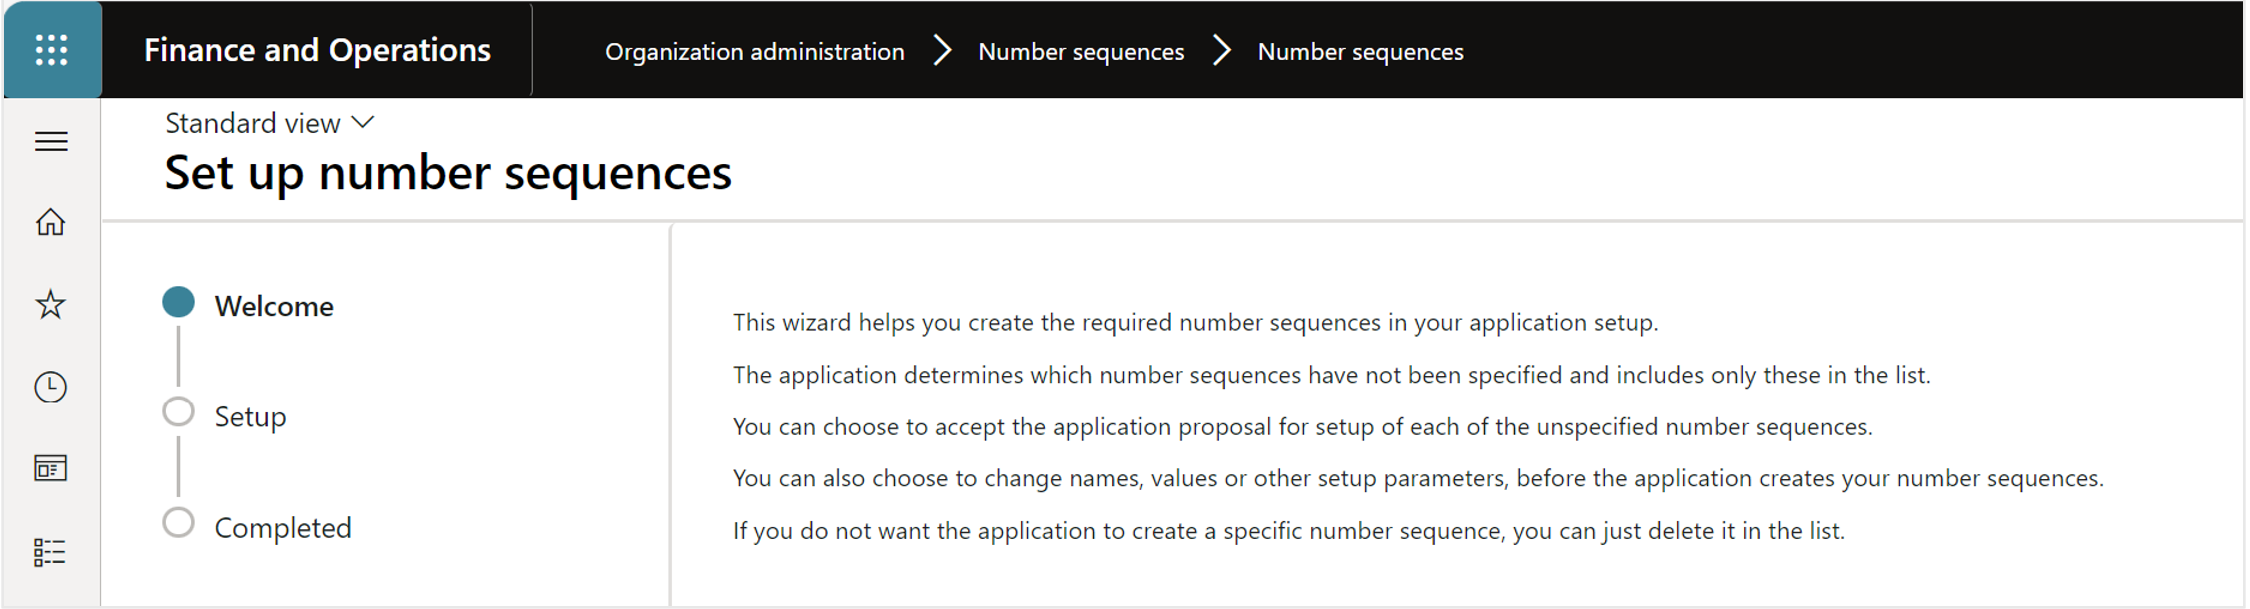
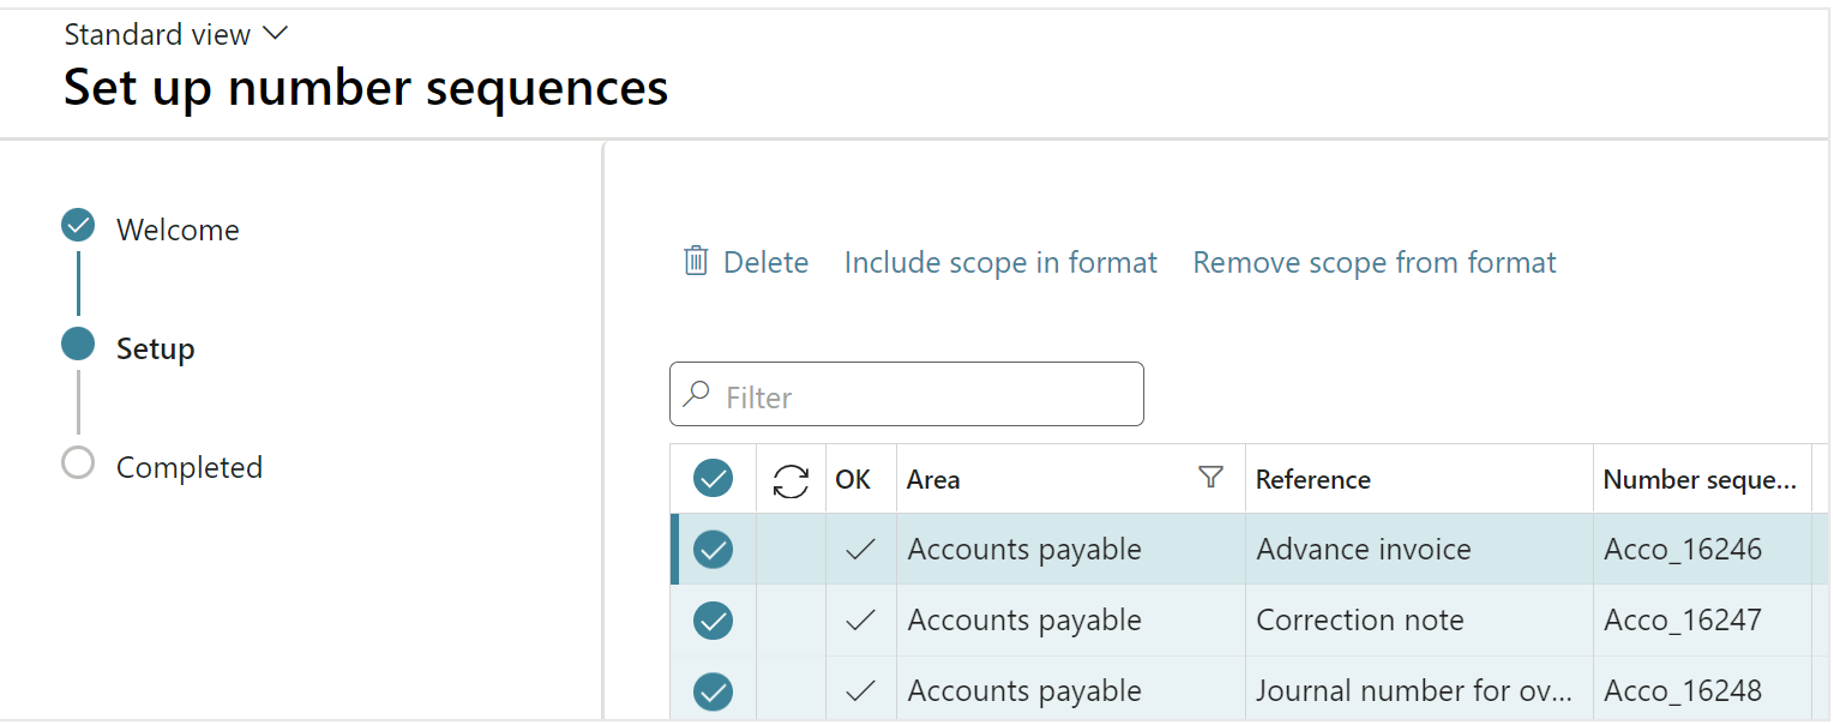
- Remove all that is not in scope for ExFlow and follow the wizard for setup until the setup is completed.
Note; The number sequence for create debit/credit invoices don´t need to be set as continuous.
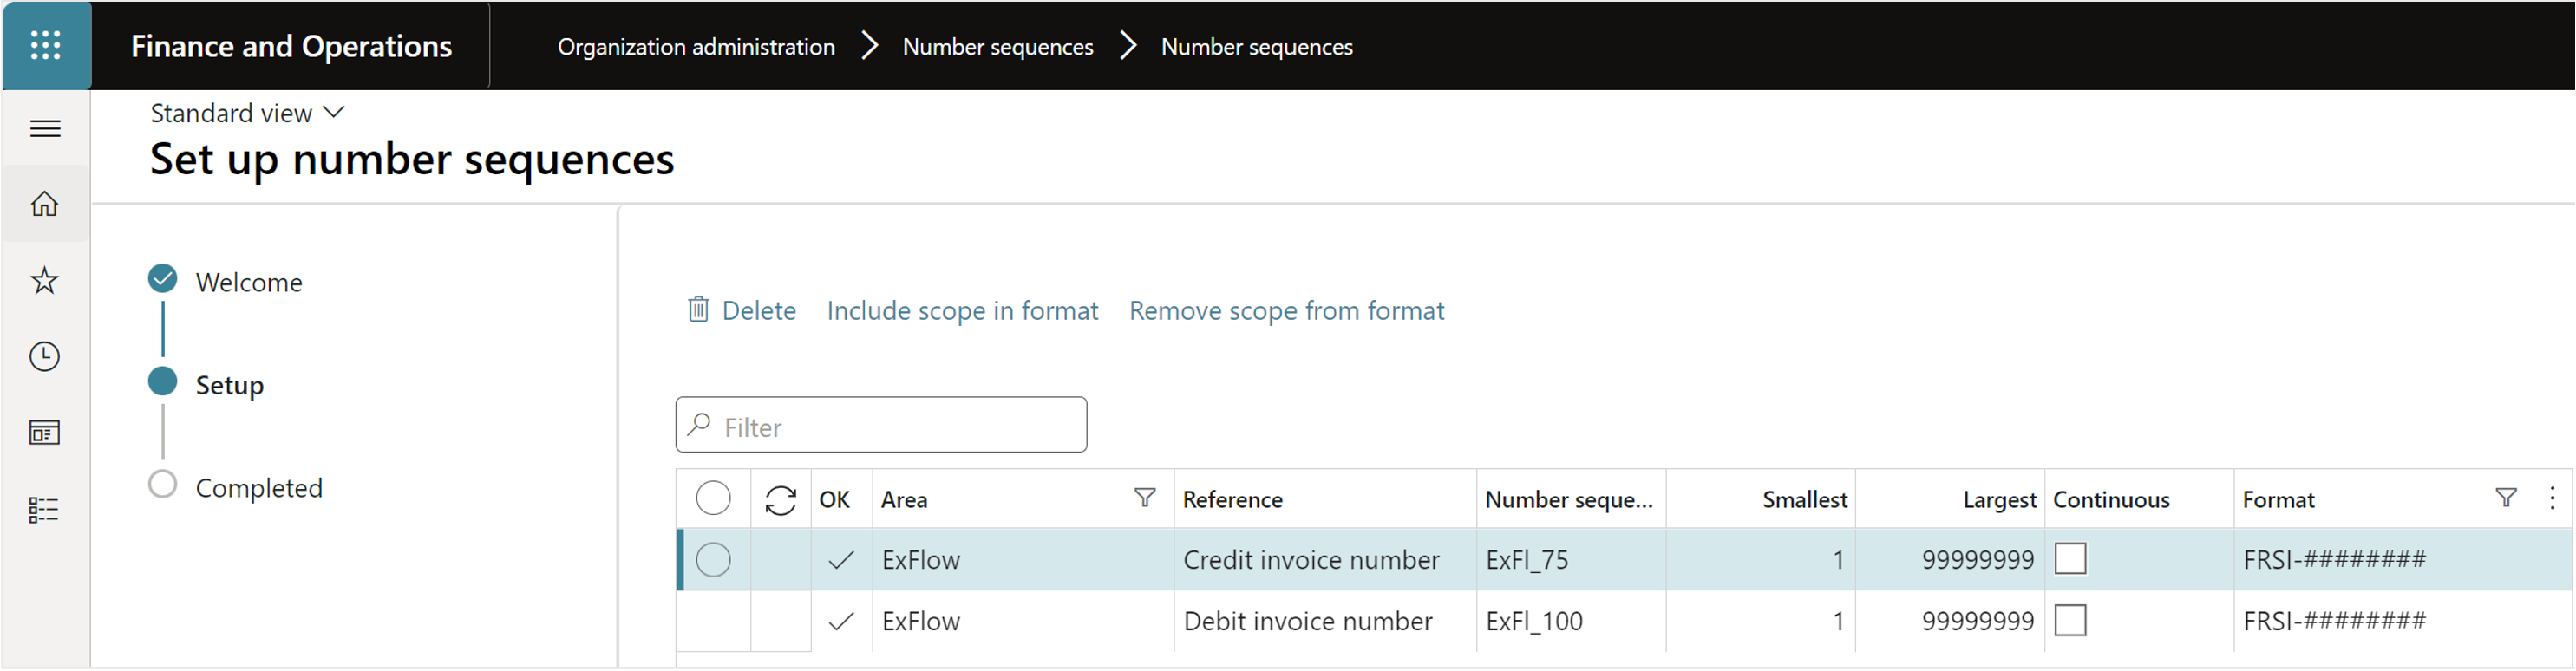
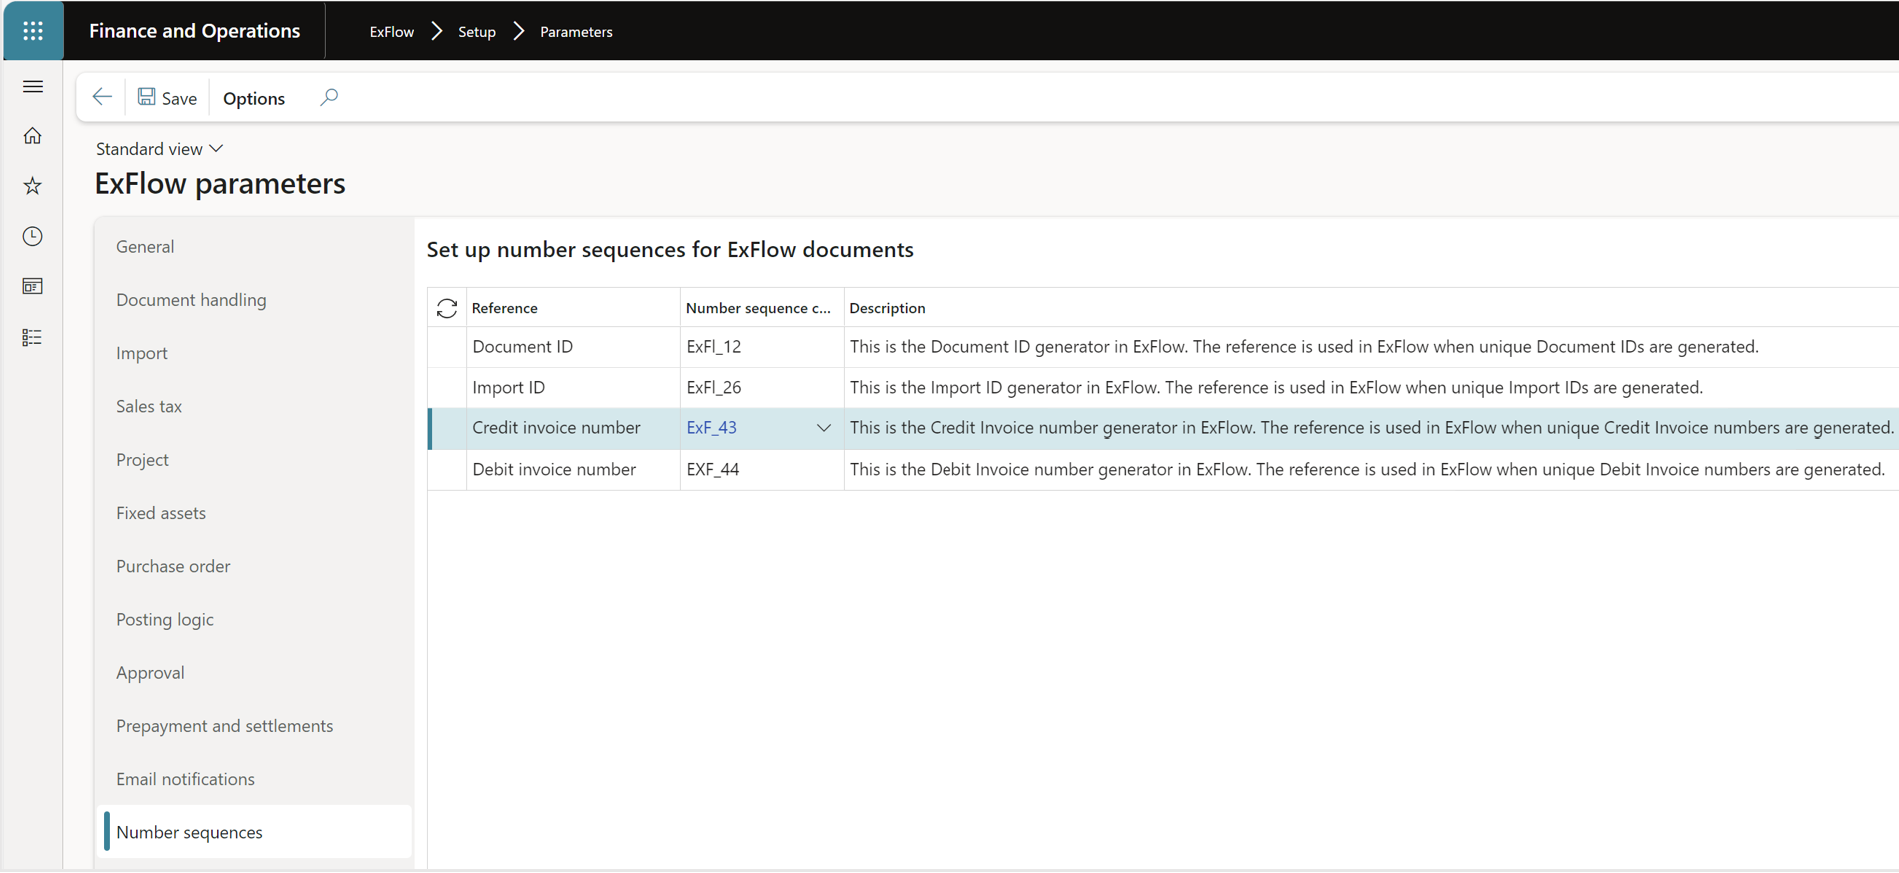
- When completed, navigate to ExFlow parameters tab number sequence and check that the number sequence is set.
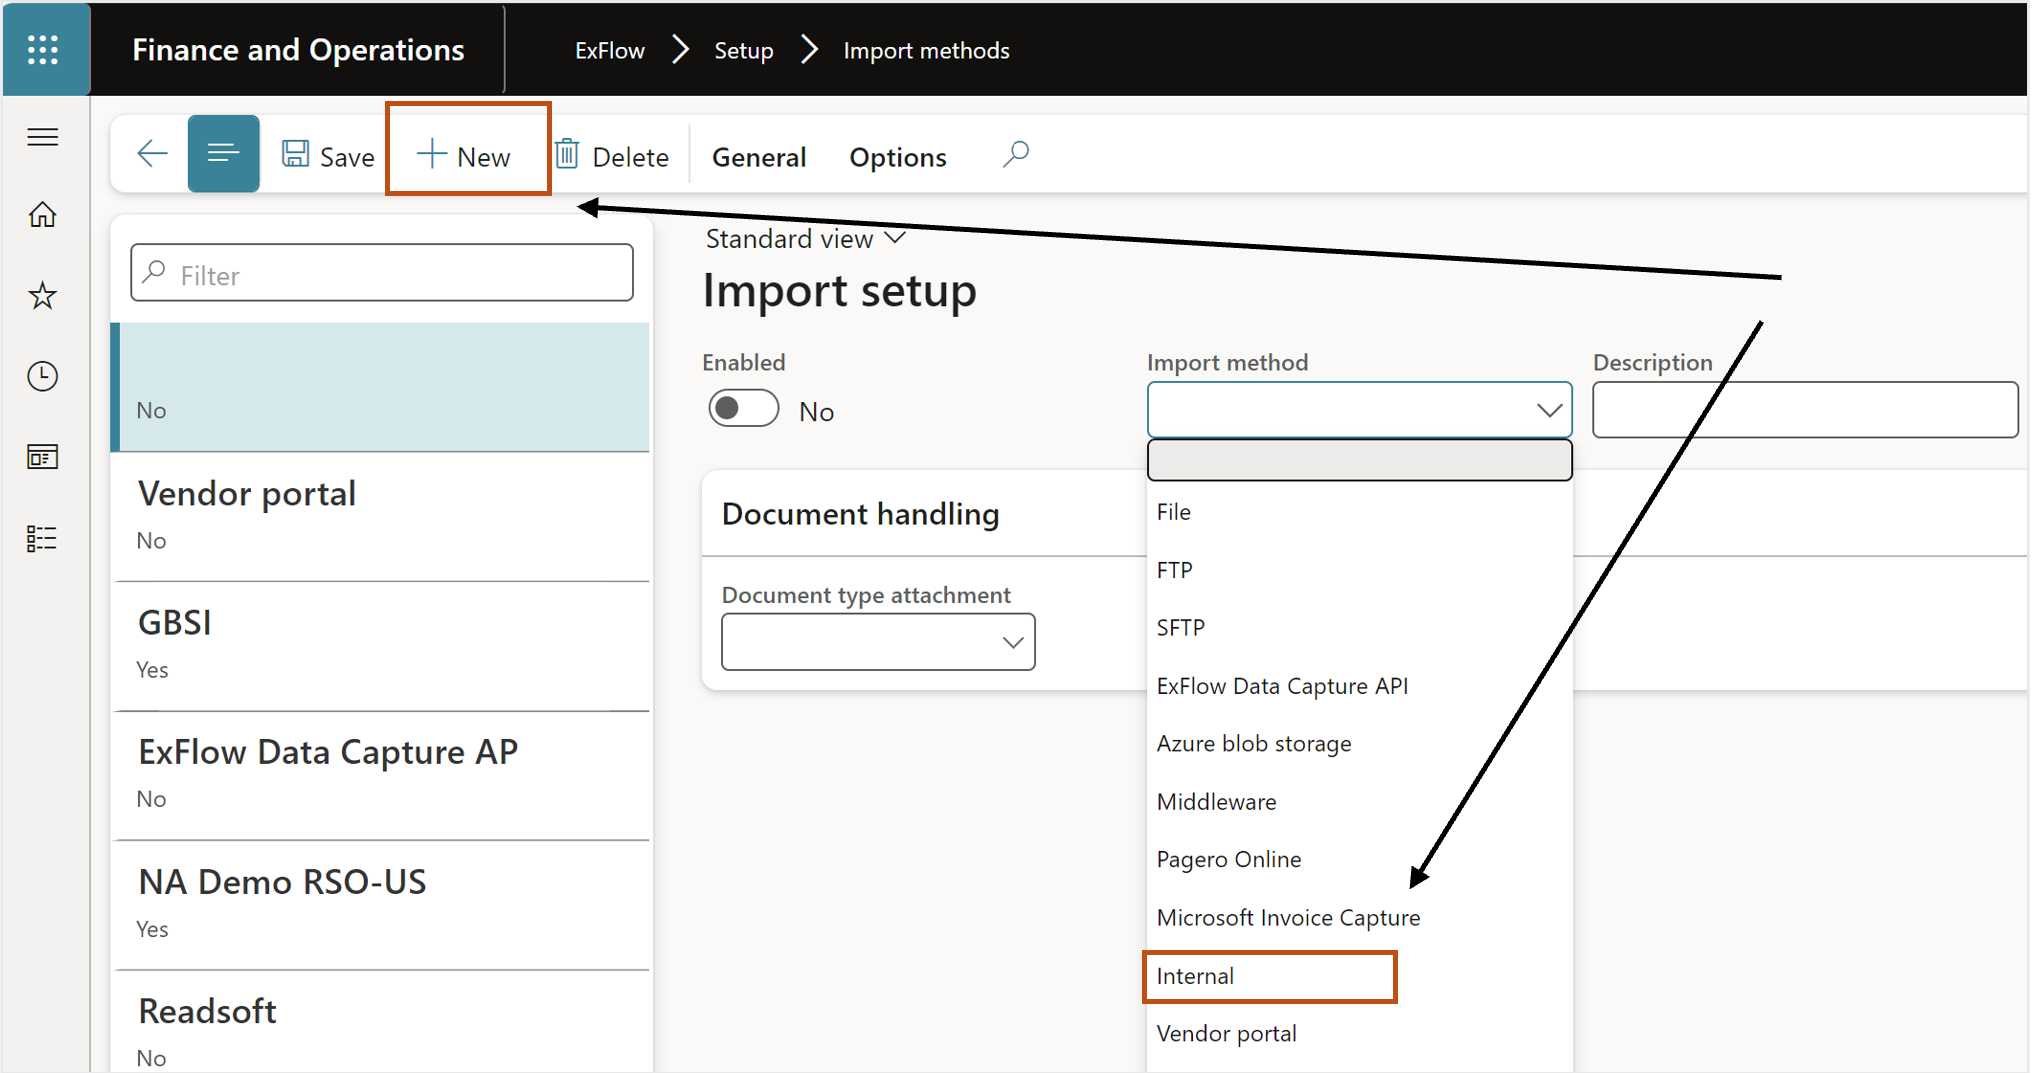
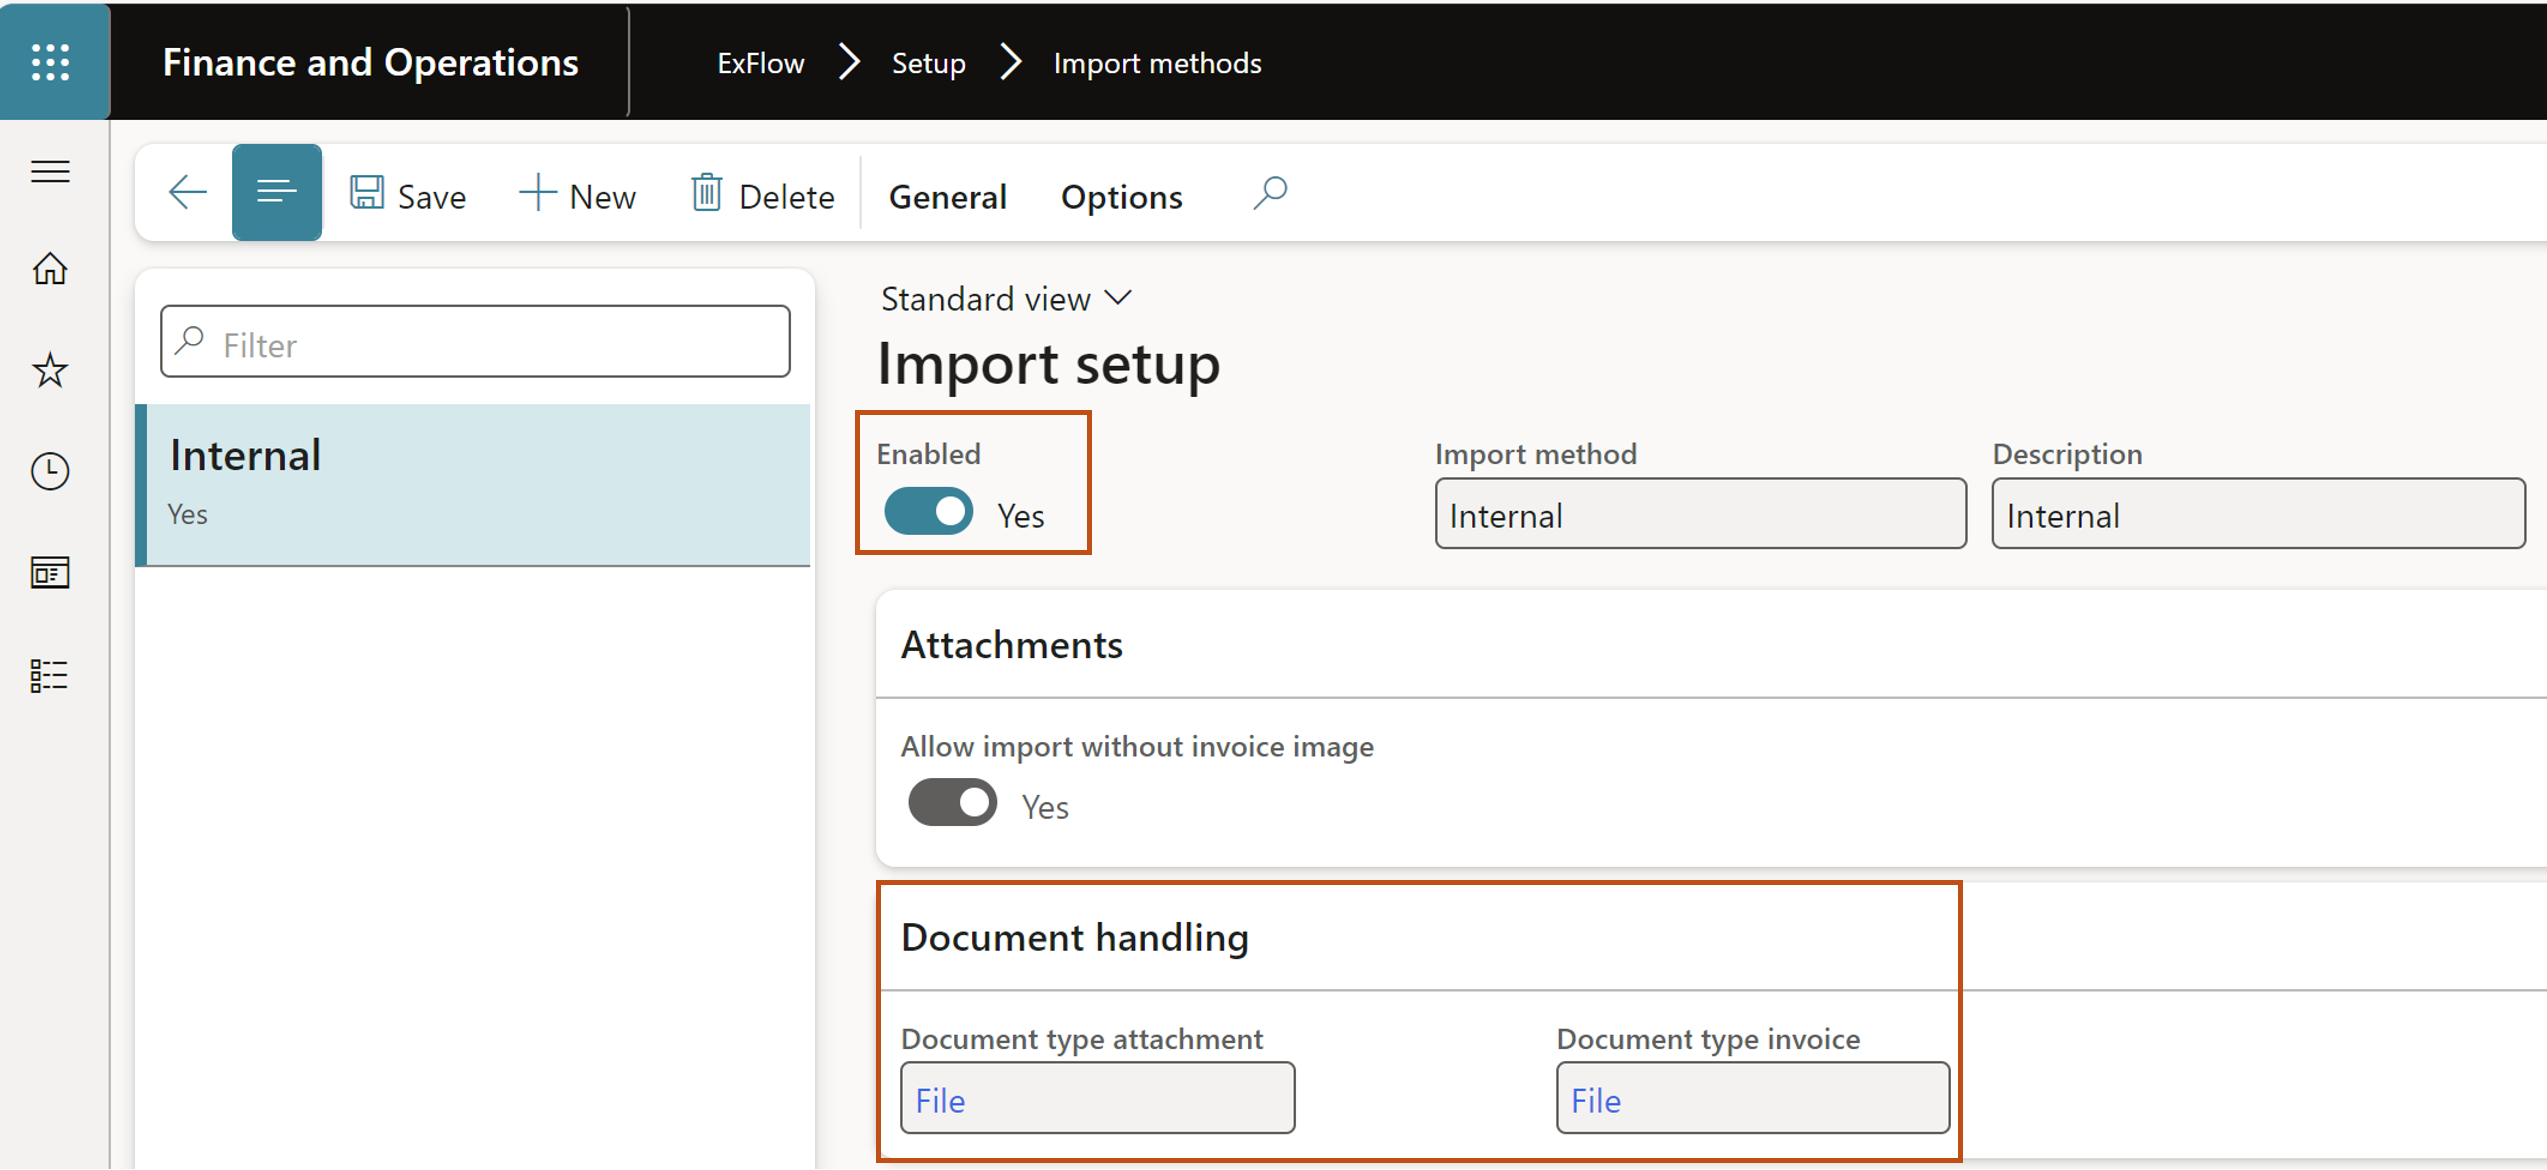
Create a new internal import method
To be able to generate the invoice image and attachment for the creation of debit/credit invoices and to copy the coding and financial dimension to the invoice, you need to create a new internal import method.
- Navigate to Exflow – setup – Import methods.
- Select new.
- User the drop-down list for import method and select Internal.
- Add the description and press “Save”, Allow import without invoice image is now enabled.
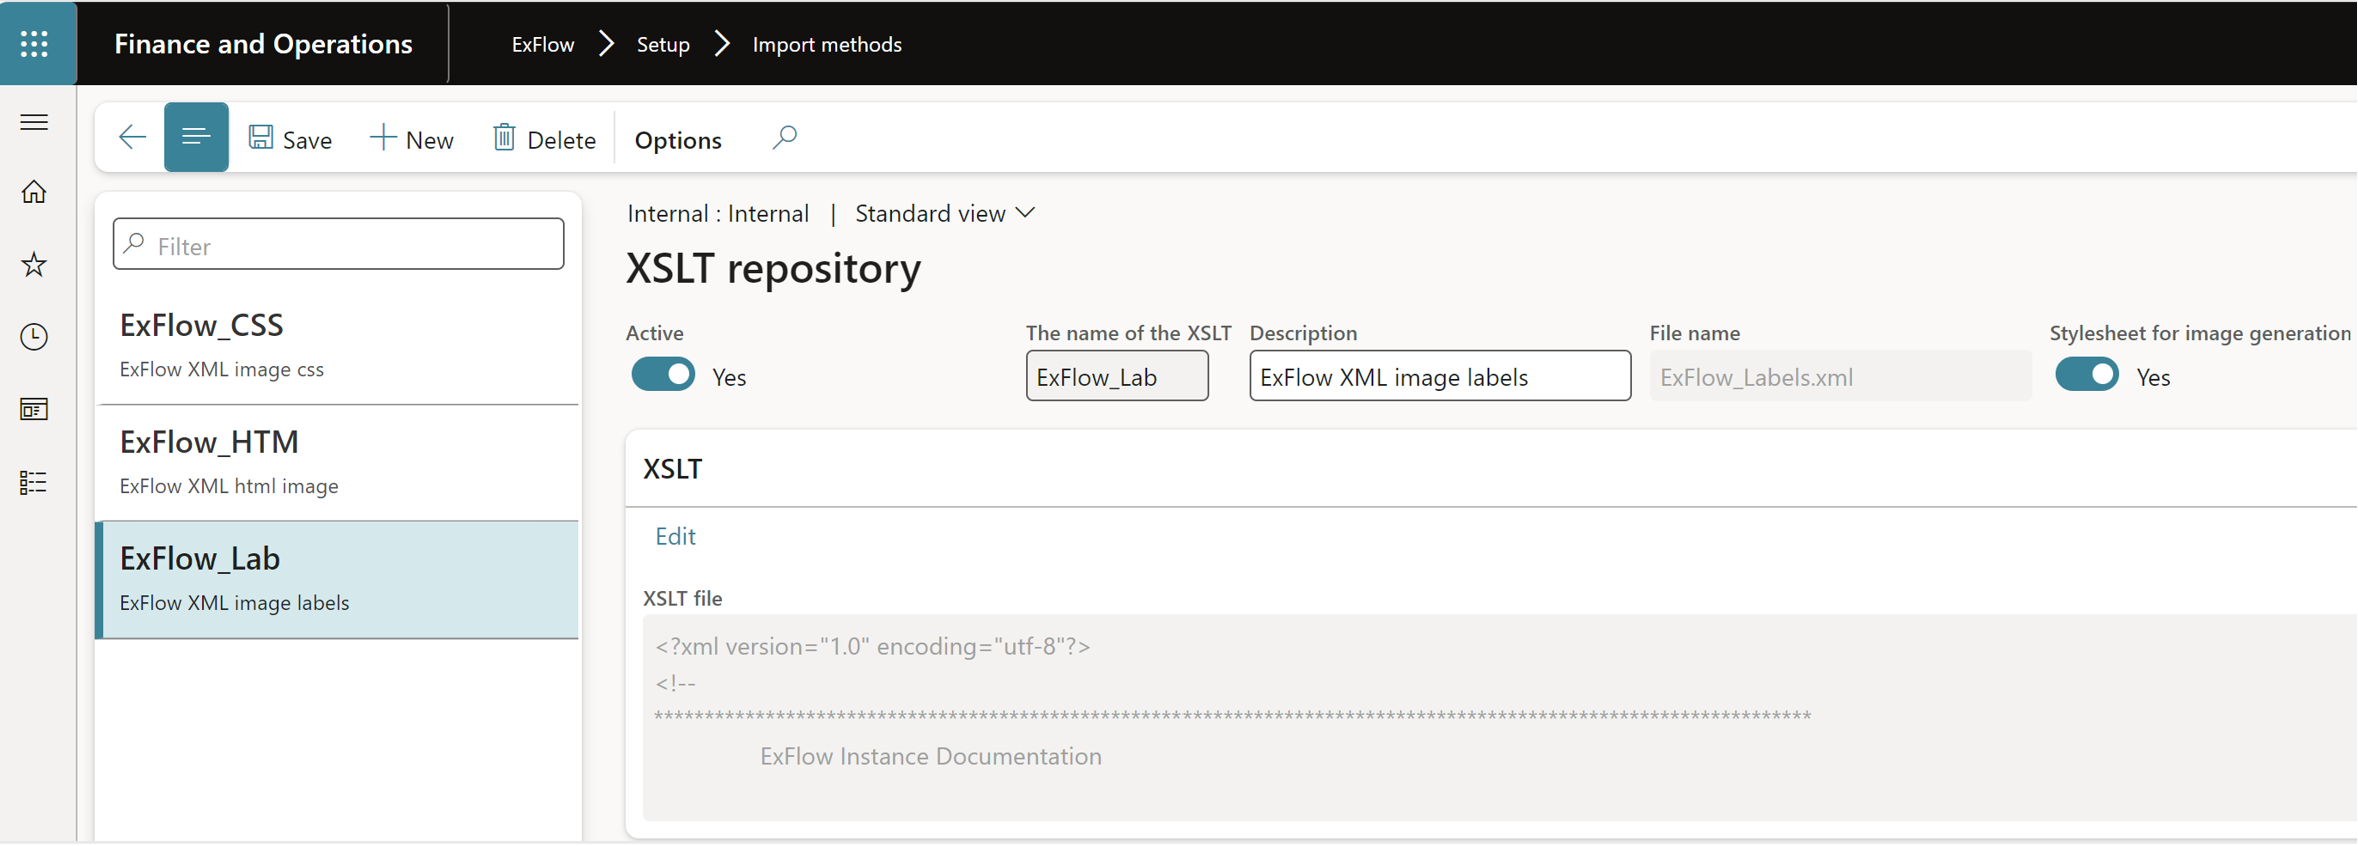
- Navigate to General and select XSLT repository.

- Select “New”, add the name of the XSLT and Description.
- Select Edit and upload the files for ExFlow.
- Set “Yes” for ”Stylesheet for image generation”.
- Activate the setup.
- Repeat the setup for all three (3) stylesheets.
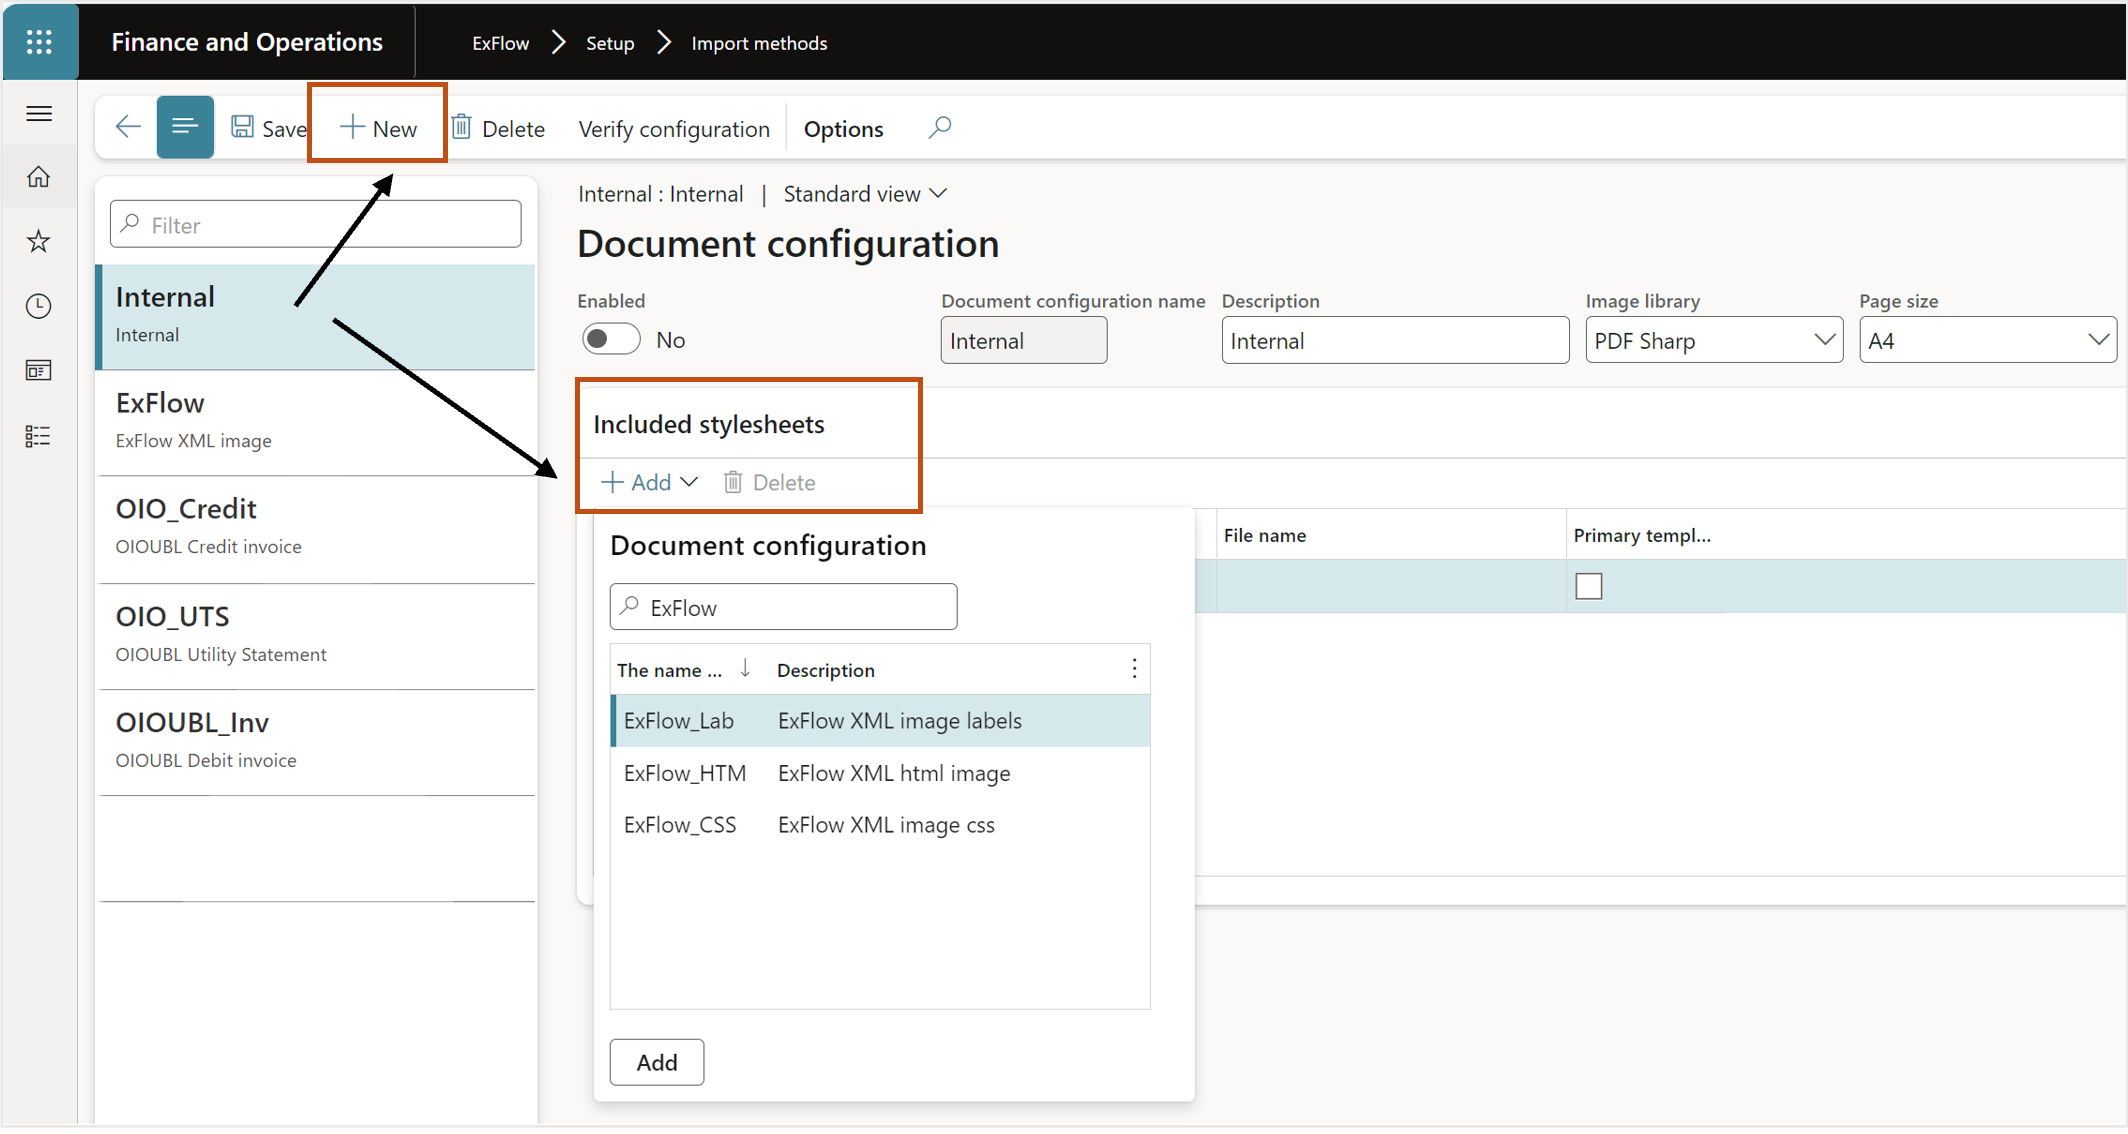
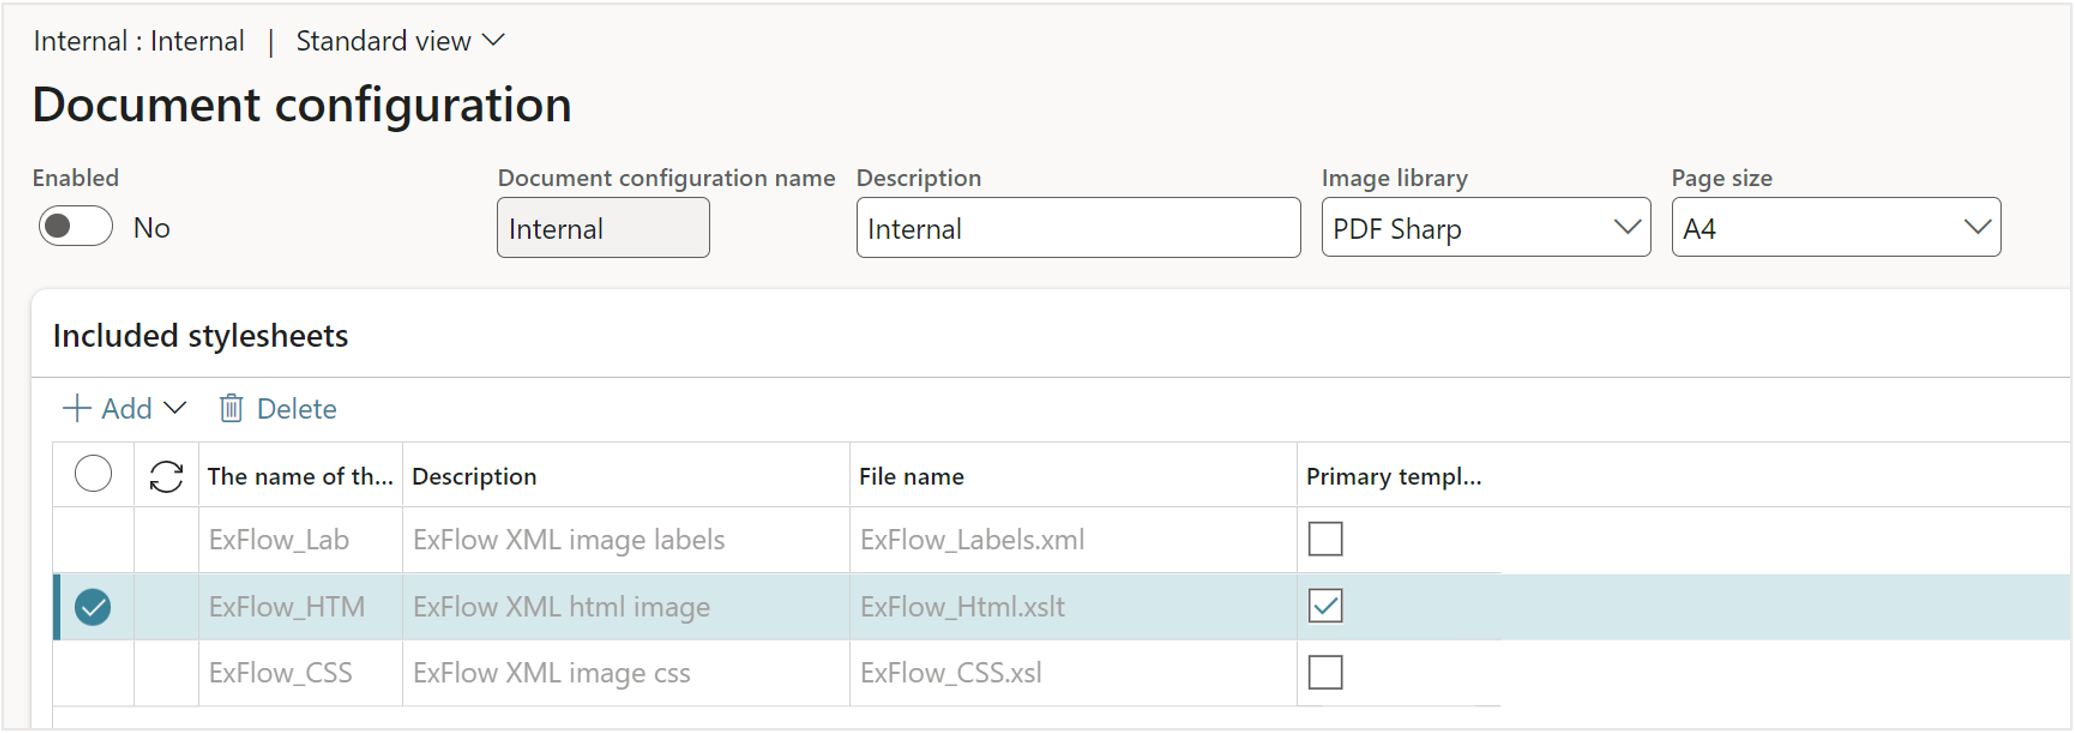
- Navigate to General – Document configuration and select Document configuration.
- Select “New”, add a document configuration name and description.
- Select “Add” and find the stylesheets for Exflow.
- Mark the stylesheets and select “Add”.
- Set the stylesheet for HTML Image as Primary template.
- Activate the configuration.
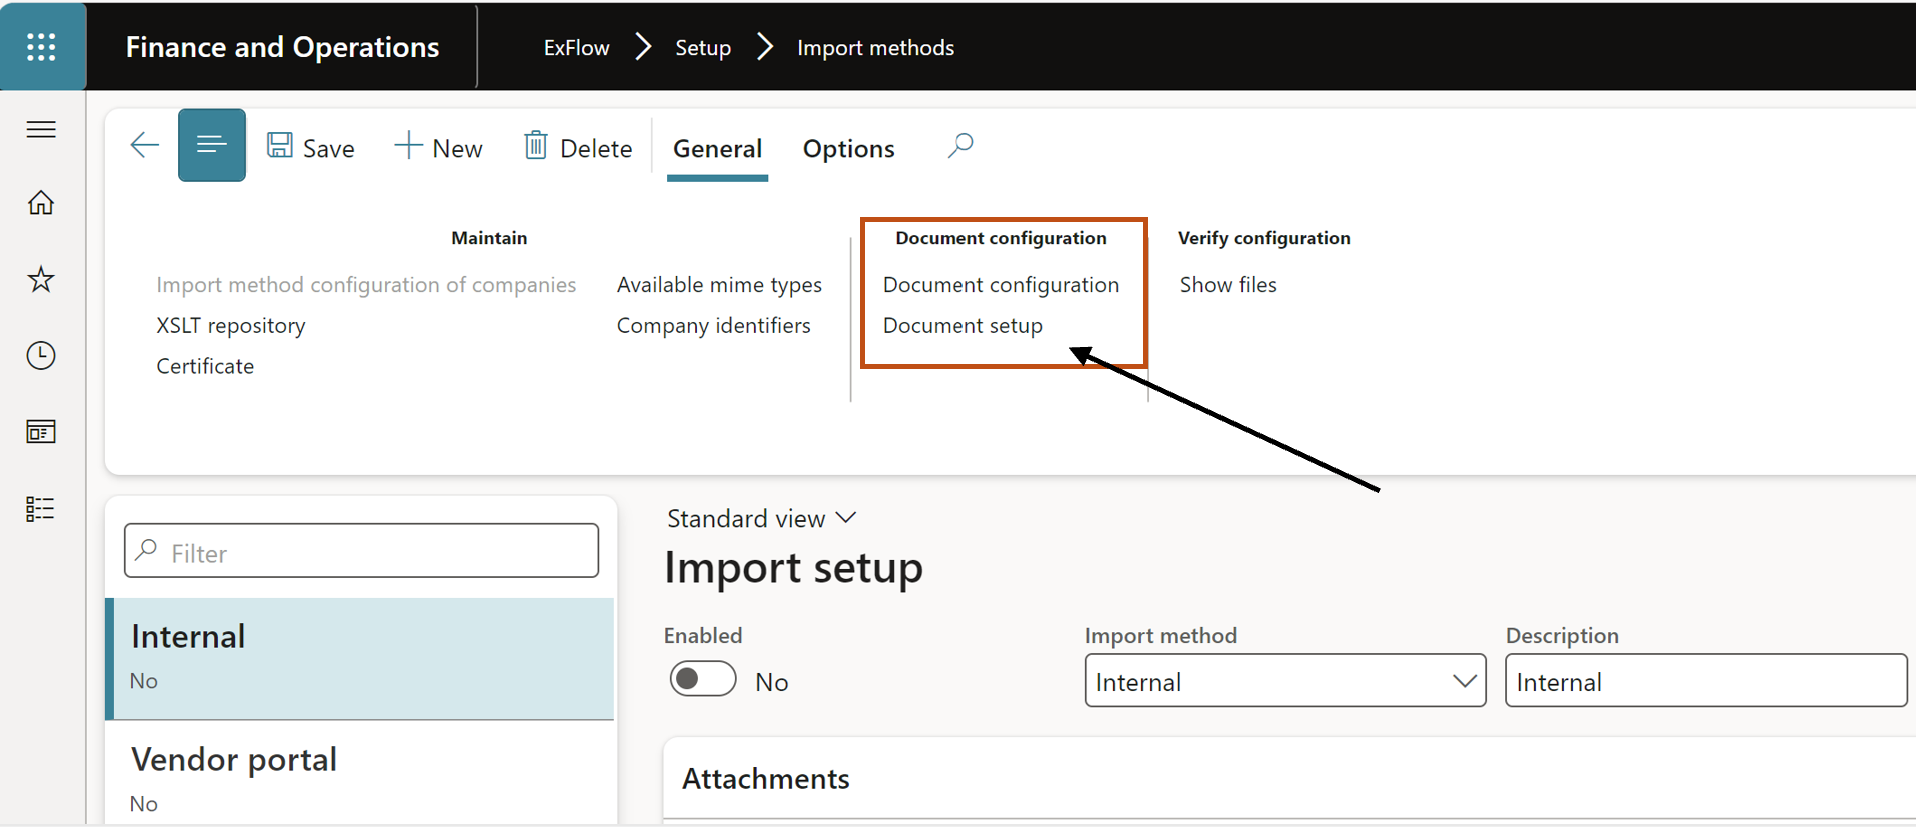
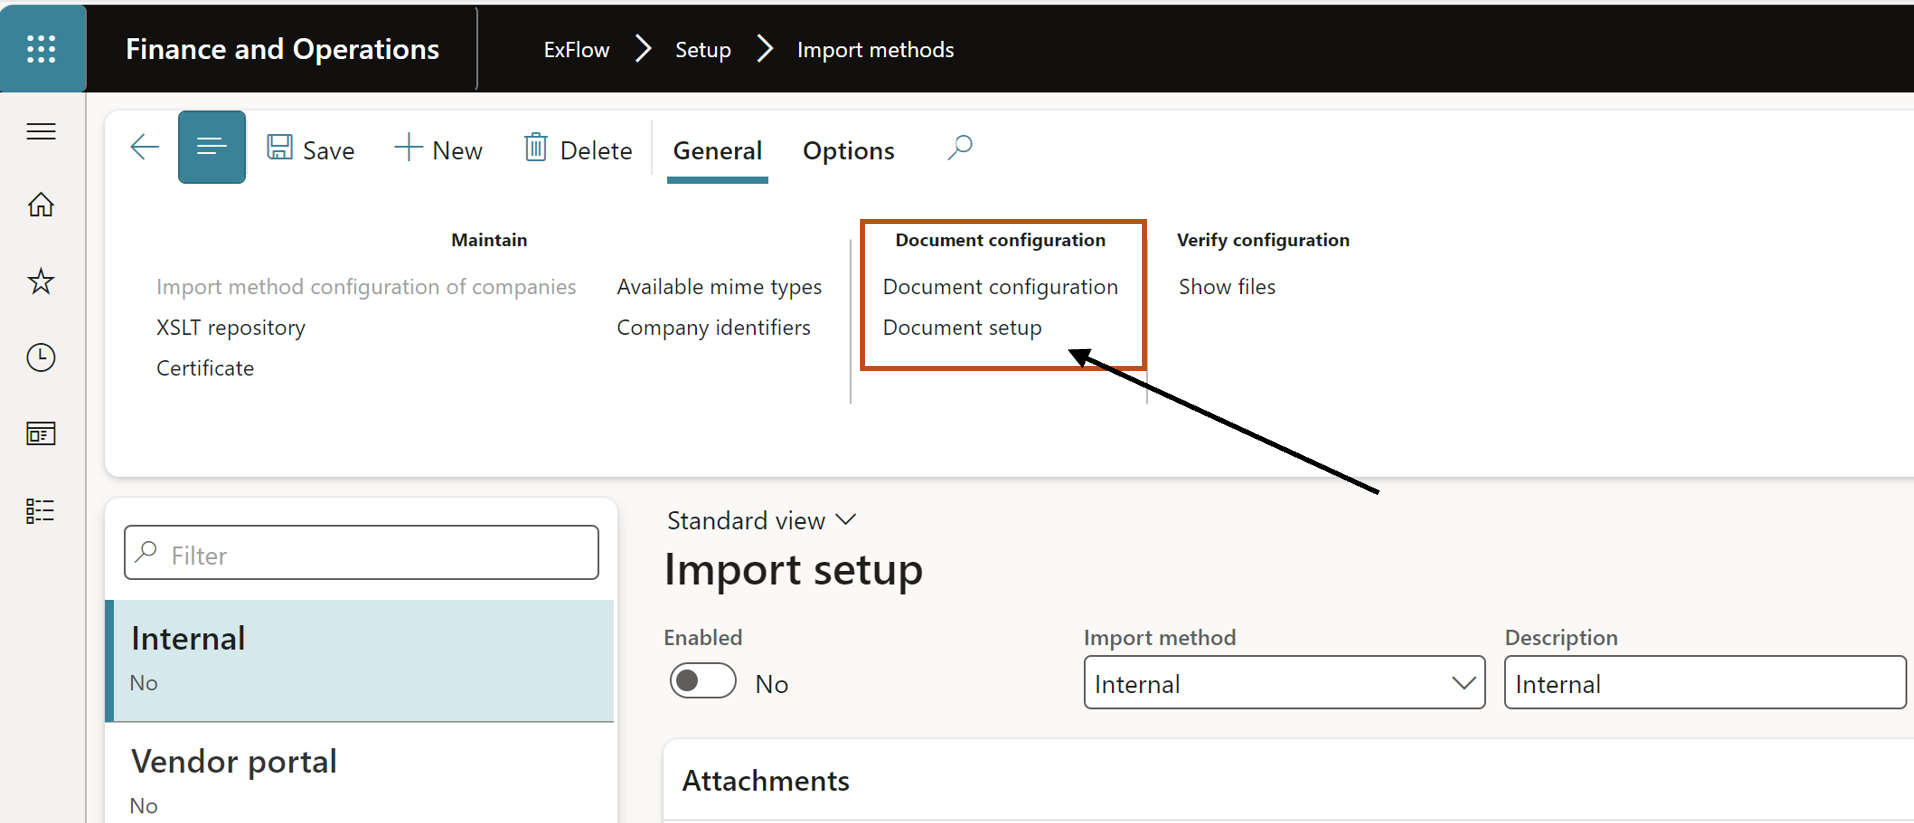
- Navigate to ExFlow – setup – Import methods.
- Select Document setup.
- Use the drop-down list for Default document configuration and select the newly created document configuration.
- Navigate back to the Import setup and add the document types for attachments and document type invoice.
- Enable the setup.
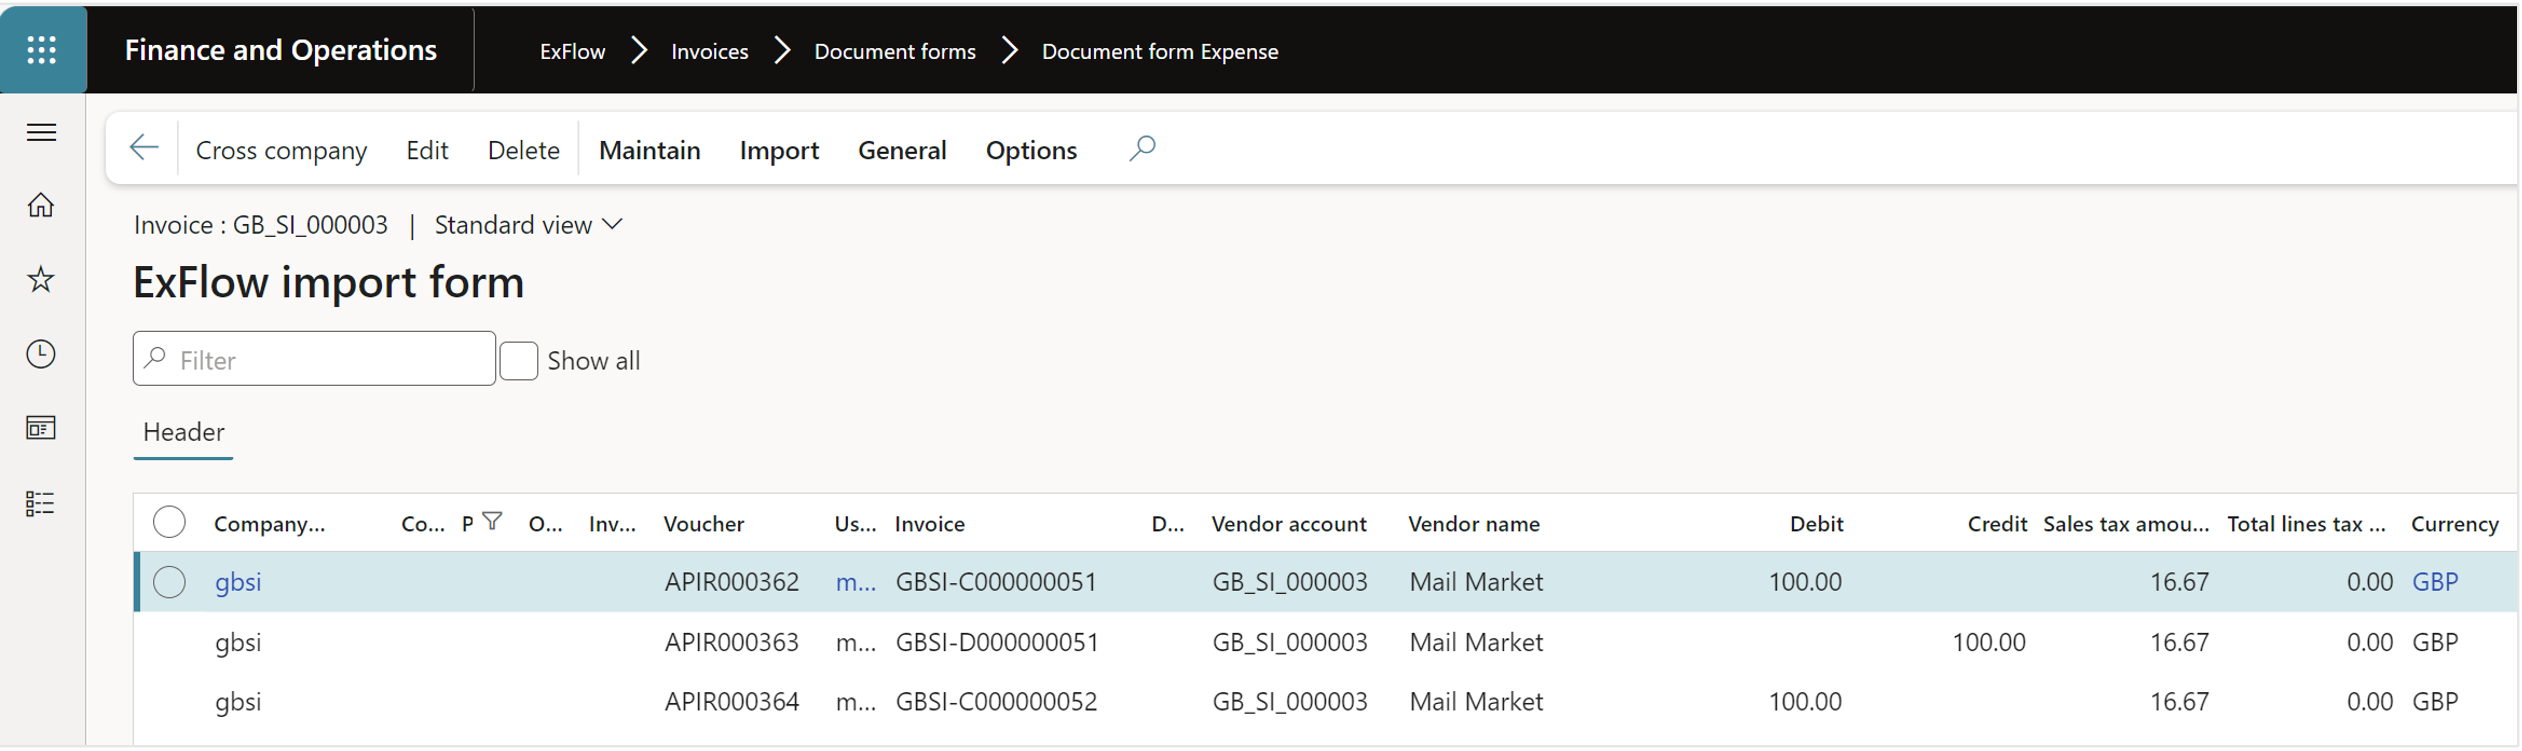
Description of functionality
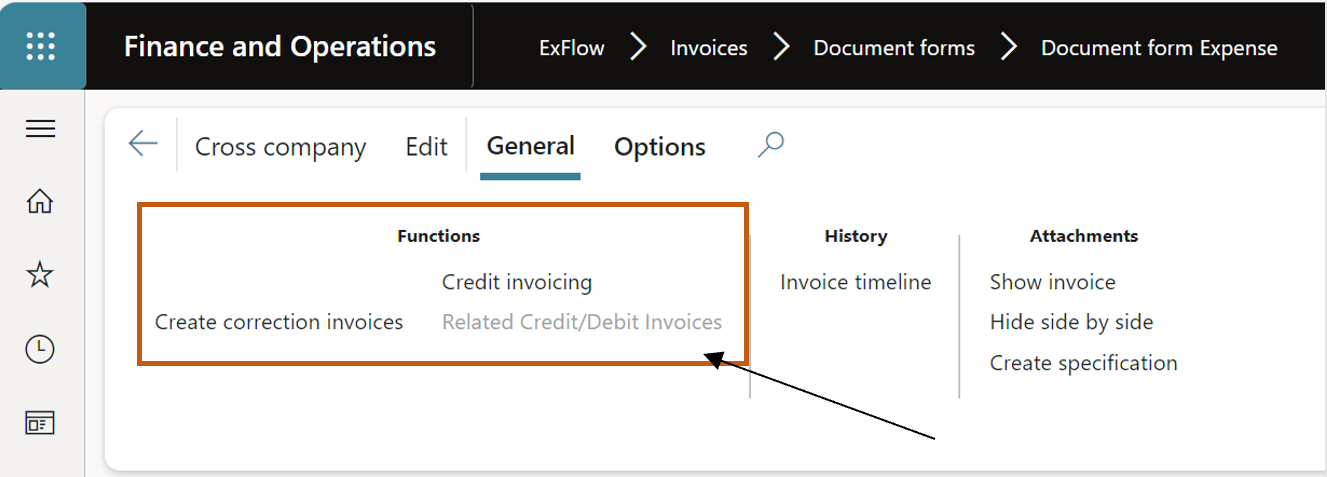
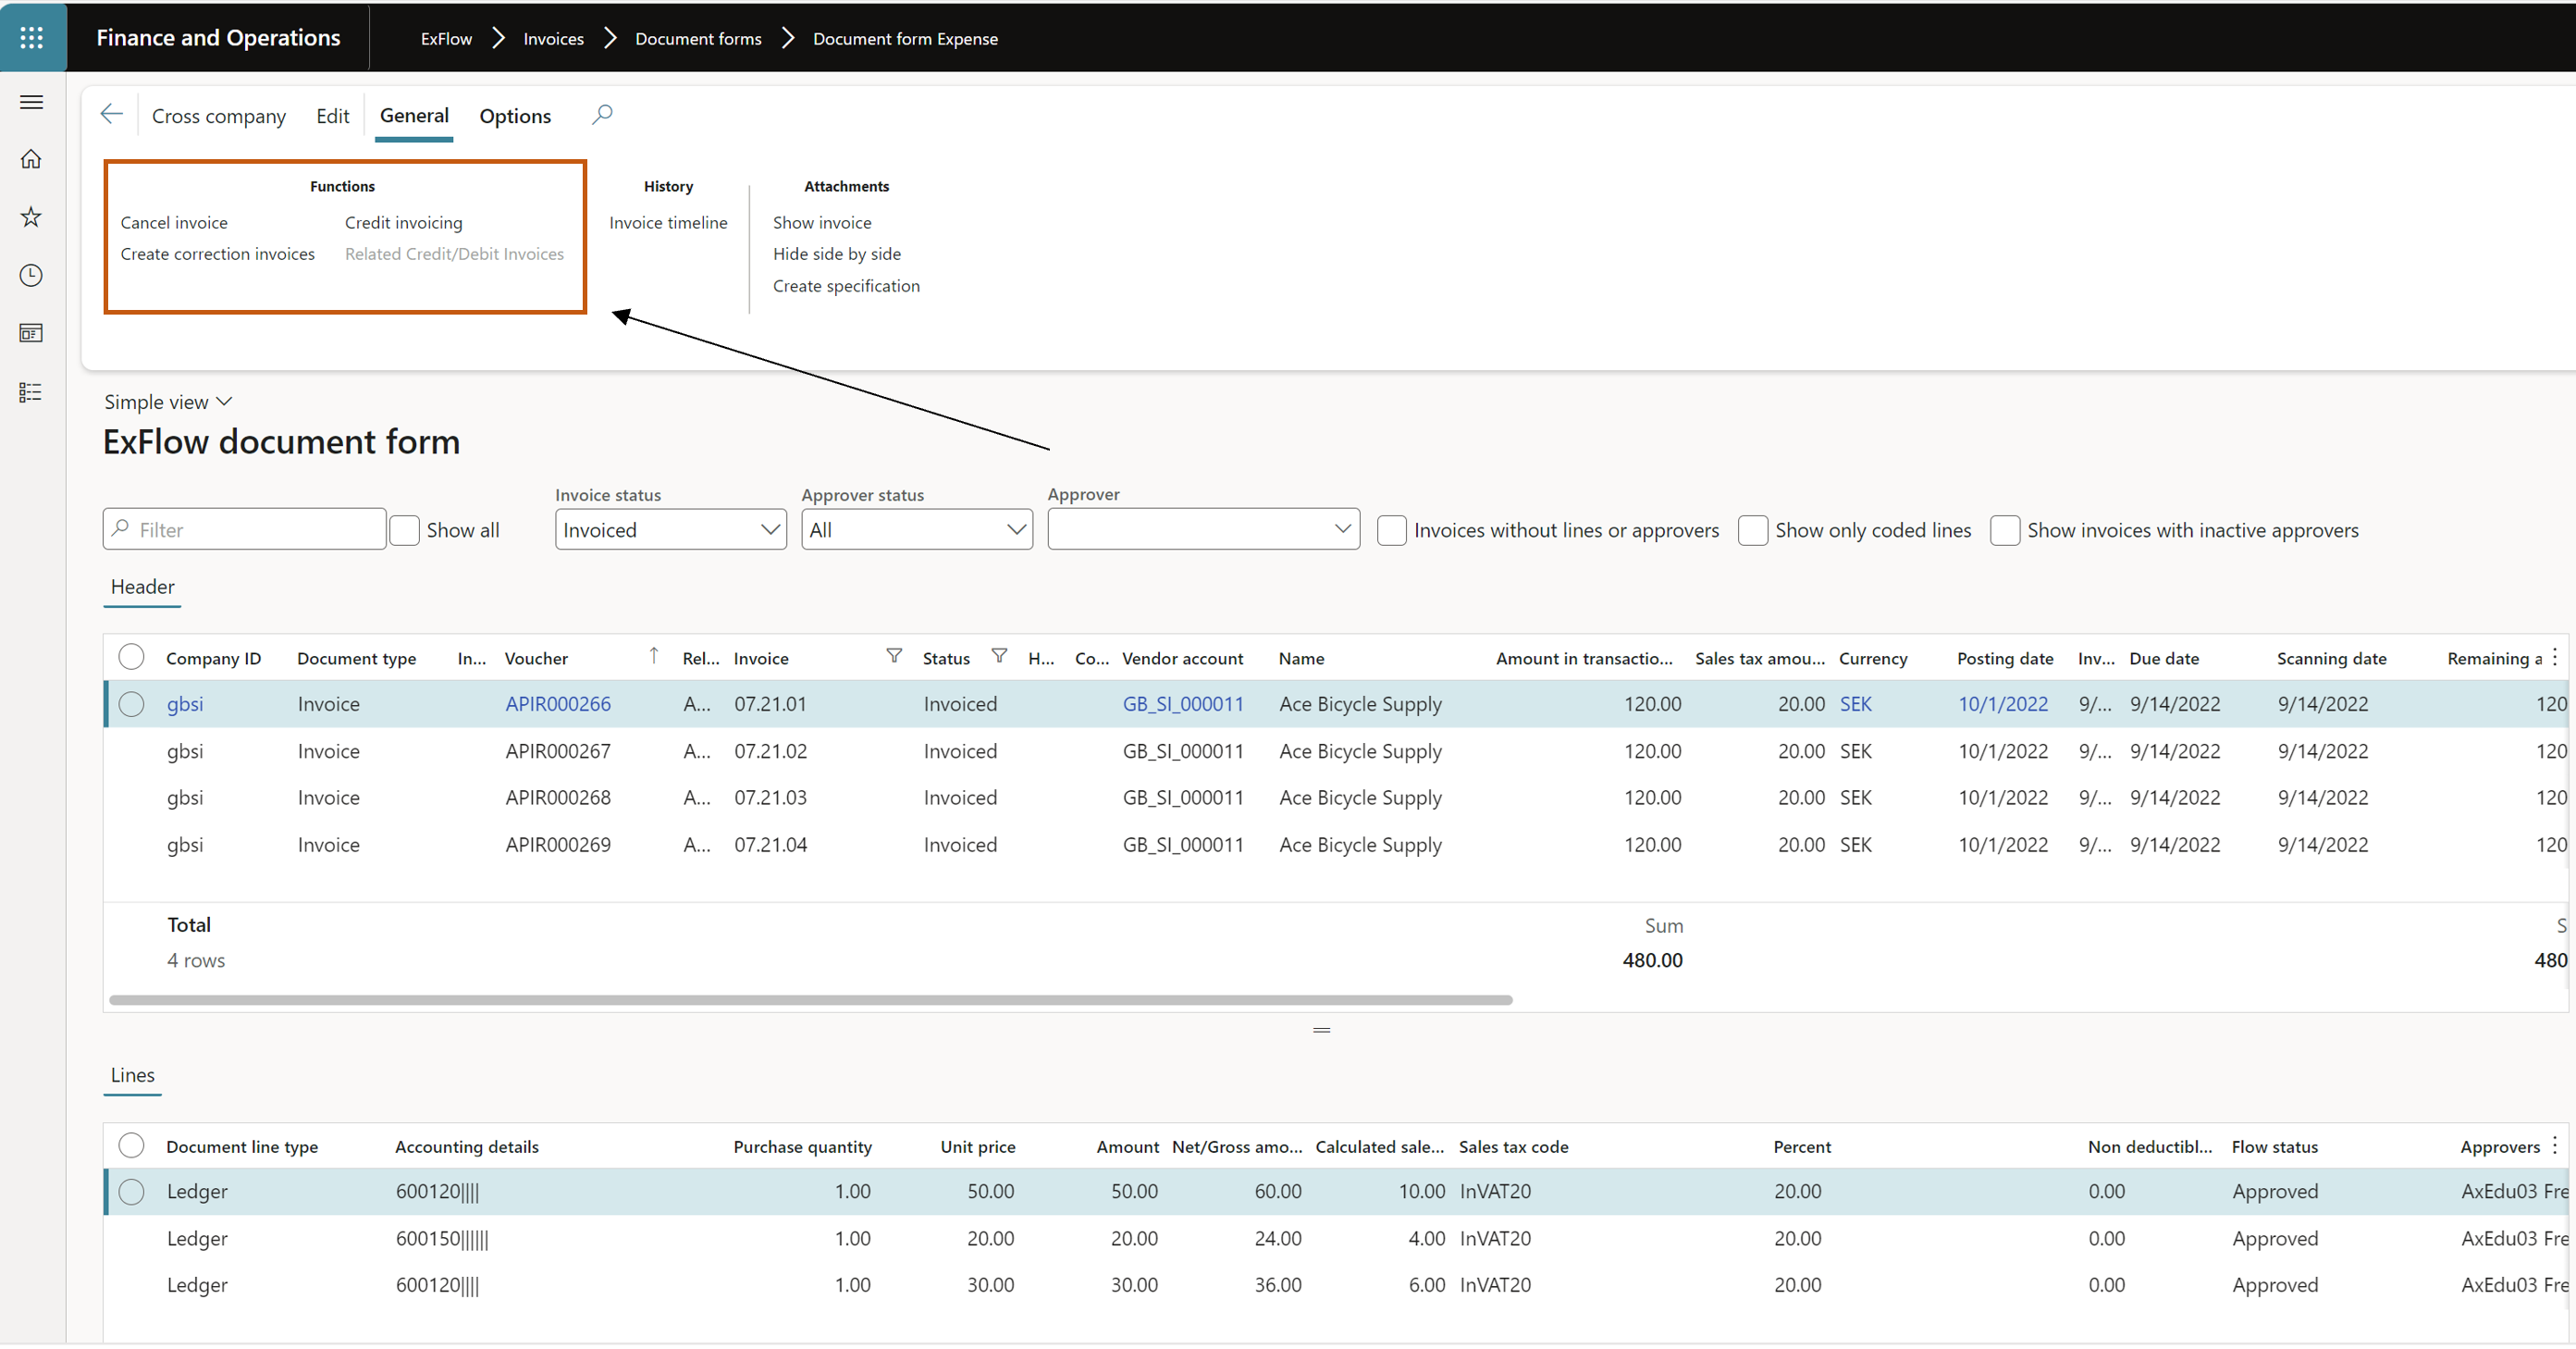
Three (3) buttons added for use of the functionality. The buttons are enabled only if the invoice status of the marked invoice is invoiced. The buttons are not working for multi-select of invoices.
- “Create correction invoices”, “Credit invoicing” and “Related Credit/Debit invoices” found from grid list in action pane under “General” in the group “Functions”. And in edit invoice view under “General” in the group “Other”.
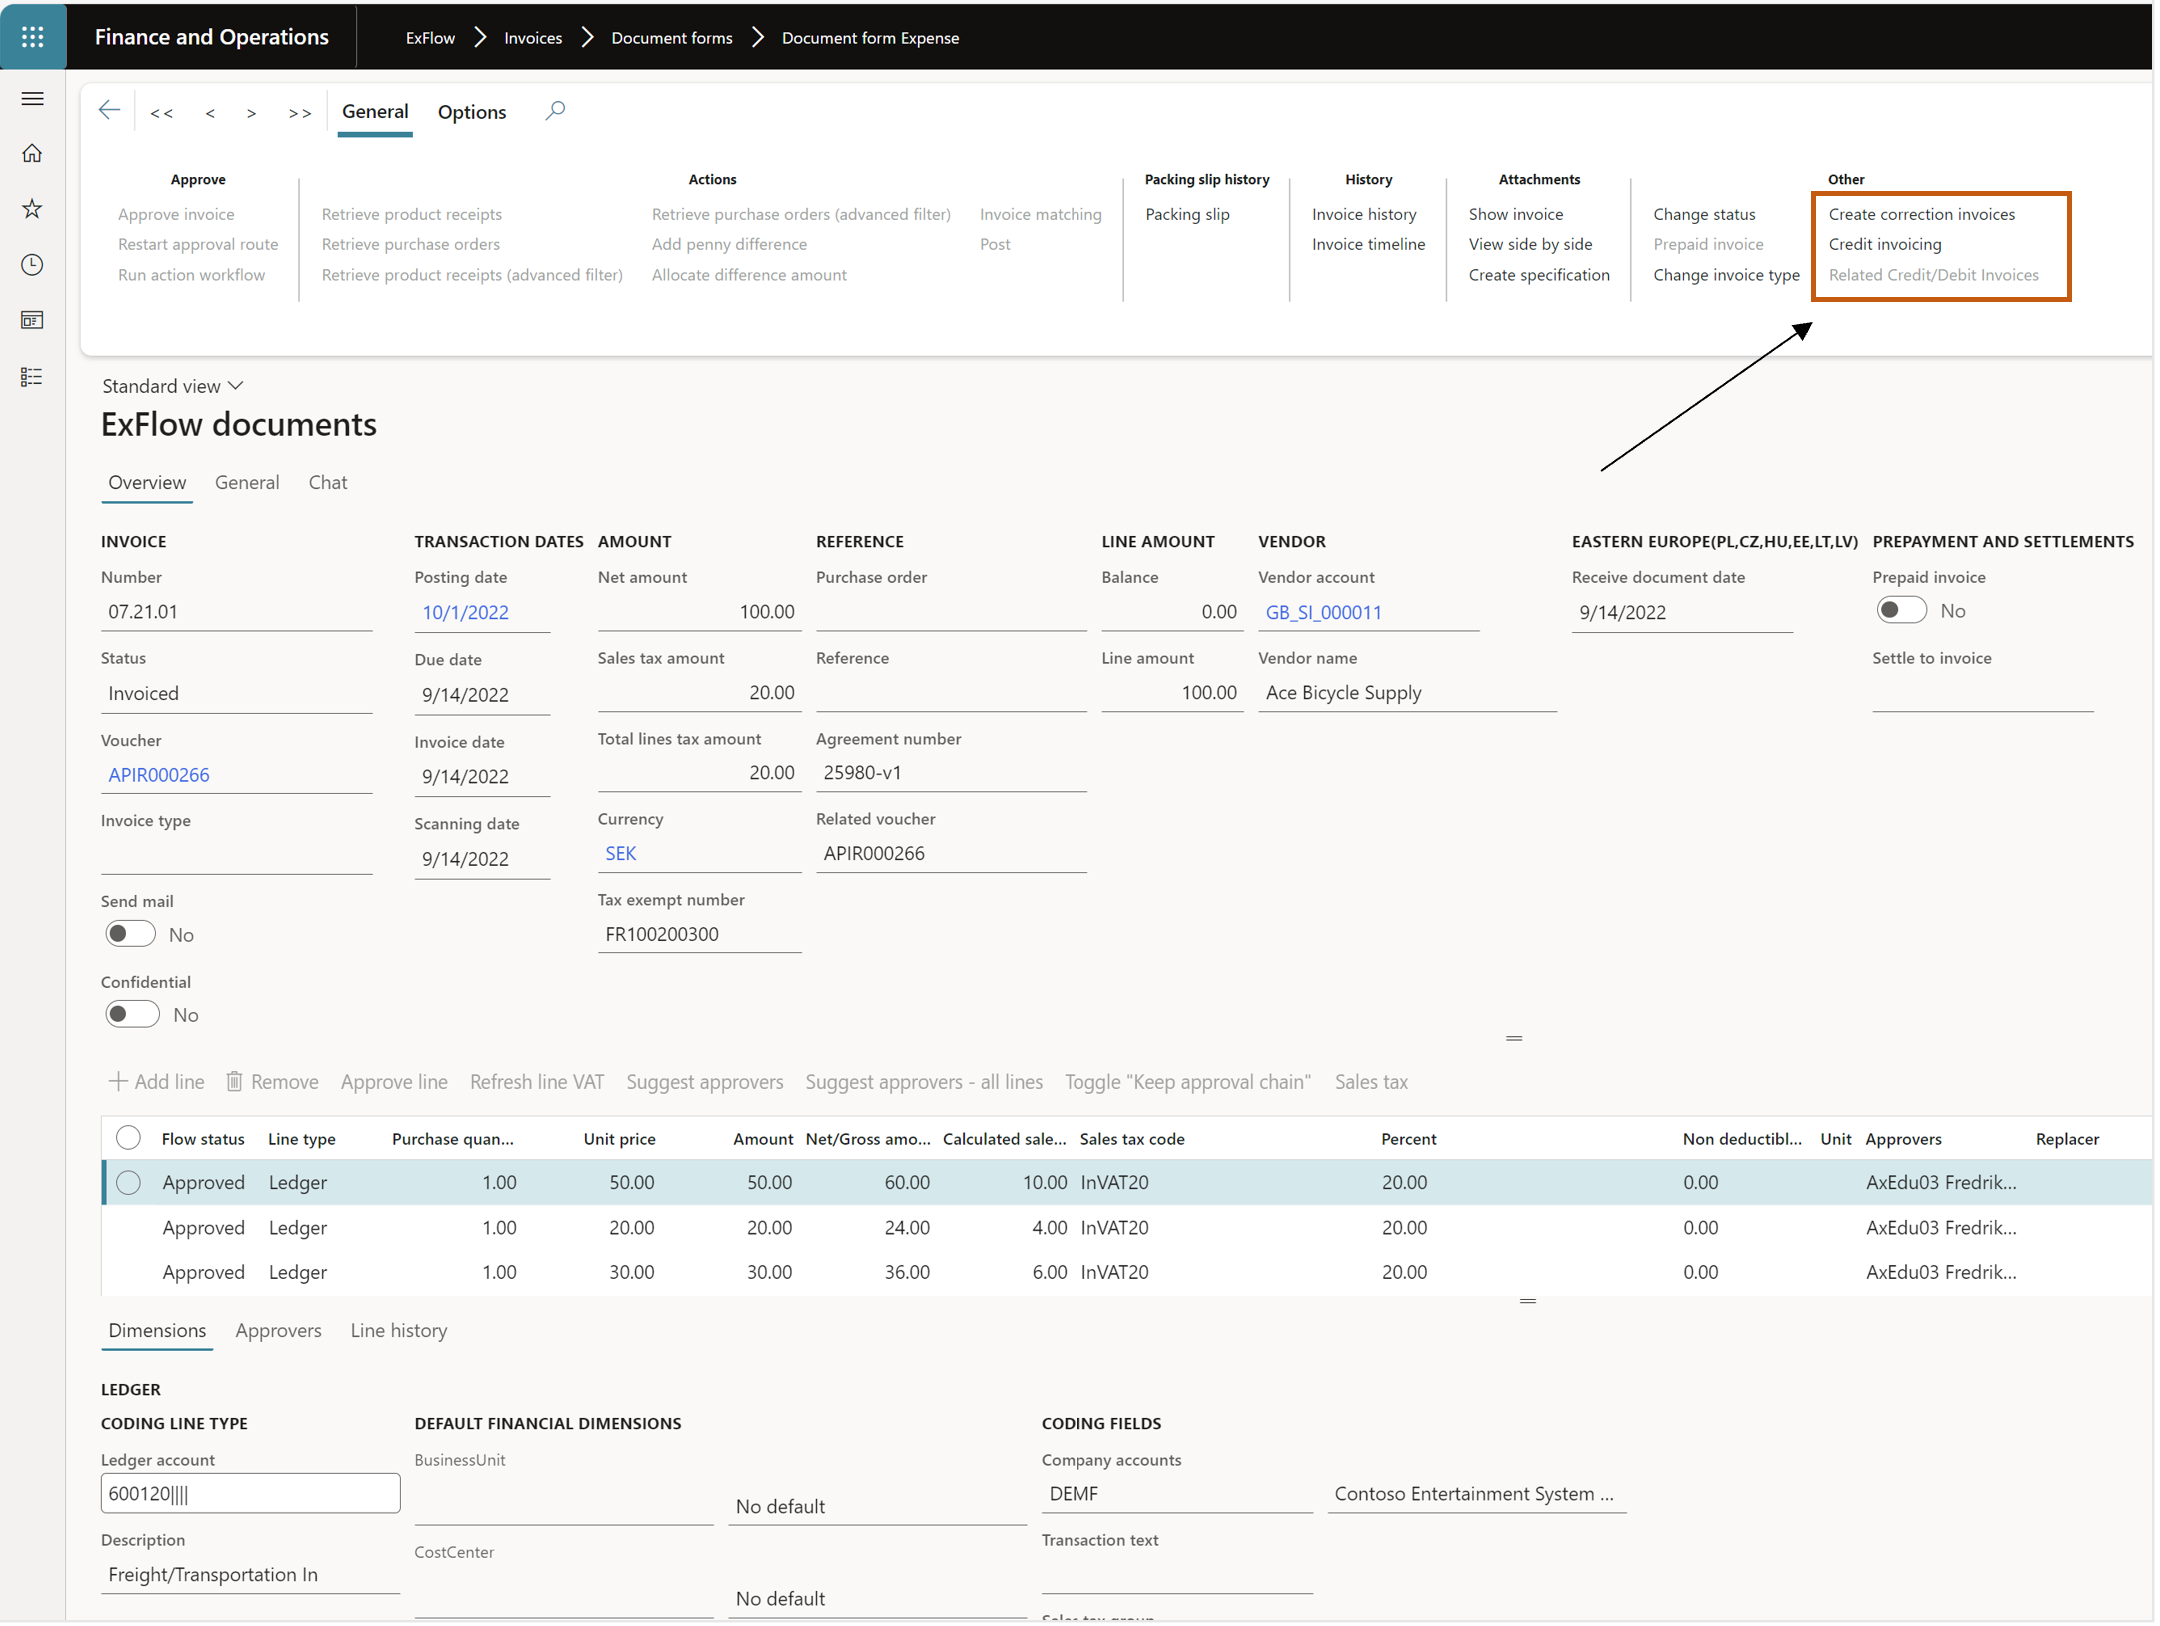
When pressing the new button “Create correction invoices”, the following happens;
- A new debit invoice which is a copy of the selected invoice is created in import form with an invoice number according to the number sequence from the new parameter “Number sequence for Debit invoice number”. If the new parameter “Debit invoice retain coding” is set true (Yes), the lines will retain the coding and making the invoice as an exact copy. If the parameter “Debit invoice retain coding” is set to false (No), the invoice should be created with the same lines as the original invoice but without coding.
The original invoice image is attached as an attachment and a new pdf is generated with the text “Correcting Debit of invoice XXX (where “XXX” is the original invoice number) and this is used as the invoice image of this invoice.
-
A new credit invoice which is a copy of the selected invoice, but with reverse signs, is created in import form with an invoice number according to the number sequence from the new parameter “Number sequence for Credit invoice number”.
The original invoice image is attached as an attachment and a new pdf is generated with the text “Correcting Credit of invoice XXX (where “XXX” is the original invoice number) associated with Debit YYY (where “YYY” is the invoice number of the new debit created in the step above) and used as the invoice image of this invoice.
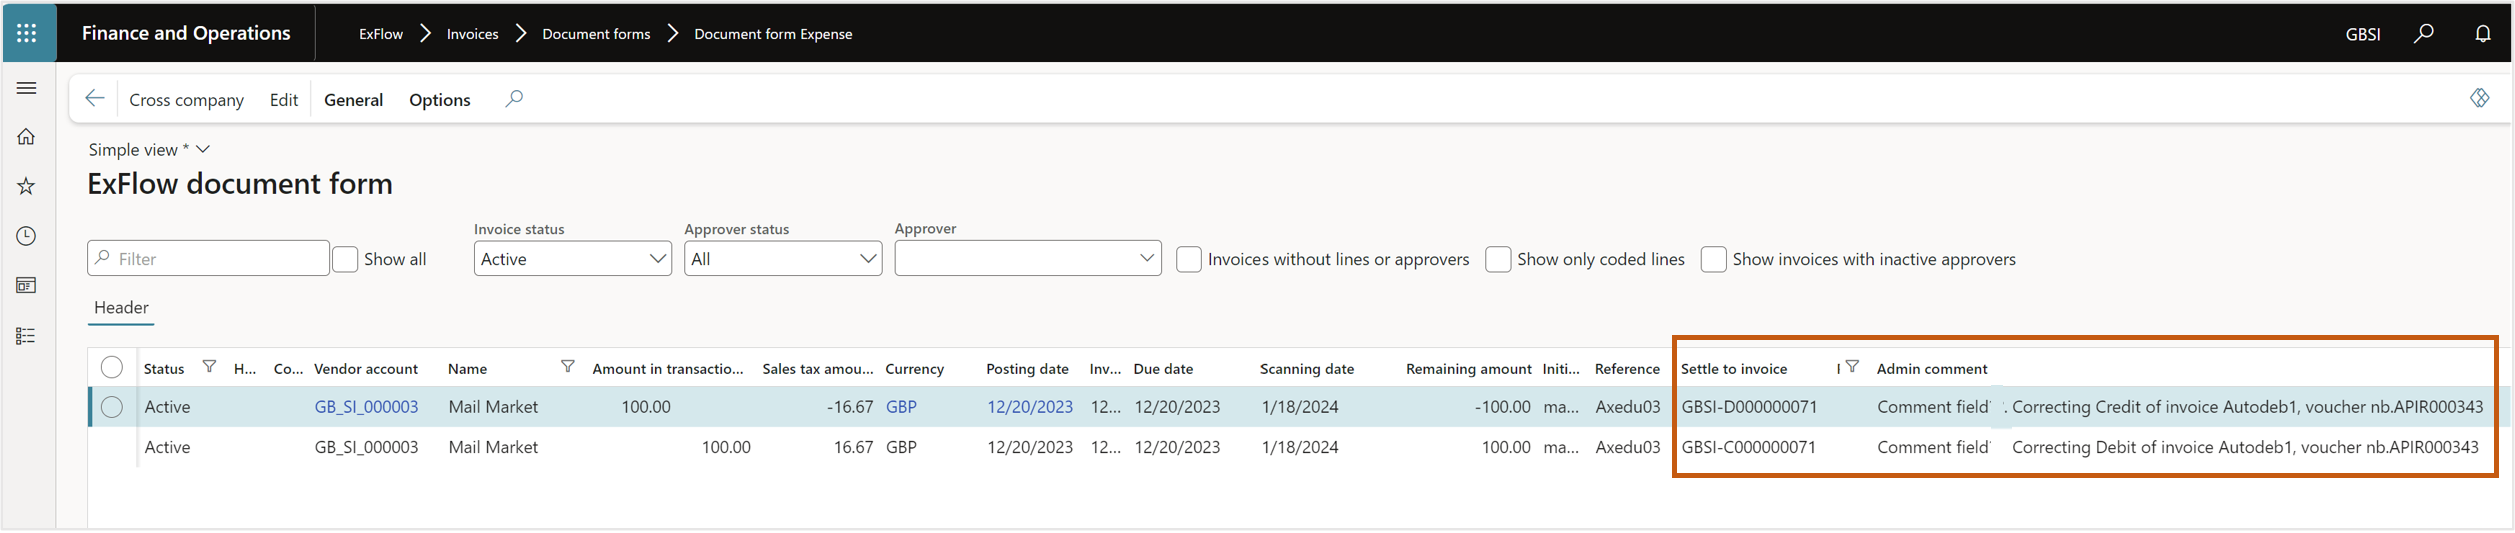
- If “Exflow automatic credit handling” (settle to invoice) is activated. The credit note is also linked as a “settle to” of the newly created debit invoice.
- If parameter “Display reason comment” is set to “Yes”, it is mandatory to add reason for the correction invoices. The comment is added to the admin comment field on the invoice.
When pressing the new button “Credit invoicing”, the following happens;
-
A new credit invoice which is a copy of the selected invoice, with reverse signs, is created in import form with an invoice number according to the number sequence from the new parameter “Number sequence for Credit invoice number”. The original invoice image should be attached as an attachment and a new pdf should be generated with the text “Correcting Credit of invoice XXX (where “XXX” is the original invoice number).
-
If reason comment is set to “Yes”, it is mandatory to add reason for the credit invoice. The comment is added to the admin comment field on the invoice.
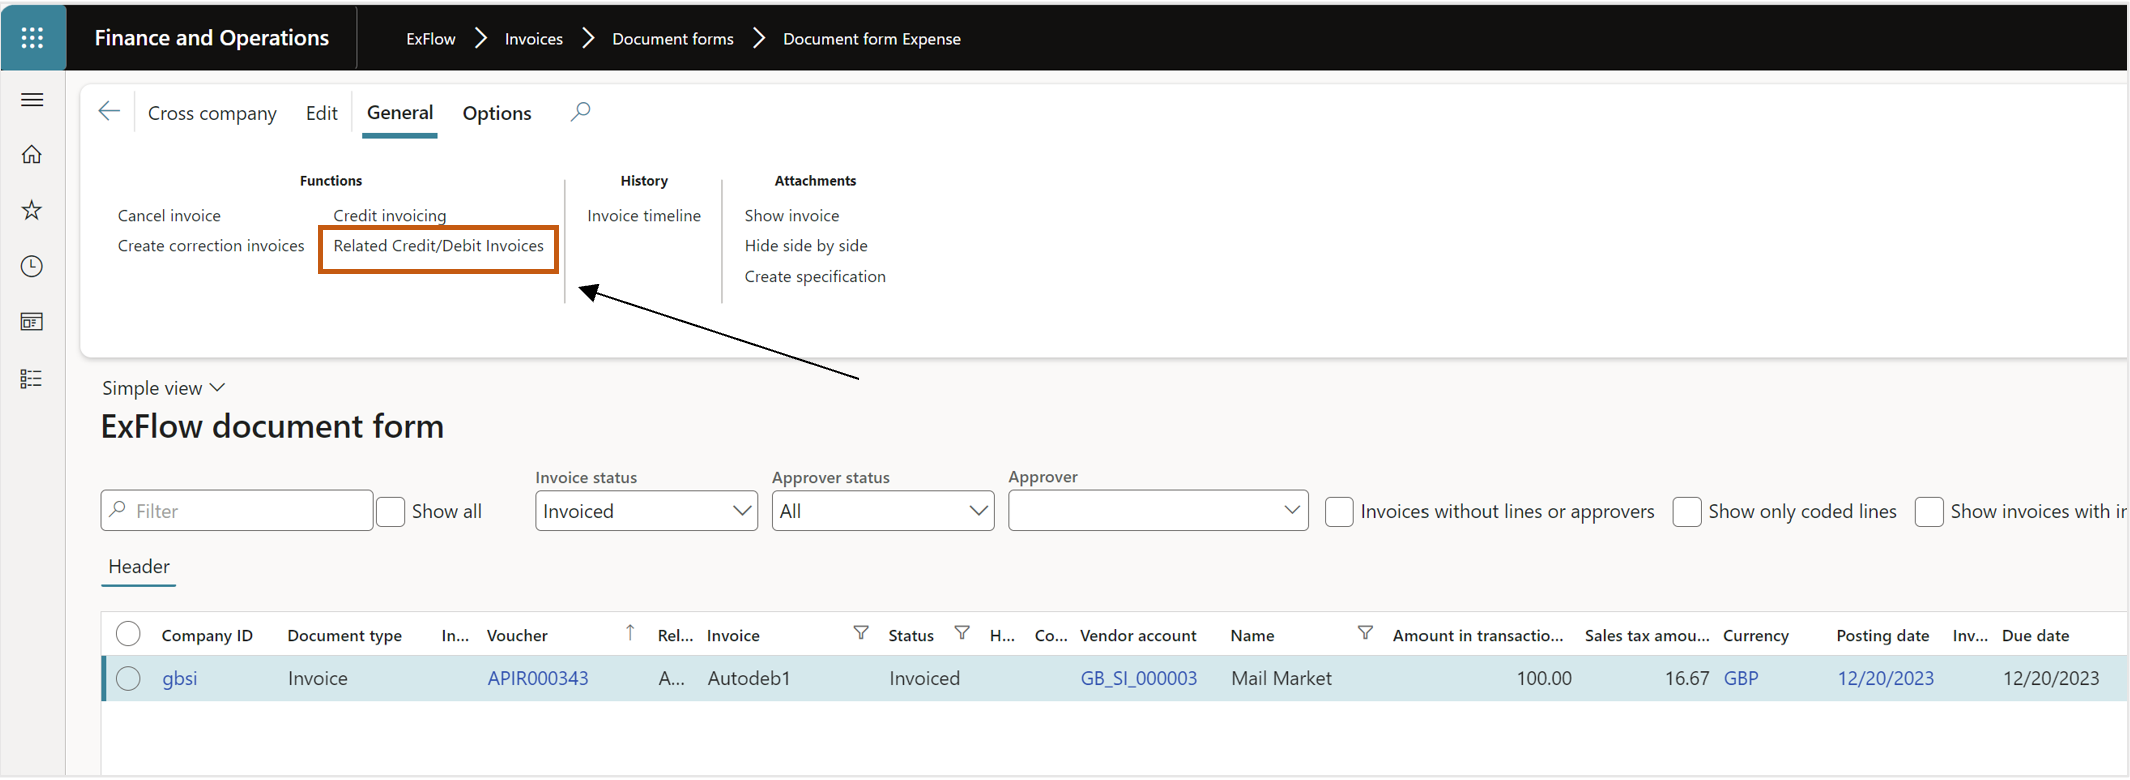
When pressing the new button “Related Credit/Debit invoices”, the following happens;
Only active from the original invoice where the Credit/Debit invoices is created from.
- Takes you to a separate table that stores all records that are created from the original invoice. Import form filtered by source Document Table where these invoices were created from.
Step by Step process
Create correction invoices
- Navigate to Document form.
- Mark the Non-PO invoice – go to “General” – “Functions”.
- Select “Create correction invoices”.
- If parameter is set to yes, enter the reason for the correction – OK.
- New credit and debit invoice is now created in import form.
- Go to import form - Mark the invoice you want to work with – select edit – make corrections if needed.
- If the automatic credit handling (settle to invoice) is active, the credit invoice is connected to the created debit invoice.
- Click Post and the invoice is sent out for approval.
Credit invoicing
- Navigate to Document form.
- Mark the Non-PO invoice – go to “General” – “Functions”.
- Select “Credit invoicing”.
- If parameter is set to yes, enter the reason for the correction – OK.
- New credit invoice is created in import form.
- Go to import form - mark the invoice – select edit > If needed connect to a new imported debit invoice, using exflow automatic credit handling.
- Click Post and the invoice is sent out for approval.