Employee
Just like the mobile app any user can access the AppsForDynamics365.com web portal to create expenses and mileages.
Login into the portal
Logging into the AppsForDynamics365 Portal requires login information provided by email when the account is set up. The login can be done in two different ways:
Username and password or Sign in with Microsoft.
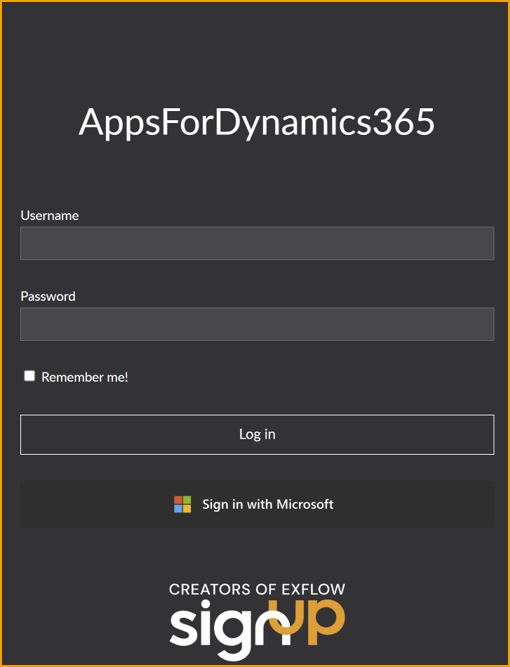
Alternatively, contact the Business Central administrator or IT department if logging in is not possible.
Main page
The main page is the next page in the portal. The page is grouped by Expenses, Mileages, Expense report and Per Diam.
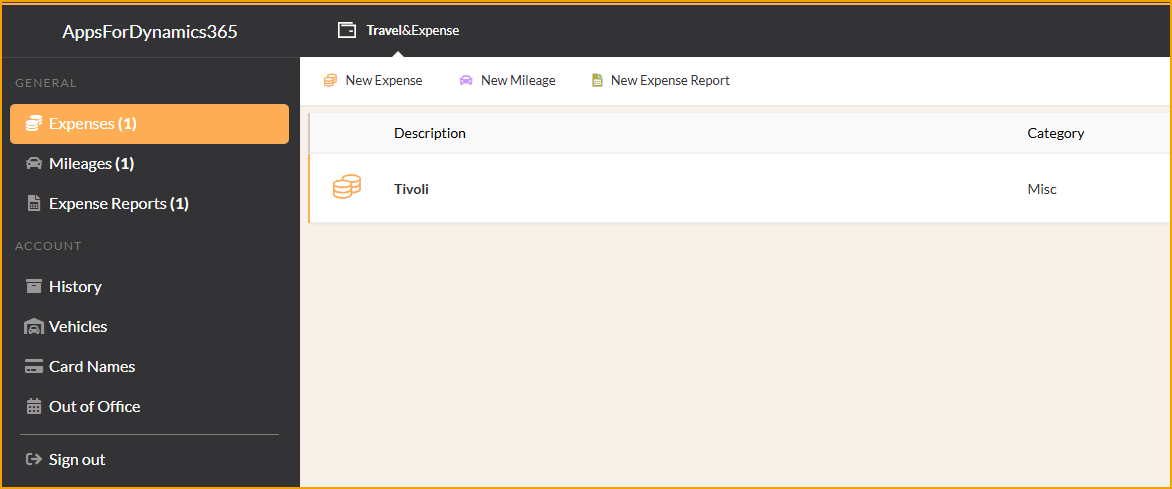
The Expenses list will display your expenses that have not been sent for approval yet. Each item will show this icon

The Mileages list will display your mileages that haven't been sent for approval yet. Each item will show with this car icon

The Credit card transactions are credit card transactions made with your employee credit card. Each item will show this card icon

Submitting expenses
Though expense submission is suggested to be done via the app, it can be done through the web portal as well, almost the same way.
Go to: Travel & Expense --> New Expense
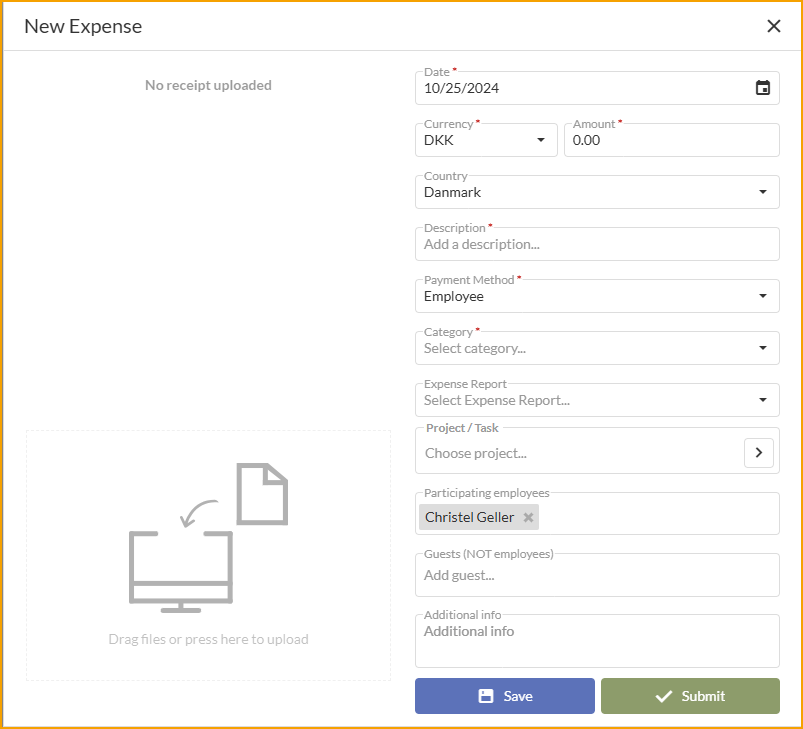
Start the process of submitting an expense by filling out the following view:
| Expense details | |
|---|---|
| File or photo: | Add a file or photo of the receipt or any relevant file by clicking on left hand side area, or just drag them onto the area. Supported file types are PDF and most common image types. |
| Date: | Select the date. Today's date is set by default. |
| Currency: | Change the currency if needed. |
| Amount: | Enter the amount. |
| Country: | If needed, change the country for the expense. This defaults to your country setting in Business Central. |
| Description: | Enter a description. This will be the title for the expense. |
| Paid by: | In the field, choose between Employee and Company Card. |
| Category: | Choose a category for the expense between the ones provided by your company. |
Save or Submit: Save the expense and send later or send immediately.
Below are optional fields when creating an expense, depending on your company policies.
| Optional fields | |
|---|---|
| Employees: | Add or remove employees. Your name is added by default. |
| Attendees: | Add or remove attendees. Examples include guests or customers. |
| Project/Task: | Type a job and task. This is primarily used for consultancy firms. |
| Additional info: | Enter any additional information that may be relevant. |
Credit card transactions
Credit card transactions are a popular way to pay for several things, and this also extends to paying on behalf of the company. ExFlow Travel & Expense simplifies reporting these transactions, especially if Credit Card Agreements have been set up, as automatic matching with fitting expense reports becomes possible.
A credit card transaction can be opened from the dashboard, details filled in, and then sent as an expense. If an expense has already been created for the credit card transaction, it can be merged with the credit card transaction.
Submitting credit card transactions before transaction is imported
Go to: Travel & Expense --> New expense
The process of submitting an expense begins by filling out the following view.
Important! This is the process for reporting an expense before the credit card transaction is imported to ExFlow Travel & Expense.
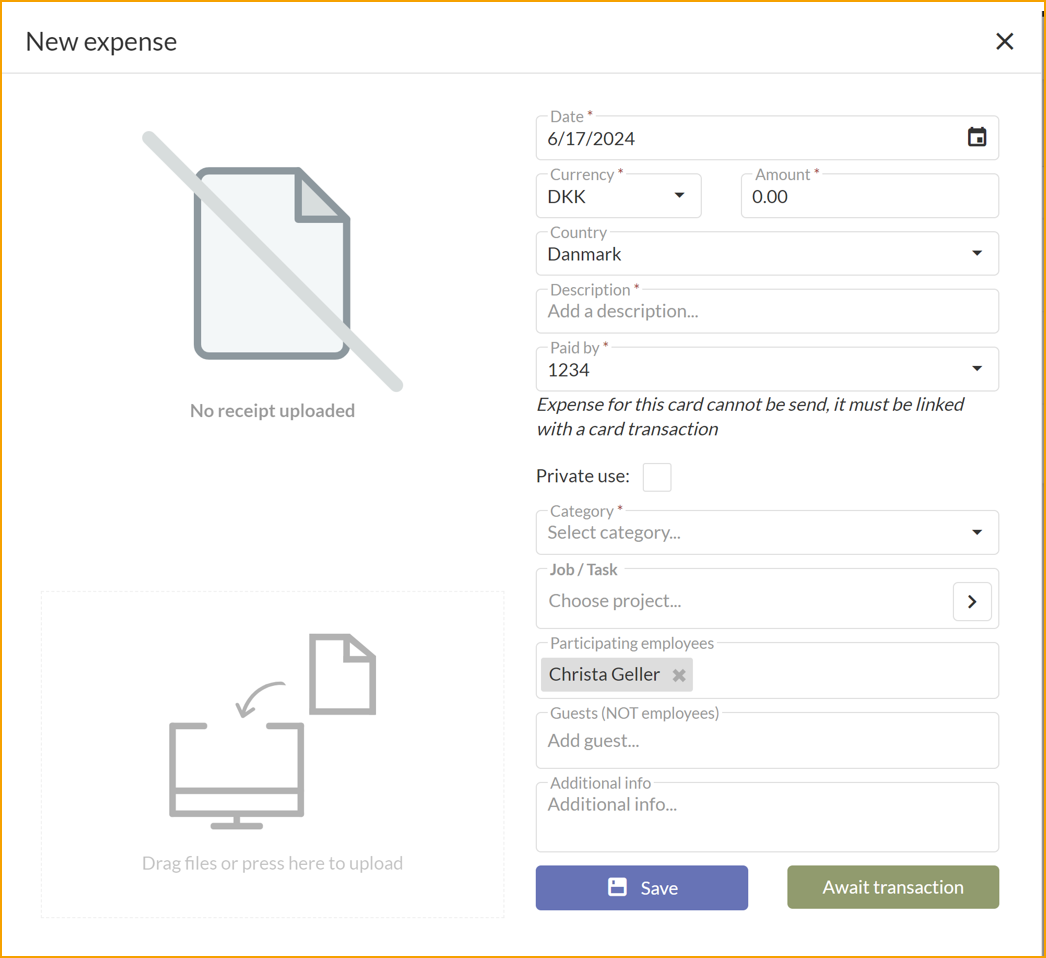
| Expense details | |
|---|---|
| File or photo: | Add a file or photo of the receipt or any relevant file by clicking on left hand side area, or just drag them onto the area. Supported file types are PDF and most common image types. |
| Date: | Select the date. Today's date is set by default. |
| Currency: | Change the currency if needed. |
| Amount: | Enter the amount. |
| Country: | If needed, change the country for the expense. This defaults to your country setting in Business Central. |
| Description: | Enter a description. This will be the title for the expense. |
| Paid by: | In the field, choose between Employee and Company Card. |
| Category: | Choose a category for the expense between the ones provided by your company. |
Save or Await transaction: Save the expense and send later or send immediately.
Below are optional fields when creating an expense, depending on your company policies.
| Optional fields | |
|---|---|
| Employees: | Add or remove employees. Your name is added by default. |
| Attendees: | Add or remove attendees. Examples include guests or customers. |
| Project/Task: | Type a job and task. This is primarily used for consultancy firms. |
| Additional info: | Enter any additional information that may be relevant. |
Submitting credit card transactions when transaction is imported
Go to: Travel & Expense --> Choose the credit card transaction

Start the process of submitting an expense by filling out the following view.
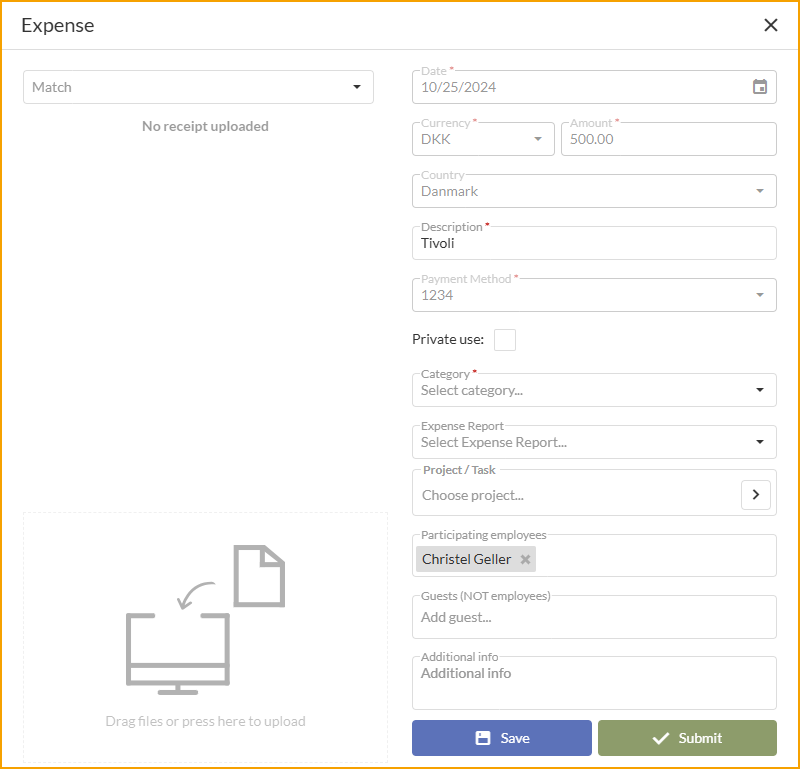
| Expense details | |
|---|---|
| File or photo: | Add a file or photo of the receipt or any relevant file by clicking on left hand side area, or just drag them onto the area. Supported file types are PDF and most common image types. |
| Date: | Select the date. Today's date is set by default. |
| Currency: | Change the currency if needed. |
| Amount: | Enter the amount. |
| Country: | If needed, change the country for the expense. This defaults to your country setting in Business Central. |
| Description: | Enter a description. This will be the title for the expense. |
| Paid by: | In the field, choose between Employee and Company Card. |
| Category: | Choose a category for the expense between the ones provided by your company. |
Save or Submit: Save the expense and send later or send immediately.
Below are optional fields when creating an expense, depending on your company policies.
| Optional fields | |
|---|---|
| Employees: | Add or remove employees. Your name is added by default. |
| Attendees: | Add or remove attendees. Examples include guests or customers. |
| Project/Task: | Type a job and task. This is primarily used for consultancy firms. |
| Additional info: | Enter any additional information that may be relevant. |
Matching issue between expense report and credit card transaction
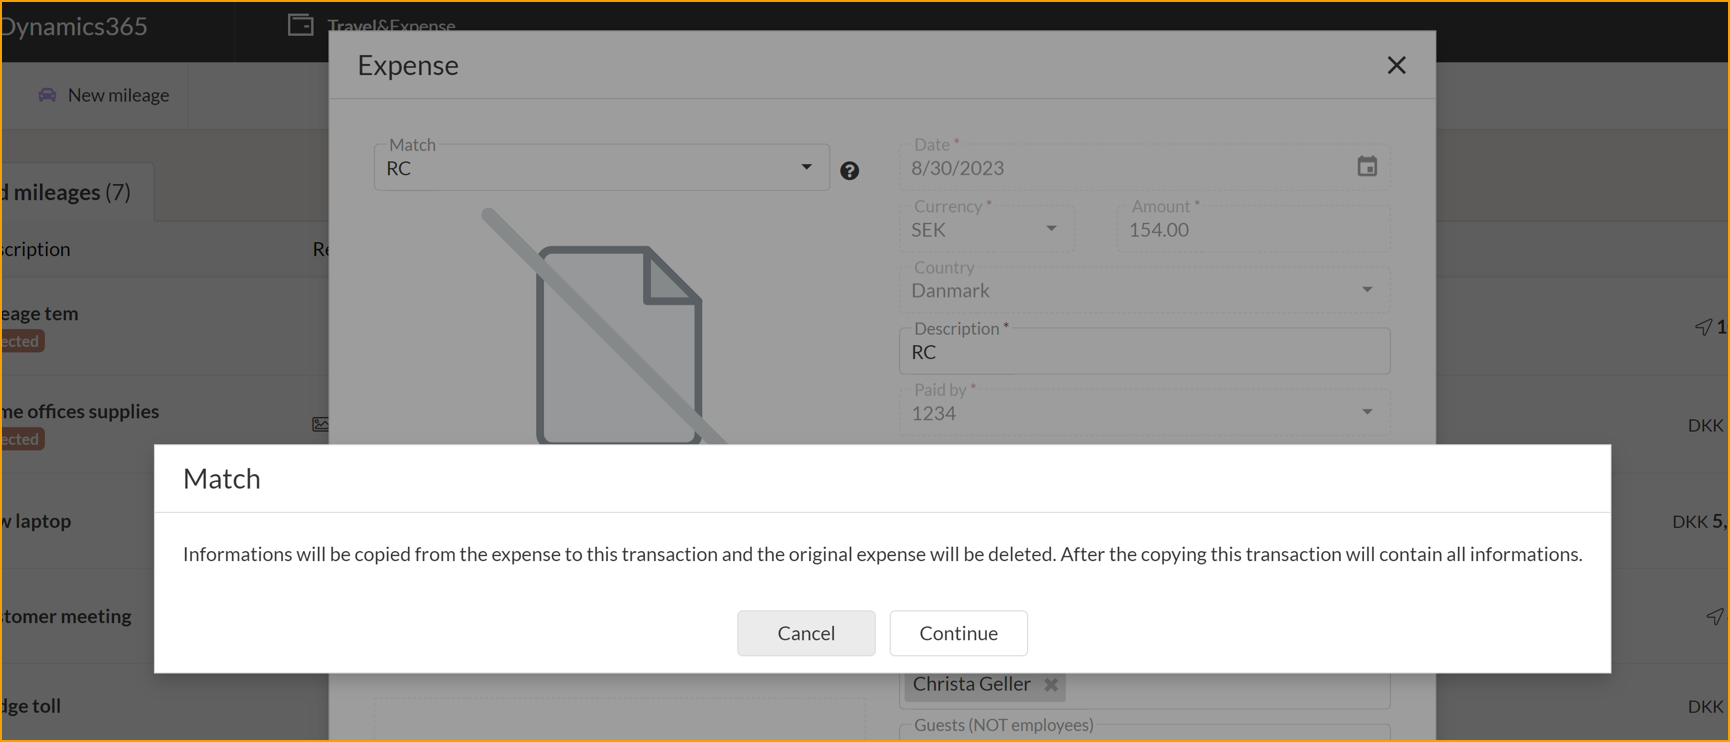
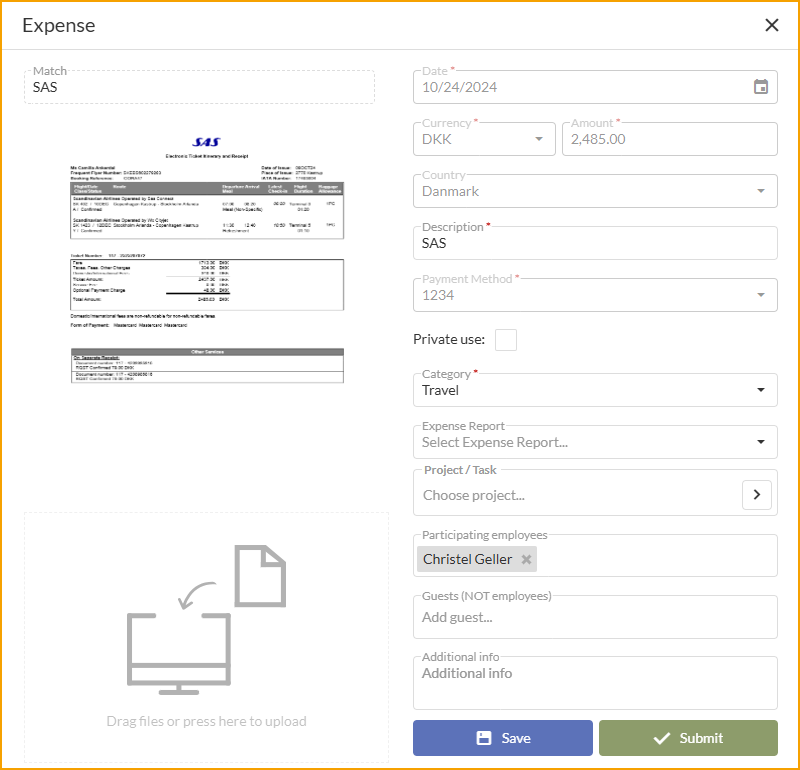
If the expense report and the credit card transaction cannot be matched automatically, the user needs to match them manually.
Go to: Travel & Expense --> Choose the credit card transaction

On the left corner you find a drop down called Match.
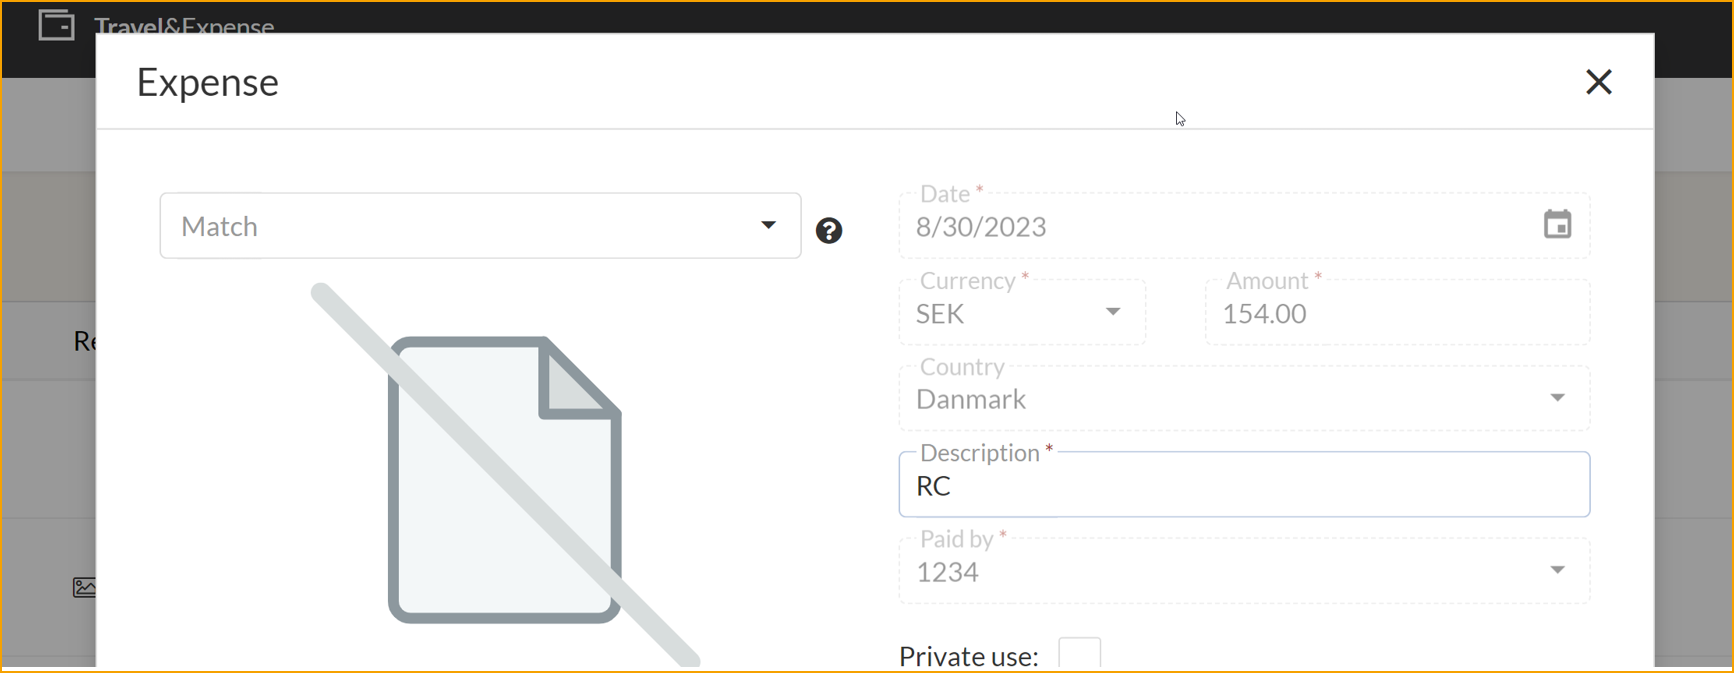
Find the expense report that is connected to the credit card transaction.
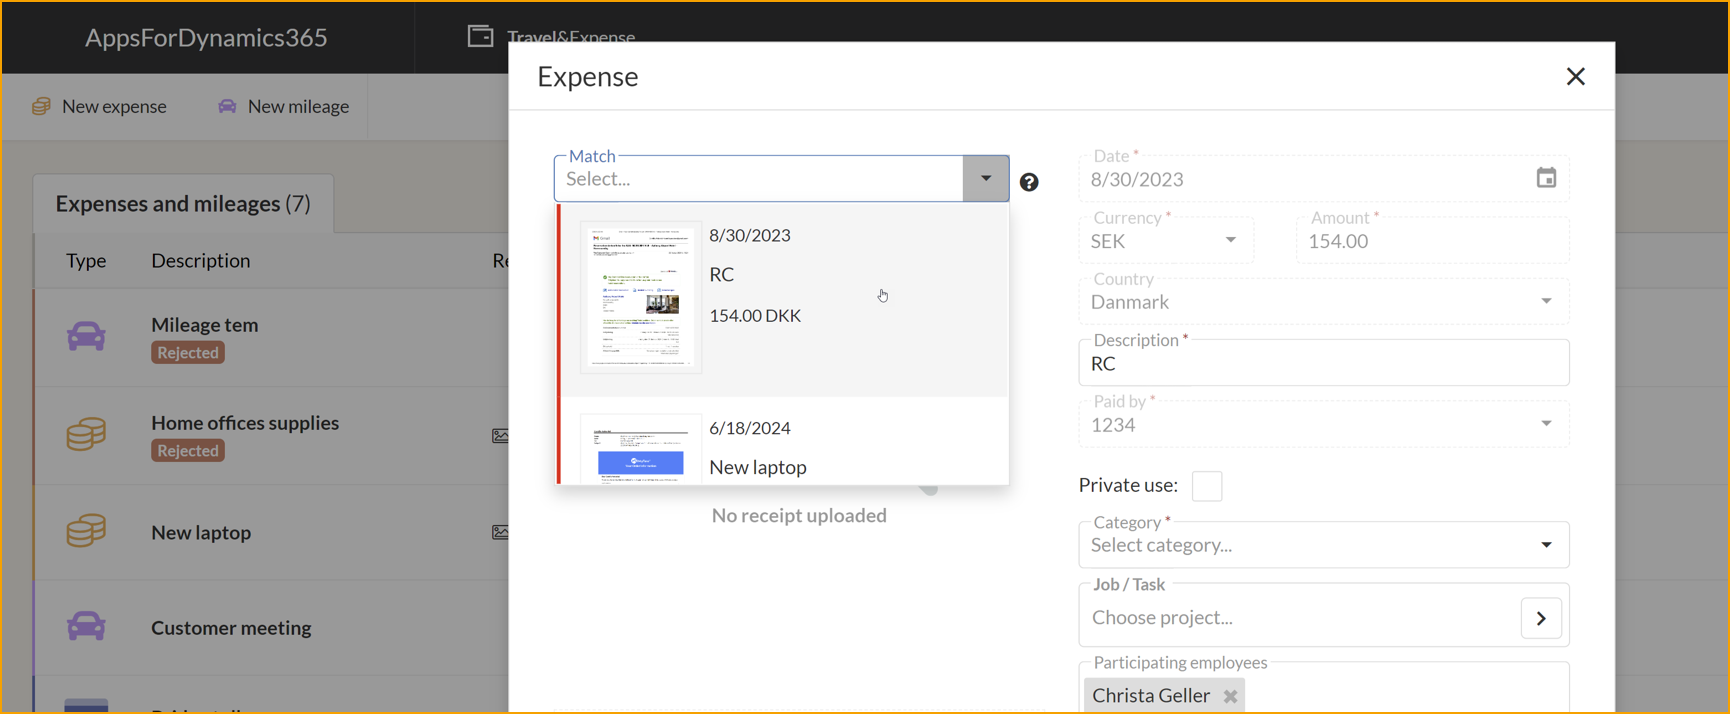
Choose Continue and Submit.
Submit with an expense report
Expense Reports enable employees to organize expenses and obtain a summary of expenditures.
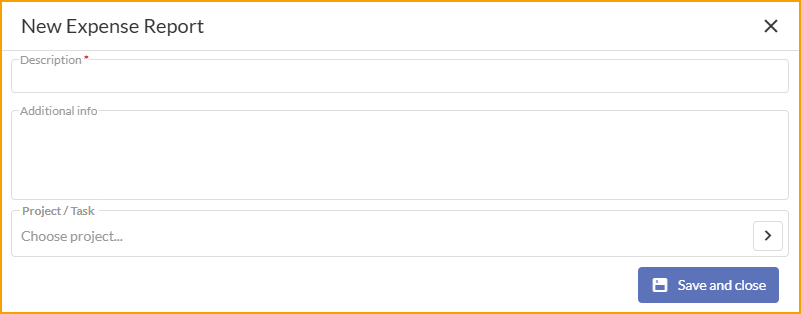
Go to: Travel & Expense --> Expense report
| Expense report | |
|---|---|
| Description: | Enter er description for the expense report. |
| Additional info: | Enter any additional information. |
| Project/Task: | The expense report can be connected to a specific project, this will add the project and task to all transactions that is added to the expense report. |
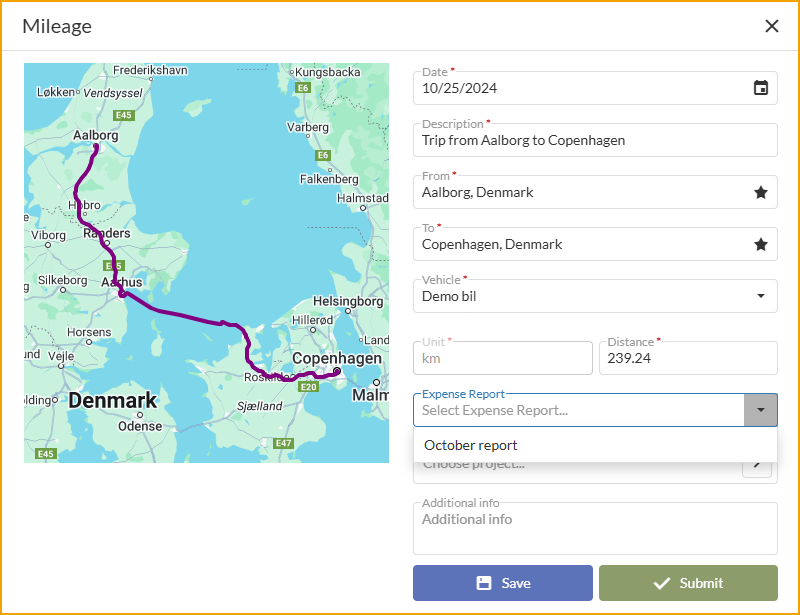
After creating an expense report, a new field labeled Expense Report will be displayed when submitting an expense, mileage, or per diem. Below is an example from the mileage page.
